Have you ever found yourself in a situation where you have received a document with multiple edits and comments that you need to incorporate into your final version? Microsoft Word provides a handy feature called "Track Changes" that allows you to accept or reject each change individually. However, if you have a large number of changes in your document, this process can be time-consuming and tedious. In such cases, the "Accept All Changes" feature comes to the rescue. In this article, we will guide you step-by-step on how to accept all changes in Word and save time while ensuring a polished final document.
Track Changes in Word
Before we jump into the steps, let's take a moment to understand what the "Track Changes" feature in Word does. When you enable this feature, any modifications, additions, or deletions made to the document are highlighted and displayed in different colors. This allows users to easily identify and review the changes made by others. The "Track Changes" feature is commonly used in collaborative writing scenarios, where multiple authors or reviewers need to provide feedback and suggestions.
Accepting all changes at once
Now, let's get started with accepting all changes in Word. Just follow these simple steps:
Step 1: Open the document in Microsoft Word
First, open the document in Microsoft Word by clicking on the program icon or selecting it from your computer's applications menu. If you have already started reviewing the document with the "Track Changes" feature enabled, you will see the changes highlighted in the document.
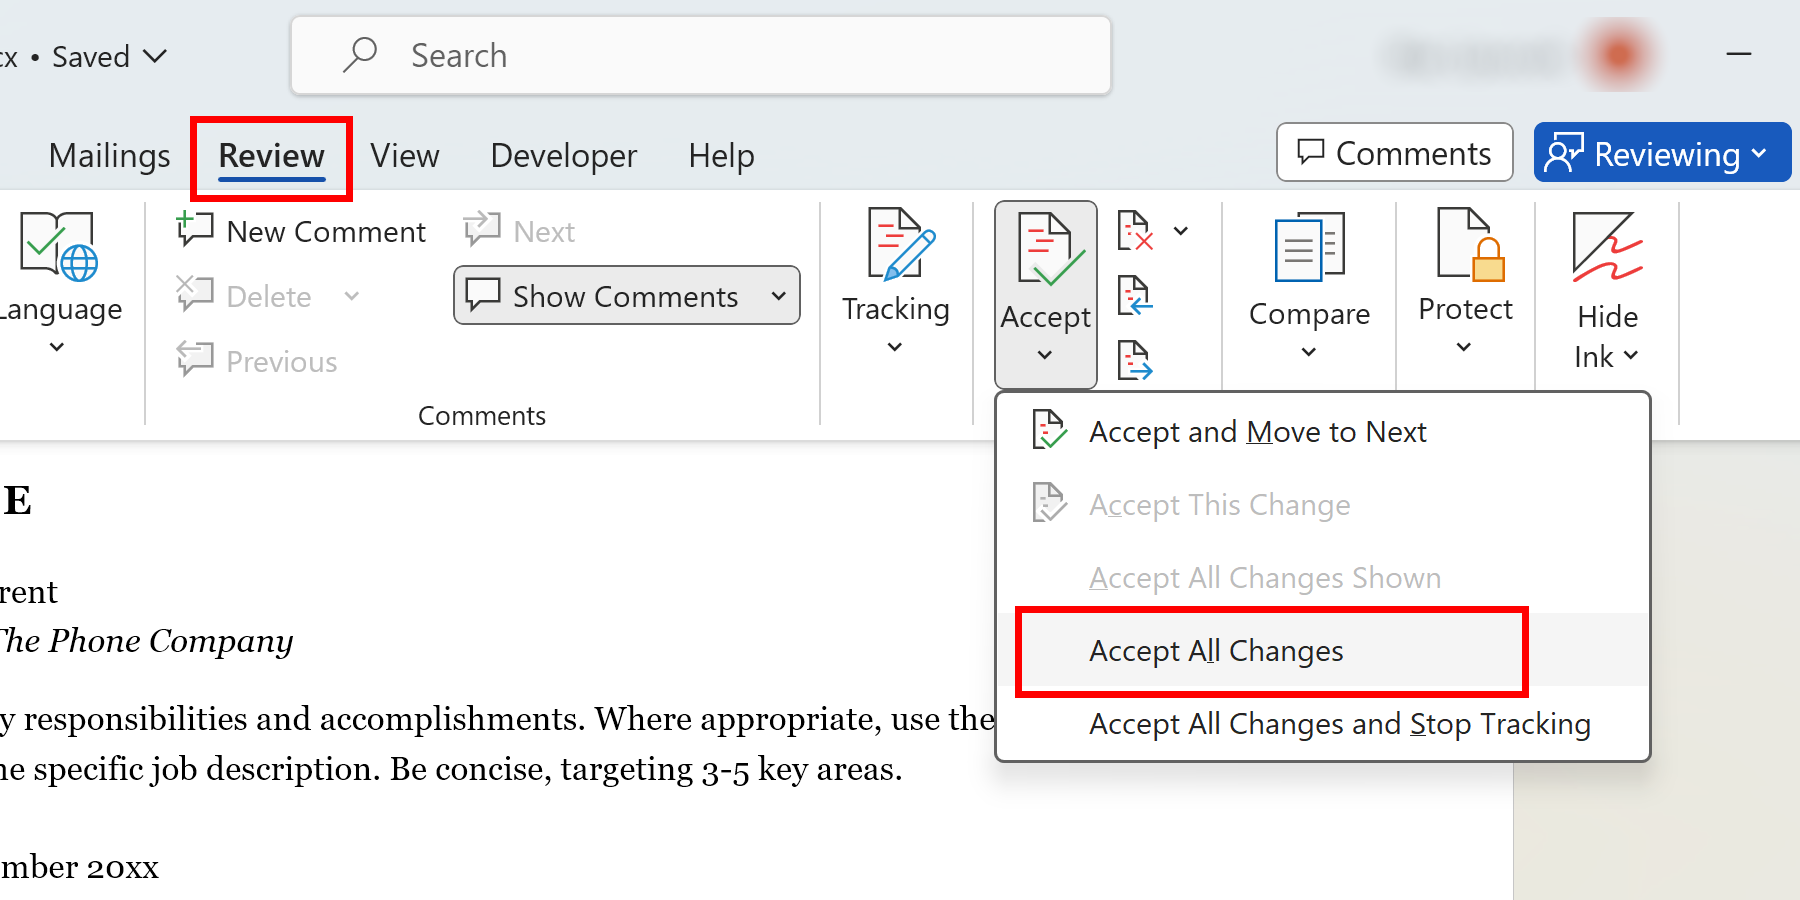
Step 2: Access the "Review" tab
Once the document is open, navigate to the "Review" tab in the Word toolbar. The "Review" tab contains all the tools and features related to reviewing and editing documents.
Step 3: Click on "Accept"
Under the "Review" tab, you will find various options related to accepting or rejecting changes. Locate and click on the "Accept" button. It is usually located on the left side of the toolbar, along with other review-related options.
Step 4: Choose "Accept All Changes"
After clicking on the "Accept" button, a drop-down menu will appear. From the options in the drop-down menu, select "Accept All Changes." This action will accept all the changes in the document, including modifications, insertions, and deletions made by others.
Step 5: Review the document
Once you have accepted all the changes, take a moment to review the document and make sure everything looks as expected. The accepted changes will no longer be highlighted, and the document will reflect the final version with all the modifications incorporated.
Step 6: Save the document
After reviewing the document, it is crucial to save your changes. Click on the "File" tab in the Word toolbar and select "Save" or use the keyboard shortcut Ctrl+S (Command+S for Mac users). Saving the document will store your accepted changes and ensure that the final version is available for future use.
Congratulations! You have successfully accepted all changes in Word. By following these steps, you can save time and effort when dealing with documents containing numerous edits and comments. The "Accept All Changes" feature streamlines the process, allowing you to focus on the overall content and ensure a polished final document.
In addition to accepting all changes, Word offers various other options for reviewing and managing changes. For example, you can choose to accept or reject changes on a case-by-case basis, add comments to provide feedback, and compare different versions of the document to track the progress made.
In conclusion, the "Accept All Changes" feature in Microsoft Word is a valuable tool that helps you incorporate multiple edits and comments into your final document efficiently. By following the step-by-step guide provided in this article, you can easily accept all changes in Word and save time while ensuring a polished and collaborative document. Next time you receive a document with numerous edits, remember to leverage this feature to streamline your review process.
