WordFields is built around a shared workspace — one place where your whole team can access the templates and snippets they use every day. This guide covers how to set it up properly so the right people have access to the right content.
Contract templates going out of date. Support replies written from scratch. Offer letters copied from the last one sent — wrong name still in the footer. When documents and email snippets are scattered across personal drives, inboxes, and desktops, errors creep in and time gets wasted.
WordFields gives your team one shared workspace where every document template, email snippet, and reusable message lives in one place — organized into folders, controlled by permissions, and always up to date. No more hunting for the latest version or second-guessing whether the copy you have is the approved one.
Set up text snippets
For teams that send the same emails, support replies, or messages repeatedly, snippets save significant time. Support agents, HR, and sales teams benefit most from this.
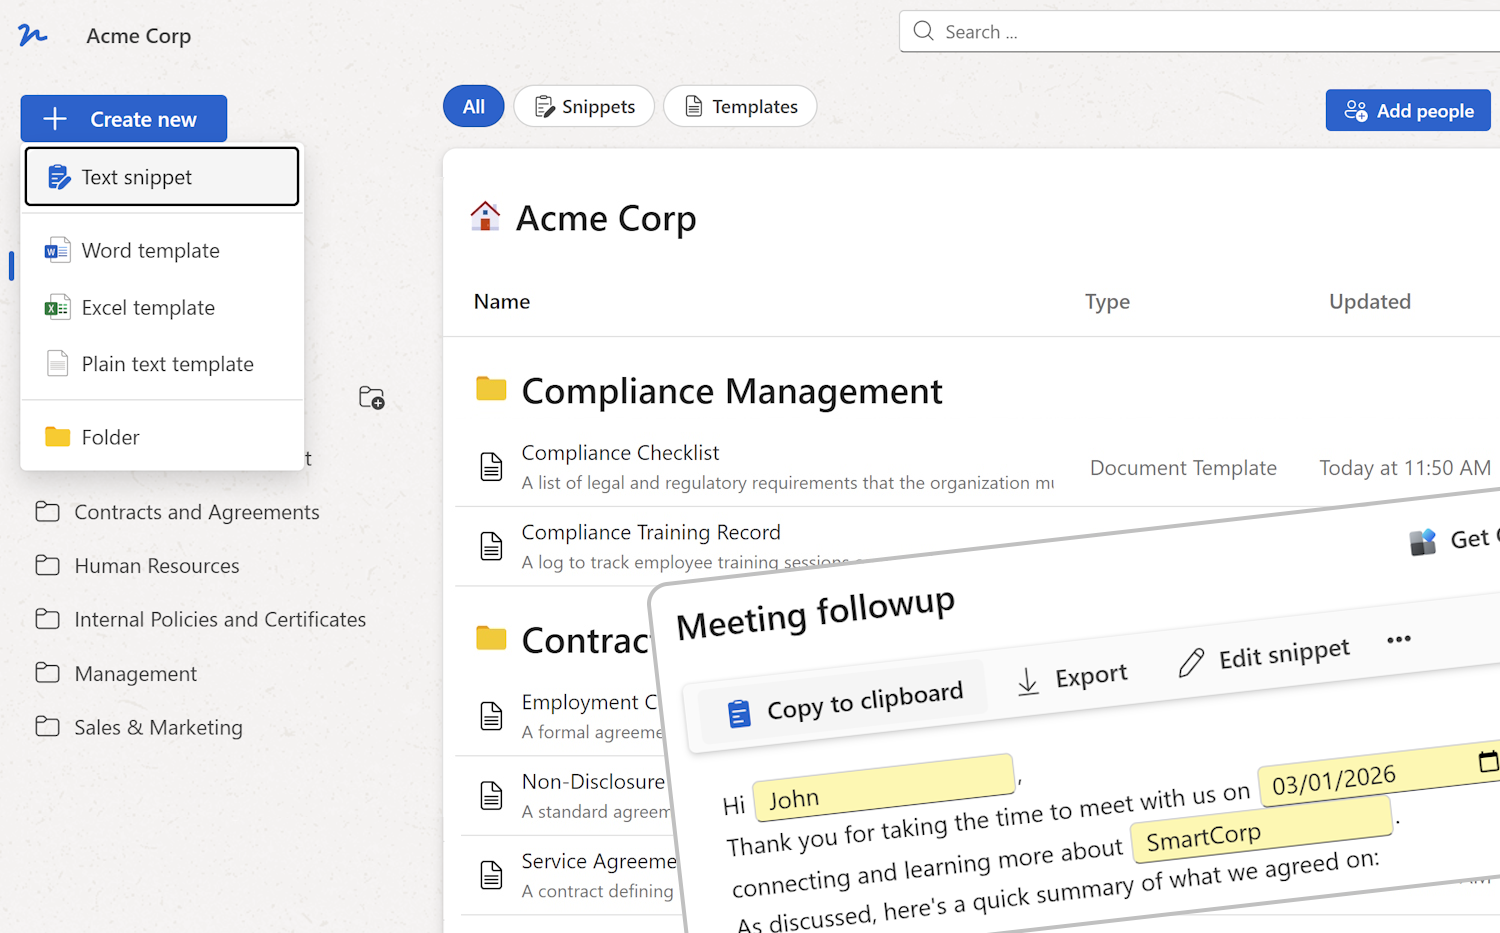
- Click + Create new and select Text snippet.
- Give the snippet a clear name that makes it easy to find — for example,
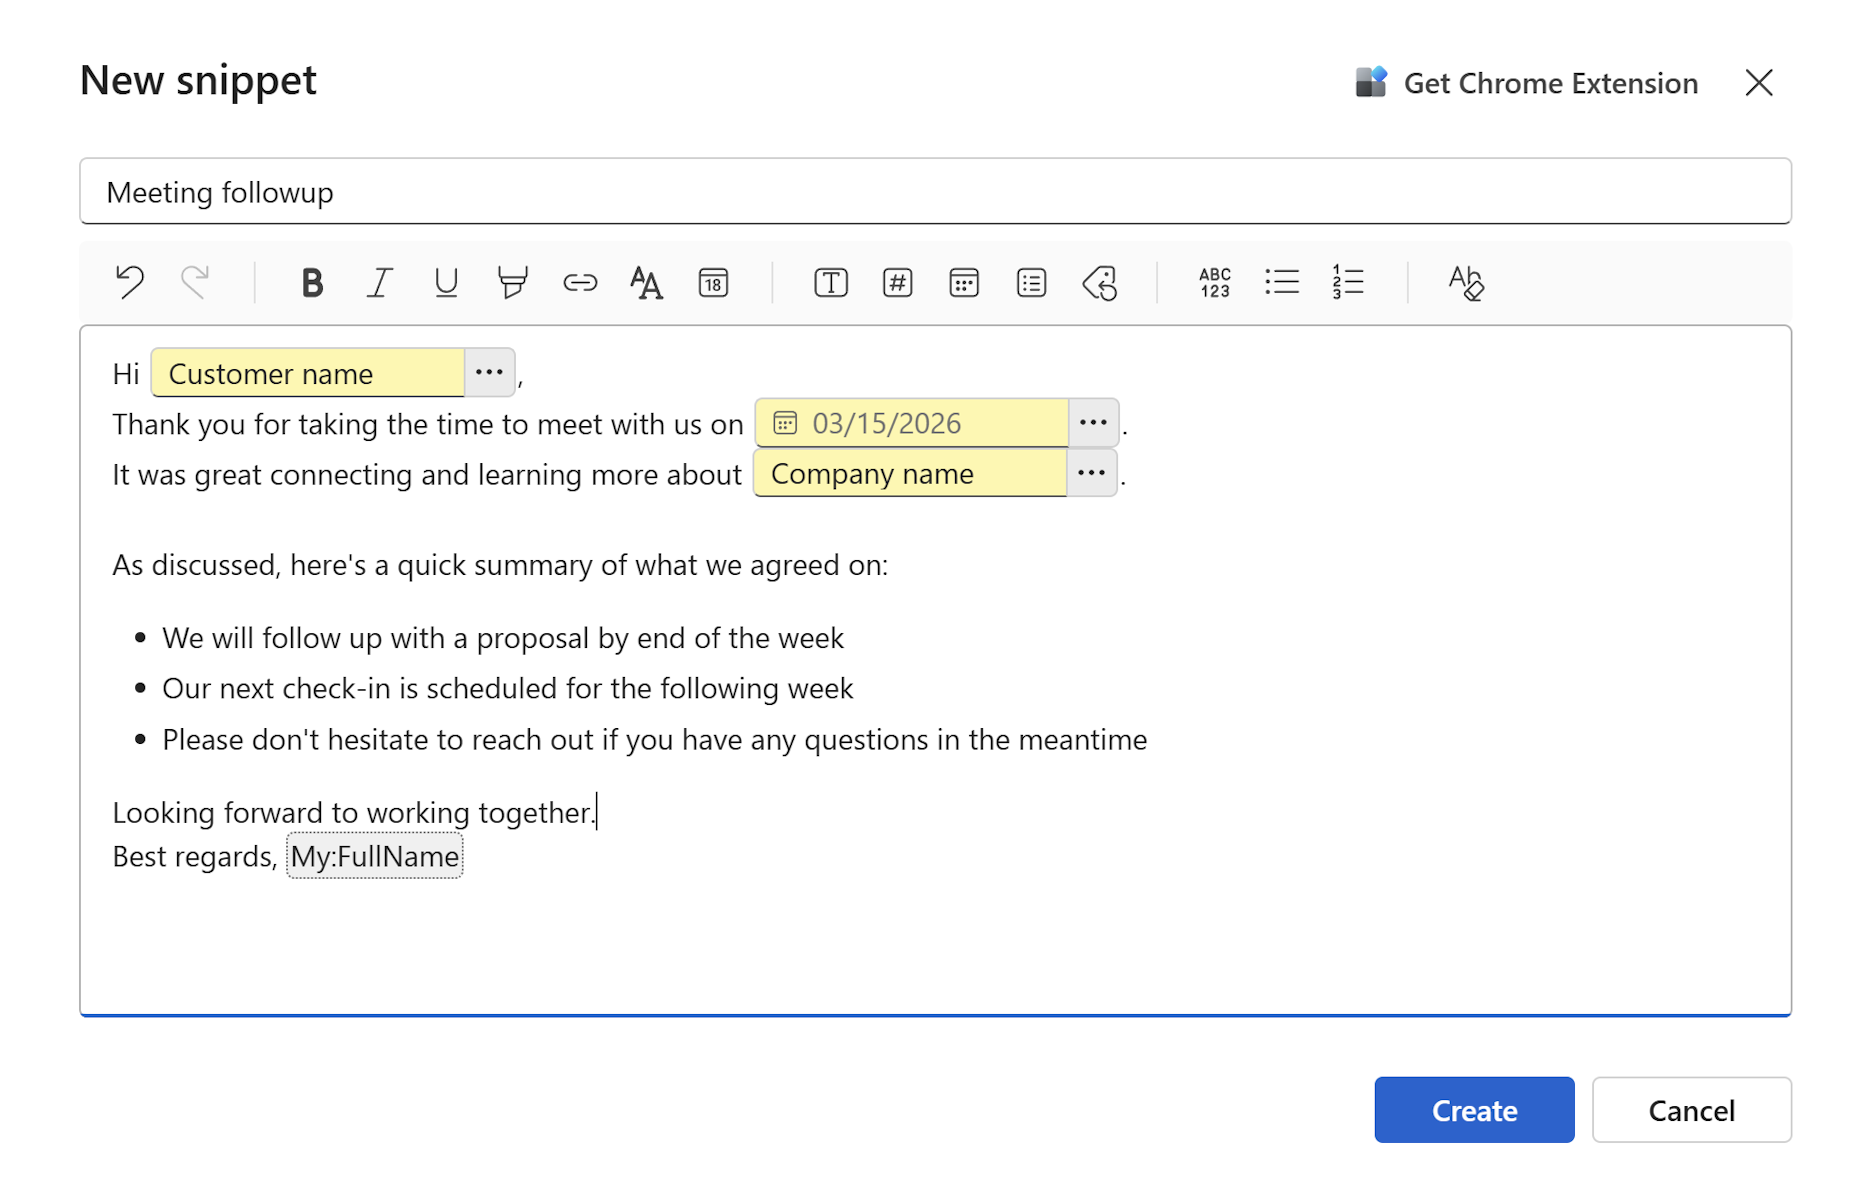
Support: Refund request responseorHR: New hire welcome email. - Write the snippet content and add fillable fields for the parts that change — the recipient's name, a date, a case number, and so on.
- Save the snippet and move it into the appropriate folder.
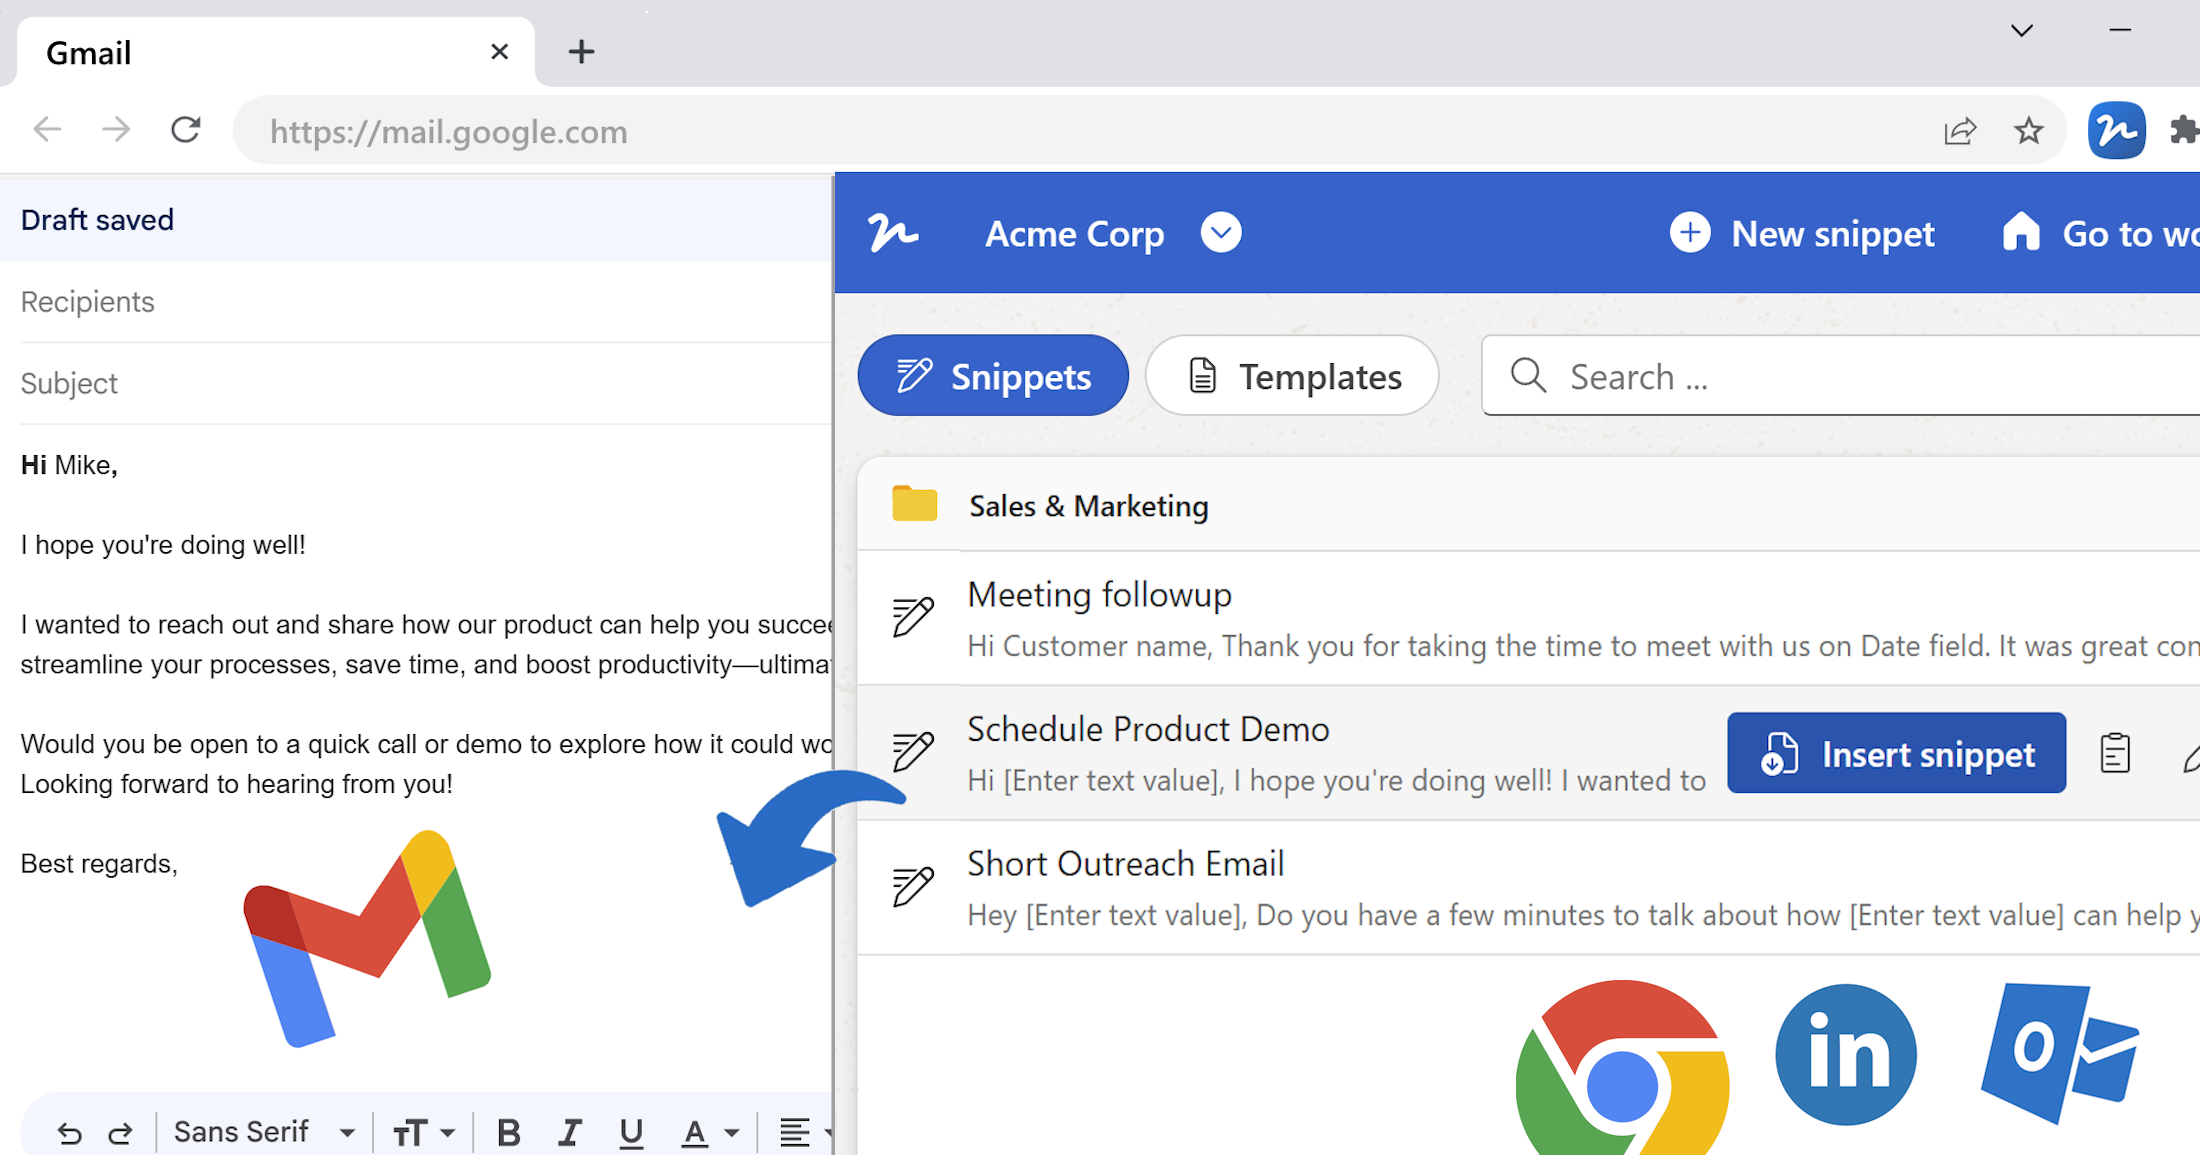
Team members can copy a snippet to their clipboard with one click, or use the Text Snippets & Templates Chrome extension to insert it directly into Gmail, Outlook, their CRM, or any web-based tool. See Using snippets to learn more.
Tip
Use merge tags like My:FullName and My:EmailAddress in snippets so each person's name and email address are filled in automatically when they use the snippet — no manual editing needed.
Set up document templates
If your team generates contracts, reports, offer letters, or any other recurring documents, convert them into templates so anyone can produce a correctly formatted document without editing the source file directly.
- Click + Create new and select Word template or Excel template.
- Upload the
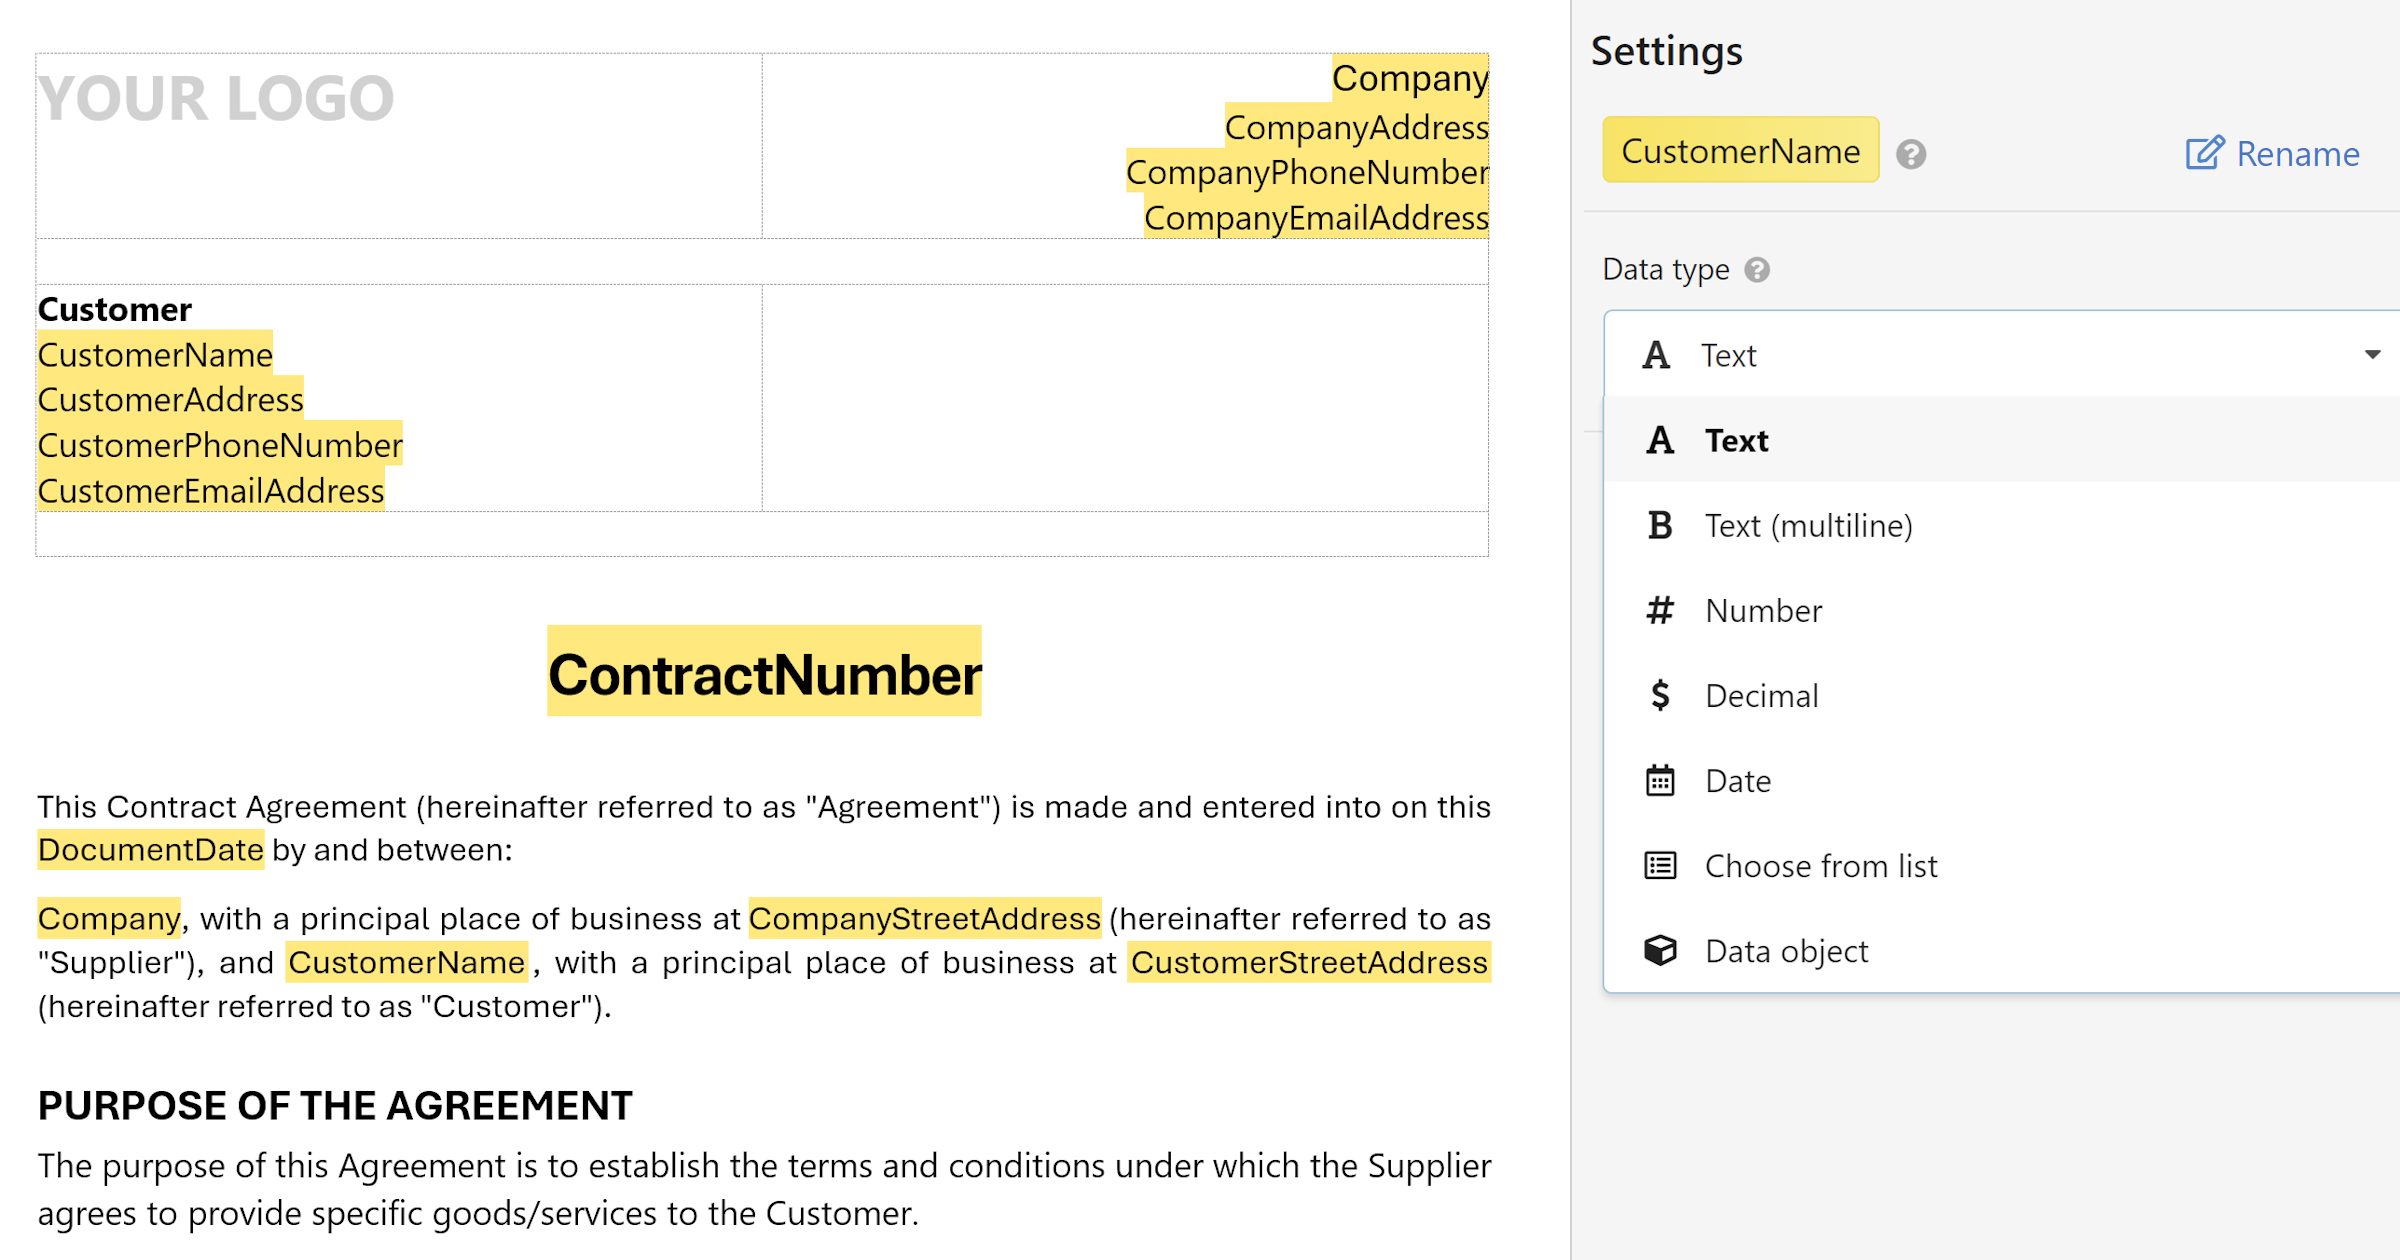
.docxor.xlsxfile your team already uses. - In the template editor, select the text that changes each time and convert it into a merge field — or type
${FieldName}directly. - Add field descriptions and notes so team members know exactly what to enter.
- Save the template and move it into the appropriate folder.
When a team member opens the template, WordFields presents a fill-out form. They complete the form and download a finished document with all formatting preserved — fonts, tables, spacing, and page breaks exactly as in the original file. See Add fillable fields to templates to learn more.
Note
Members can fill out forms and generate documents but cannot edit the template itself. Only Admins and Managers can make changes to a template.
Organise content into folders
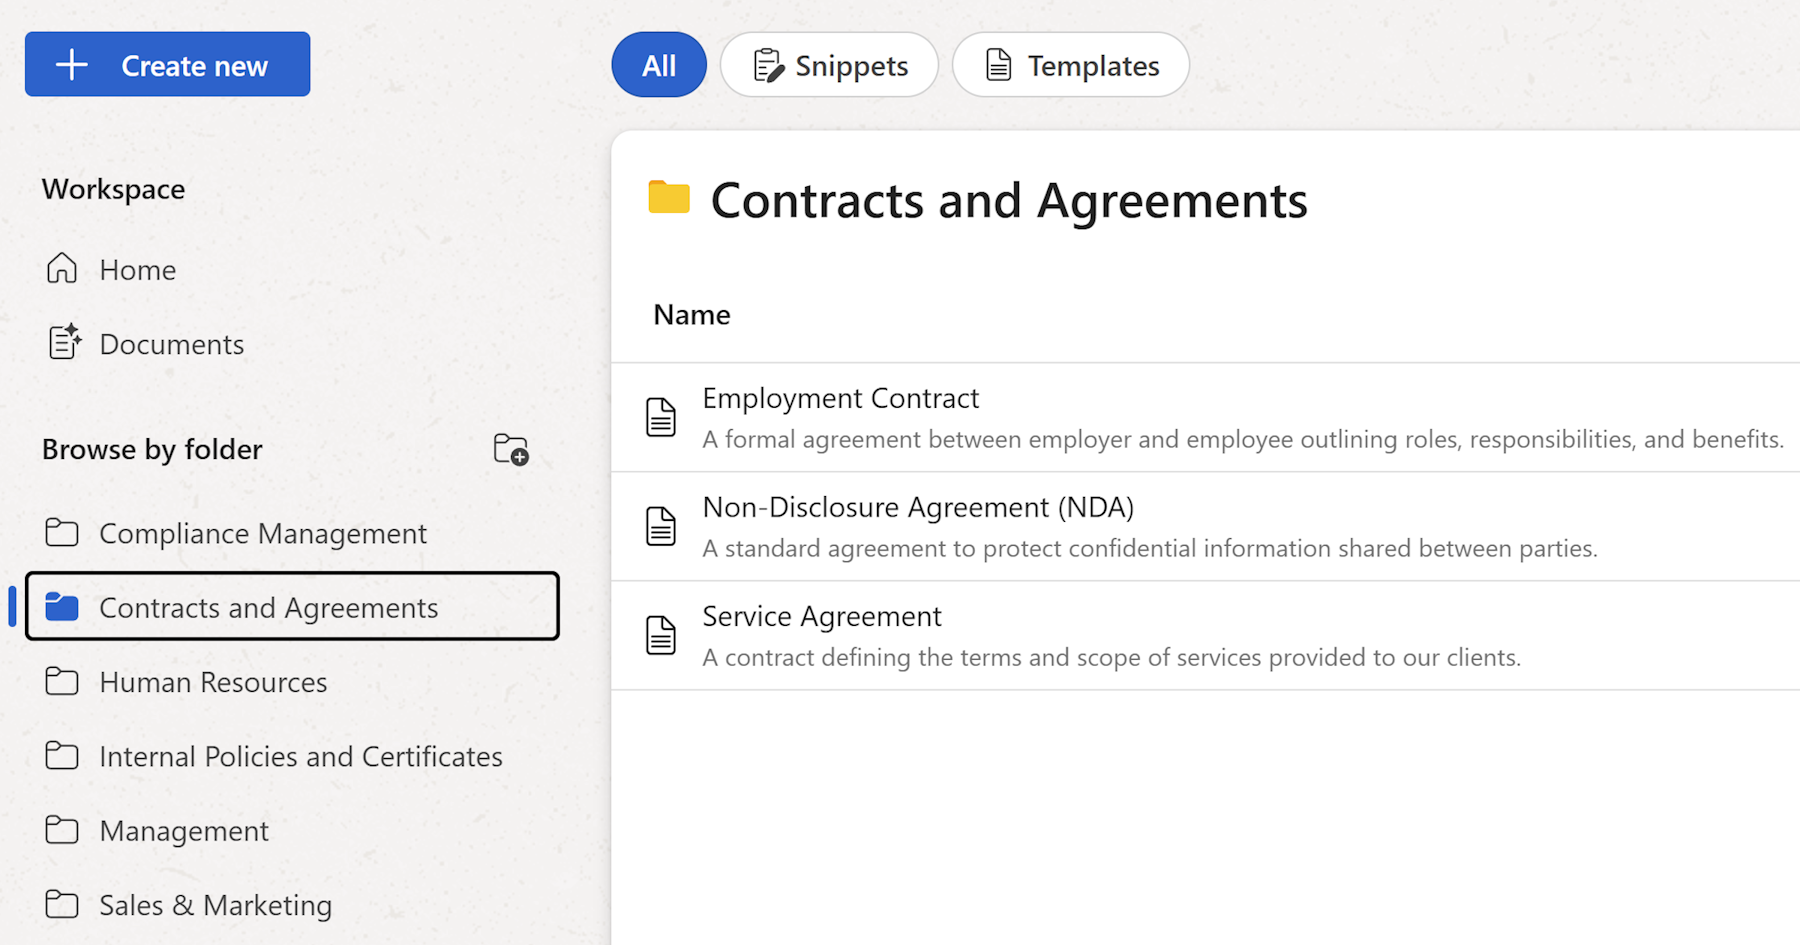
Folders are how you control who sees what. Every template and snippet lives in a folder, and permissions are set at the folder level.
- Click + Create new in the left sidebar and select Folder.
- Enter a name for the folder and click Create.
- Move relevant templates and snippets into the folder.
Create folders that reflect how your teams are structured — for example, a Legal folder for contracts and NDAs, an HR folder for offer letters and onboarding messages, and a Support folder for email snippets and response templates. See Organizing with folders to learn more.
Invite your team
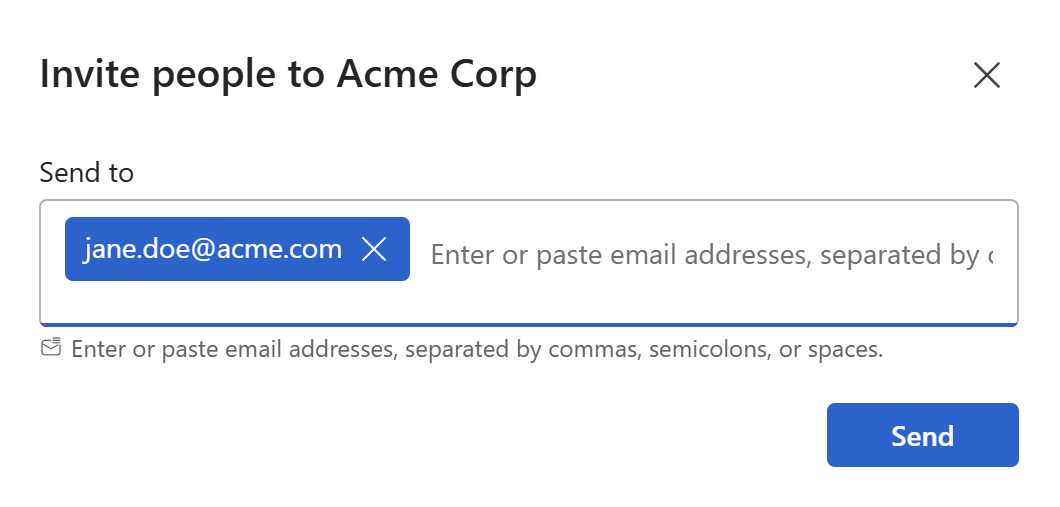
- From the workspace home screen, click Add people in the top right.
- In the Send to field, type the email addresses of the people you want to invite. After each address, press
Enter,Tab, or,to confirm it. - Click
Send.
Each person receives an email with a link to join the workspace. They appear in the users list in administration pages with an Invited status until they accept. To change it, find them in the Users list and click Edit.
Note
Pending invitations show in the Users list with the status Invited. You can resend or revoke an invitation at any time from the same list.
Understand the roles
Once a person accepts the invitation their role defaults to Member, but you can give users more permissions in your workspace. There are three roles:
- Admin — Full workspace access. Admins manage settings, billing, users, and groups. They can create, edit, and delete any template, snippet, or folder, and set permissions across the entire workspace.
- Manager — Can create templates, snippets, and folders, but cannot manage users or workspace settings. Managers control permissions only for the folders assigned to them.
- Member — Can access and use templates and snippets in folders they have been given permission for. Members cannot create or edit templates or snippets.
Tip
A good starting point for most teams is to make template owners Managers and everyone else Members. Admins should be limited to the people who actually need to manage users and workspace settings.
Set folder permissions
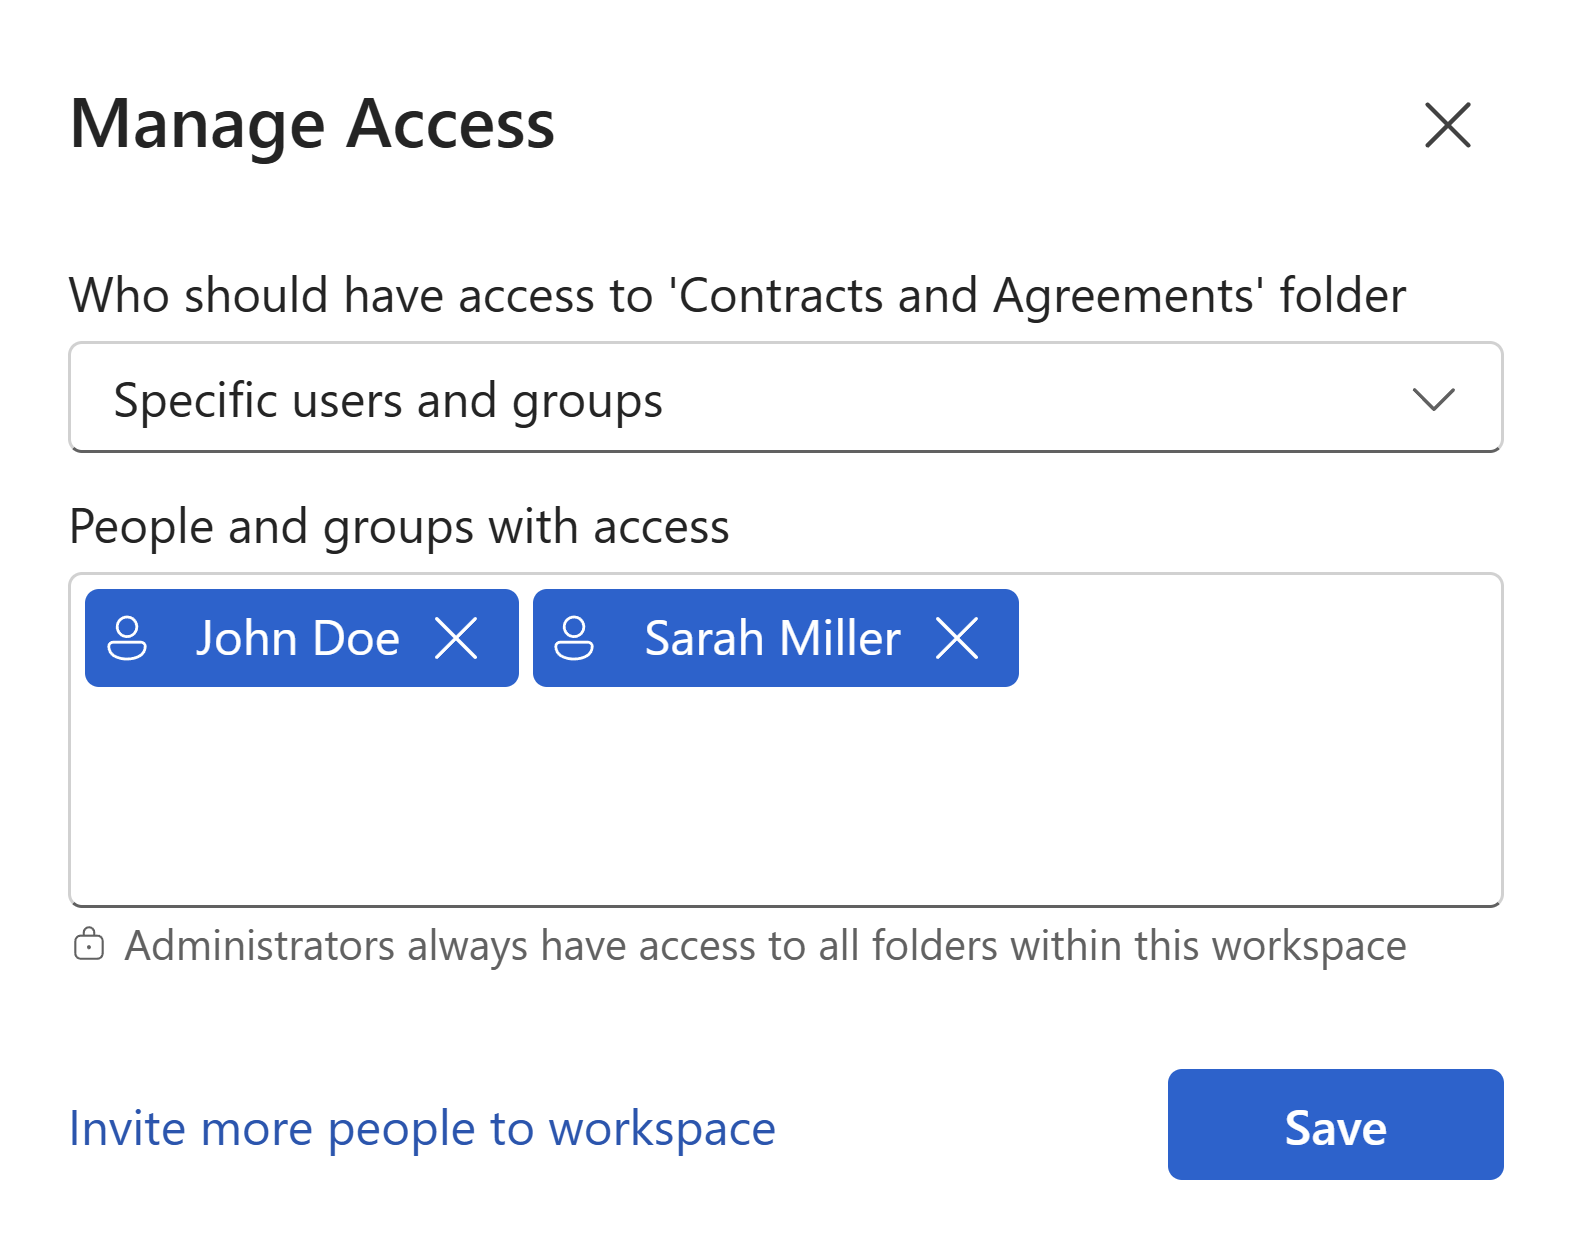
Once your folders are set up, control who can access each one.
- Navigate to the folder you want to manage.
- Click Manage access in the top right toolbar.
- Add individual users or groups and set their access level.
See Roles and permission to learn more.
Tip
Use groups rather than individual users for larger teams. Create a group once in Settings > Groups, add the relevant members, then assign the group to any folder. When someone joins or leaves the team, you only need to update the group — not every folder individually.
Keep templates up to date
When a template needs updating — a clause changes, a logo is updated, a new field is required — upload a revised version of the source file directly in the template editor. Any merge fields you have already configured are preserved automatically. Team members will use the new version from the moment it is saved, with no need to redistribute files or notify anyone manually.
Warning
Deleting a template removes it for all users immediately. If you are replacing a template rather than updating it, upload the new version first and confirm it works correctly before removing the old one.