Manually building a table from scratch and then typing data into it cell by cell is slow. If your text is already structured — separated by commas, tabs, or another consistent character — Word can convert it into a properly formatted table in a few clicks. Microsoft Word has approximately 750 million monthly active users worldwide (EarthWeb, 2025), yet this feature is one of the most overlooked time-savers in the entire application.
Key Takeaways
- Use Insert → Table → Convert Text to Table to turn delimited text into a table without retyping anything.
- Tabs and commas are the most common delimiters; Word auto-detects them and sets the column count accordingly.
- Turn on Show/Hide (
Ctrl+Shift+8) before converting — stray tabs or spaces cause misaligned columns.- The AutoFit to Contents option is the most reliable starting point for column widths.
- You can reverse the process at any time via Table Layout → Convert to Text.
When Should You Use Convert Text to Table?
Convert Text to Table is the right choice any time your data already has a consistent separator character between values — meaning each "cell" is already delineated, just not visually structured yet. Word's built-in table insertion (Insert → Table) makes you start from scratch and type everything in. This feature skips that entirely.
Common scenarios where it pays off:
- Pasted spreadsheet data copied from Excel or Google Sheets that lands in Word as tab-separated text
- CSV or TSV exports from a database or reporting tool that you need to present in a document
- Lists you typed manually with commas or tabs as separators before realizing a table would be cleaner
- Legacy documents where someone built a "table" using spaces and tabs rather than Word's actual table feature
If your data has no consistent separator, inserting a blank table and typing manually is faster than adding delimiters first. But whenever a pattern exists, Convert Text to Table handles the heavy lifting.
Step 1: Prepare Your Text with Delimiter Characters
Before selecting anything, your text needs a consistent separator character between each value that should land in its own column. Word needs this to know where one column ends and the next begins.
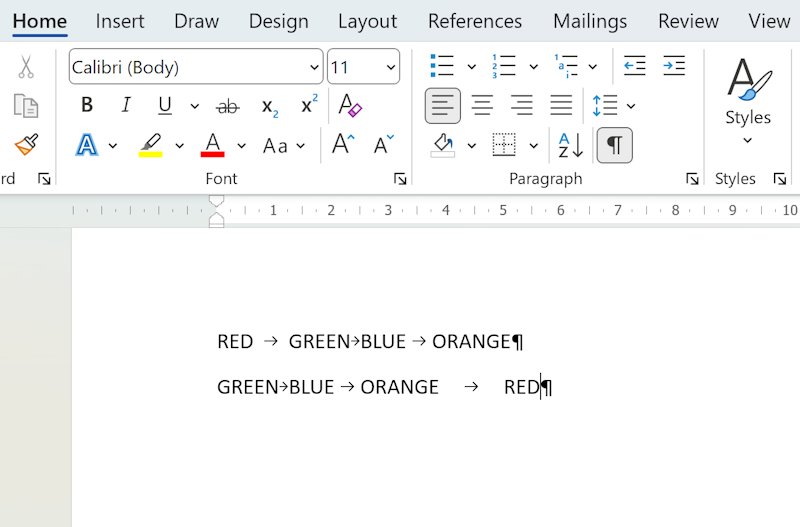
Turn on Show/Hide (Ctrl+Shift+8 on Windows, Cmd+8 on Mac) first. This reveals every tab, space, and paragraph mark as a visible symbol — making it easy to spot inconsistencies before they cause problems. A stray extra tab mid-line will create an unintended column. A missing delimiter will merge two values into one cell.
The three most practical delimiter choices:
| Delimiter | Best for | Notes |
|---|---|---|
| Tab | Data from spreadsheets | Most reliable; rarely appears accidentally in content |
| Comma | CSV file exports | Avoid if your content contains commas (e.g. addresses, names) |
| Semicolon / custom | Data containing commas | Specify your character in the dialog |
Each new row in your table should correspond to a paragraph break (pressing Enter in Word). Word uses paragraph marks to determine row count automatically — you don't set this manually.
Step 2: Select the Text and Open the Conversion Dialog
Once your text is prepared and delimiters are in place:
- Click and drag to select all the text you want to convert — include every line that should become a table row.
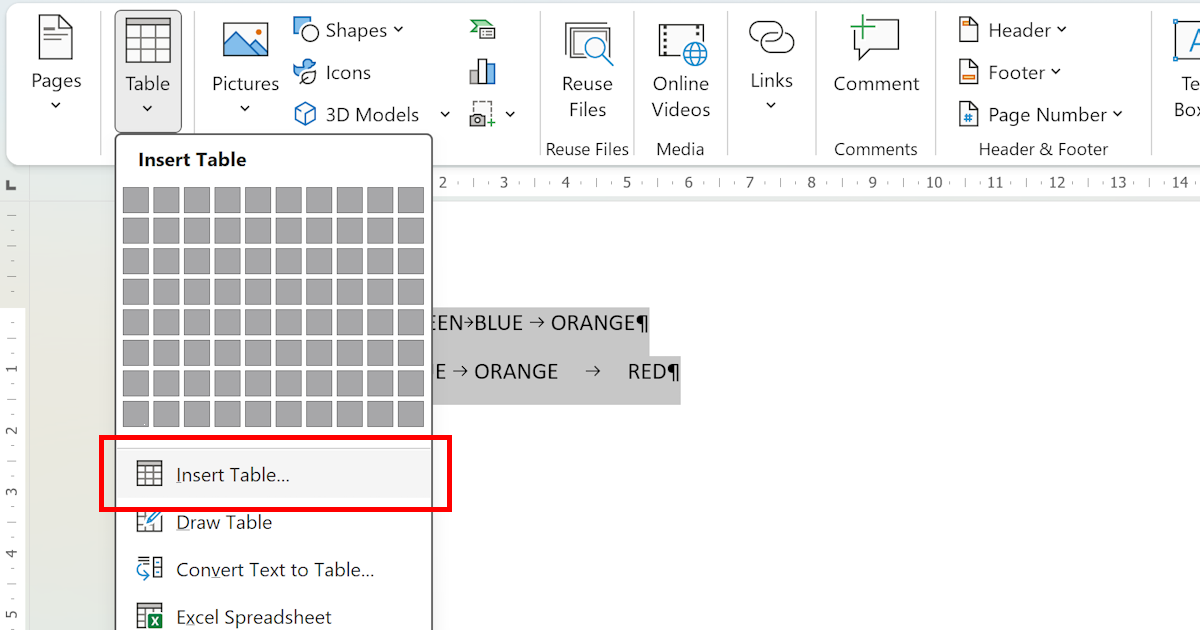
- Go to the Insert tab in the ribbon.
- Click the Table button, then choose Convert Text to Table from the dropdown.
The conversion dialog opens with Word's best guess already filled in. It reads the first line of your selection to count delimiters and sets the number of columns accordingly. If the number looks wrong, that's almost always because of a stray or missing delimiter — close the dialog, fix the text, and try again.
Tip
You can also convert just a portion of a longer document. Select only the lines you want and Word converts the selection, leaving everything else untouched. This works even inside an existing table if you need a nested structure.
Step 3: Configure the Table Options
The dialog has three settings worth understanding before you click OK.
Number of columns is auto-calculated from your delimiter count. You can edit it manually, but mismatch between this number and your actual delimiters will produce empty cells or merged values — fix the source text instead.
AutoFit behavior controls how column widths are set:
- Fixed column width — equal-width columns, ignoring content. Useful when you need a uniform grid layout.
- AutoFit to contents — columns size themselves to fit the longest value. Best starting point for most conversions.
- AutoFit to window — the table stretches to fill the page width, distributing space proportionally. Good for presentations or wide data sets.
Separate text at is where you confirm your delimiter. If you used a custom character, select Other and type it in the field.
Click OK when done.
Step 4: Review and Adjust the Result
Word creates the table instantly.
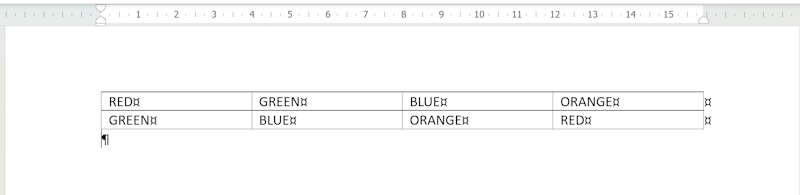
A few quick checks are worth making straight away:
- Column alignment — scan for any cells that look merged or unexpectedly split. These point to delimiter inconsistencies in the source text. Use
Ctrl+Zto undo, fix the text, and convert again. - Column widths — click and drag any column border to resize. For a faster approach, select the entire table, go to Table Layout → AutoFit, and choose AutoFit to Contents.
- Table style — with the table selected, the Table Design tab appears. Word offers dozens of pre-built styles with alternating row colors, bold headers, and border options. Applying one takes two clicks and substantially improves readability.
To add or remove rows and columns after the fact: right-click anywhere in the table and use the Insert or Delete options from the context menu. You can also click the + icons that appear at the edge of any row or column when you hover.
How Do You Reverse the Process?
Sometimes you need to go the other direction — breaking a table back into plain text. Click inside the table, go to the Table Layout tab (called Layout under Table Tools in older versions), and click Convert to Text. Choose your preferred delimiter for the output, click OK, and Word removes the table structure while preserving all the content.
This is useful when exporting content to a system that doesn't handle Word tables well, or when you need to feed the data into a CSV pipeline.
Frequently asked questions
What delimiters can Word use to split text into table columns?
Word supports tabs, commas, semicolons, paragraph marks, and any custom character you specify. Tabs work best for data copied from spreadsheets. Commas suit CSV exports. If your text data already contains commas (like addresses), use a semicolon or a custom character instead to avoid accidental splits.
Can I convert only part of a document's text into a table?
Yes. Select only the text you want to convert before going to Insert > Table > Convert Text to Table. Word converts just the selection, leaving the rest of the document untouched. This also works inside an existing table — select specific cell content and Word creates a nested table.
How do I convert a table back to plain text in Word?
Click anywhere inside the table, go to the Table Layout tab (or Table Tools > Layout), and click Convert to Text. Choose the delimiter you want to separate the former columns — tabs are the most common choice. Word removes the table structure and replaces it with delimited plain text.
Why does Word create the wrong number of columns when I convert text?
The column count is determined by how many delimiters appear on the first line. If some rows have extra commas or tabs — including trailing ones — Word adds extra columns to accommodate them. Use the Show/Hide tool (Ctrl+Shift+8) before converting to spot and remove any stray delimiters in your text.
