When it comes to managing access to documents and files in SharePoint, it's essential to have a robust and flexible permission system. SharePoint provides various options to customize permissions for a document library, allowing you to control who can view, edit, and delete files. In this article, we will explore the different ways to customize permissions for a SharePoint document library and empower you to manage access effectively.
Understanding SharePoint Permissions
Before we dive into customizing permissions, let's first understand how permissions work in SharePoint. SharePoint employs a hierarchical structure for permissions, starting from the top-level site collection down to individual items within a document library. The permission levels range from full control (highest) to read-only access (lowest), with multiple intermediate levels.
By default, SharePoint inherits permissions from higher levels in the hierarchy. However, you have the flexibility to customize permissions at any level to grant or restrict access as required. This granular control helps ensure that sensitive documents are accessible only to authorized users.
Customizing Permissions at the Document Library Level
To customize permissions for a SharePoint document library, follow these steps:
Open the SharePoint site and navigate to the desired document library.
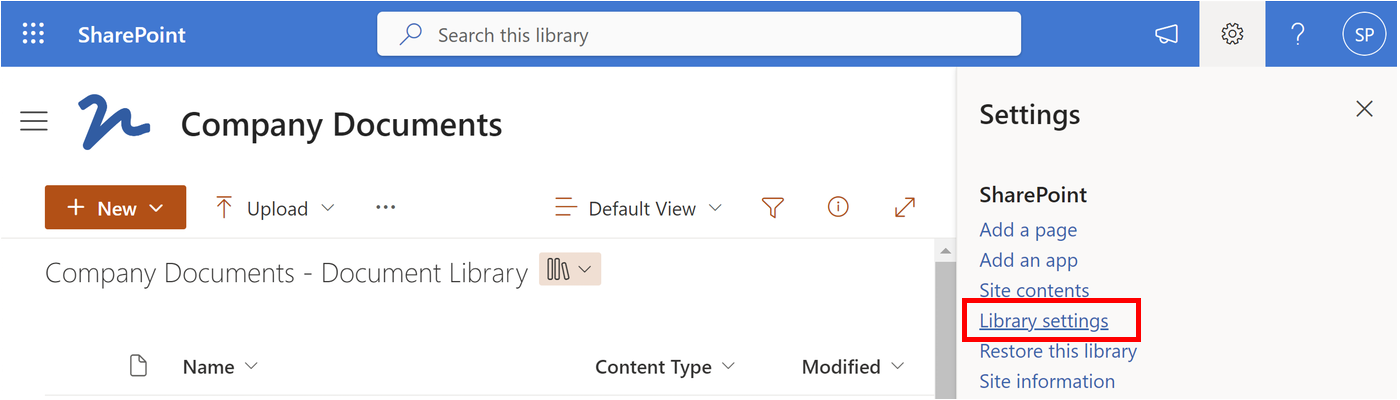
If you are using SharePoint 365 (Online) click on the "Settings" button in the top right toolbar and select "Library Settings" from the menu. Then click on "More library settings".
If you are using an older verison of SharePoint click on the Library tab in the ribbon and select Library Settings from the menu.
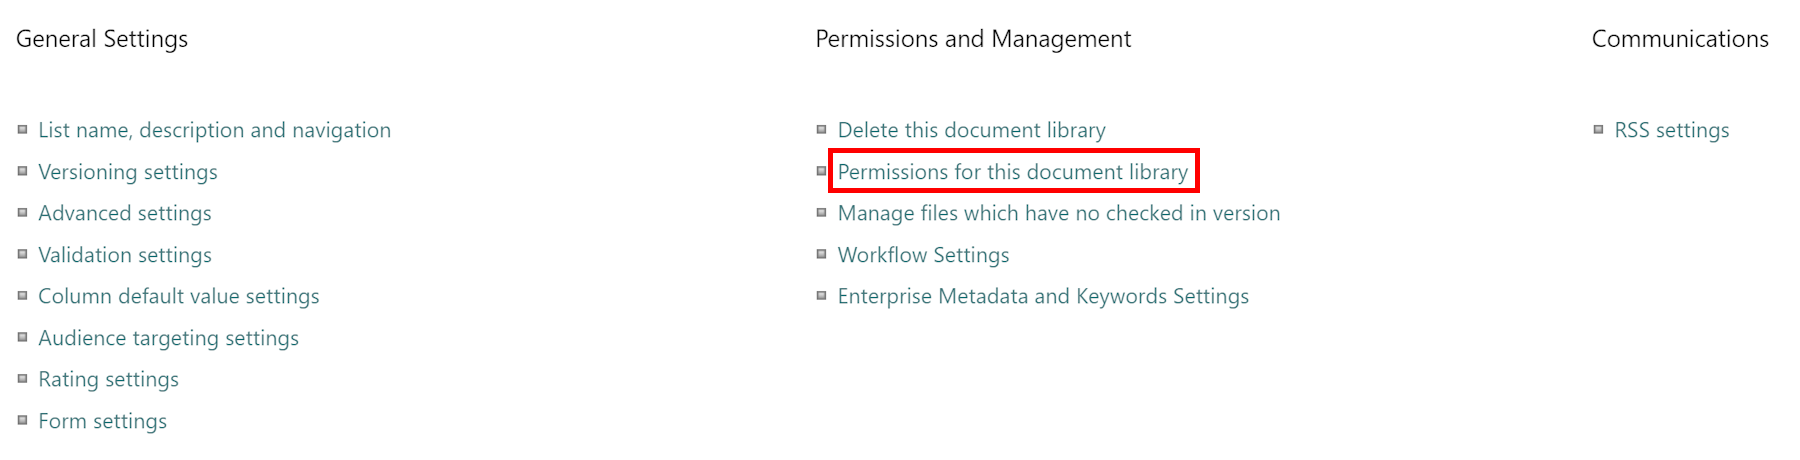
In the Permissions and Management section, click on Permissions for this document library.
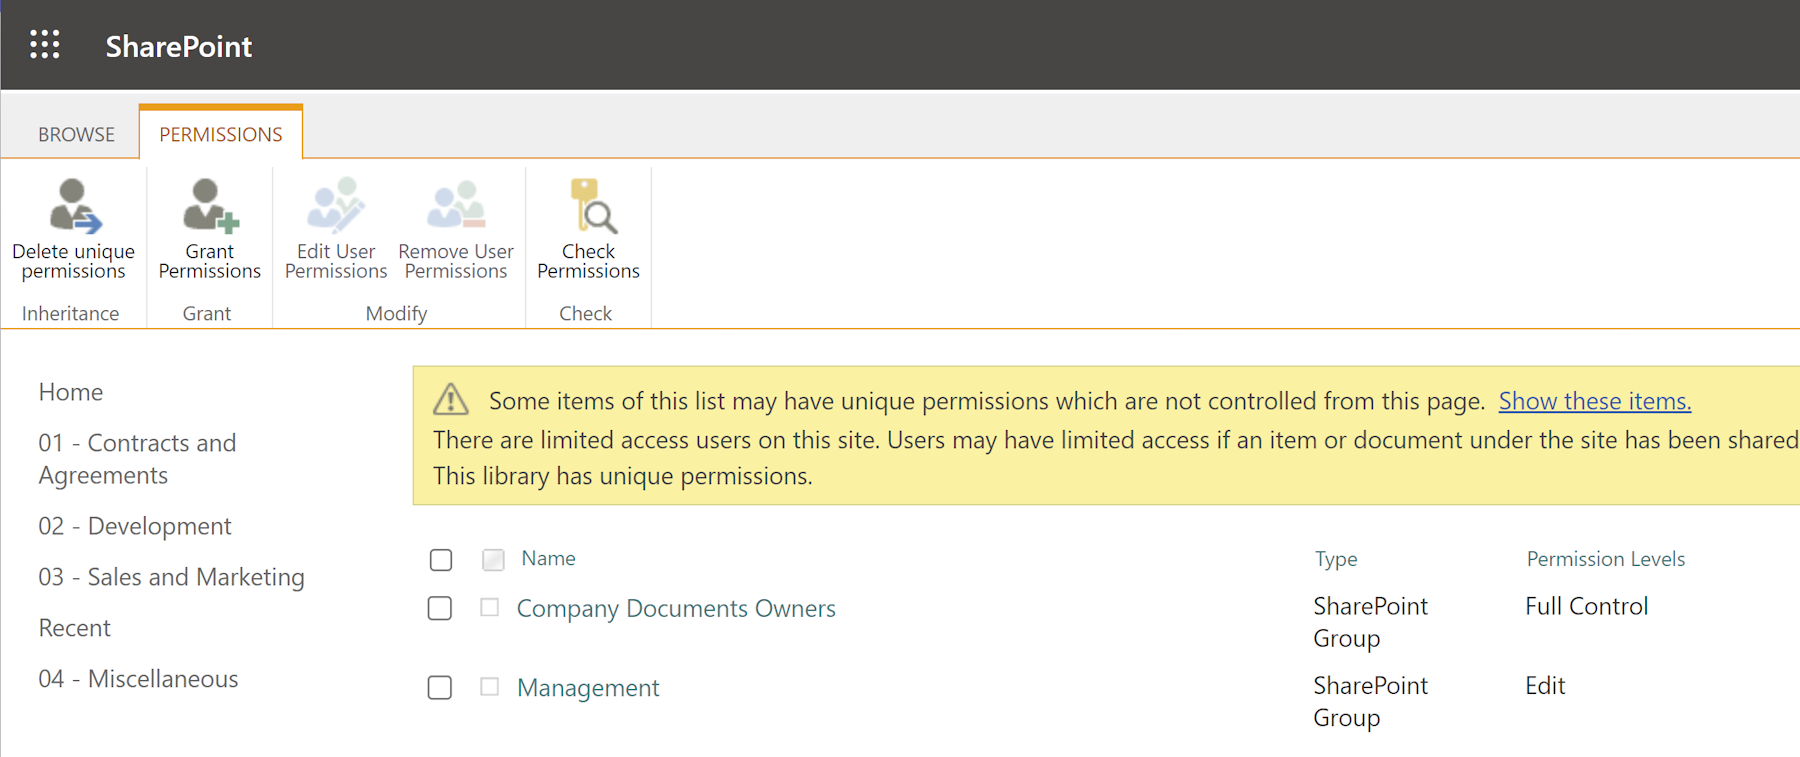
You will now see the Permissions page for the document library.
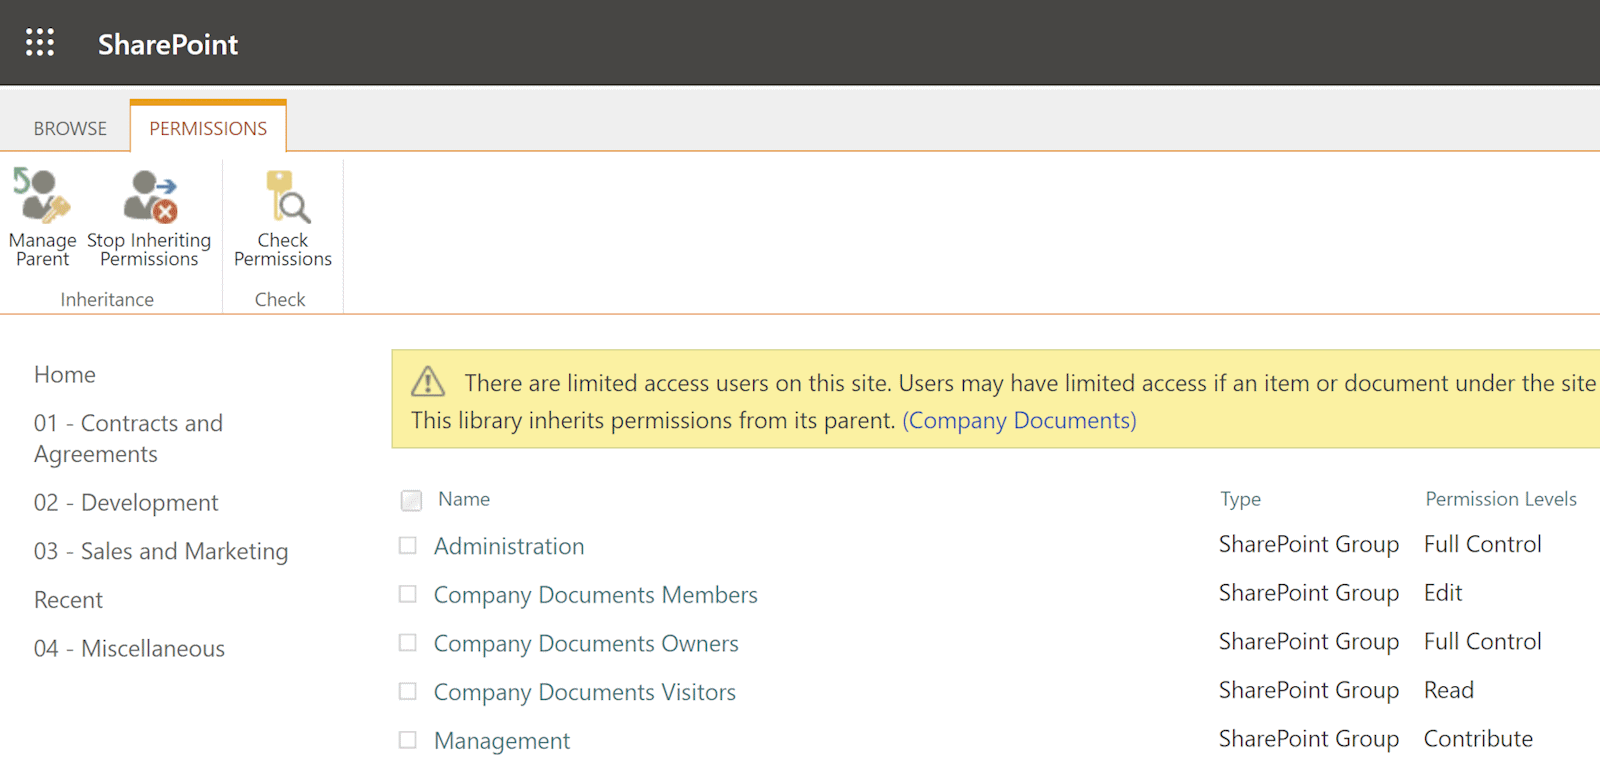
To add users or groups with unique permissions, click on Stop Inheriting Permissions in the Inheritance group in the toolbar.
SharePoint will warn you about the consequences of stopping inheritance. Click OK to proceed.
After stopping inheritance, you can add or remove users or groups from the library using the Grant Permissions option in the ribbon.
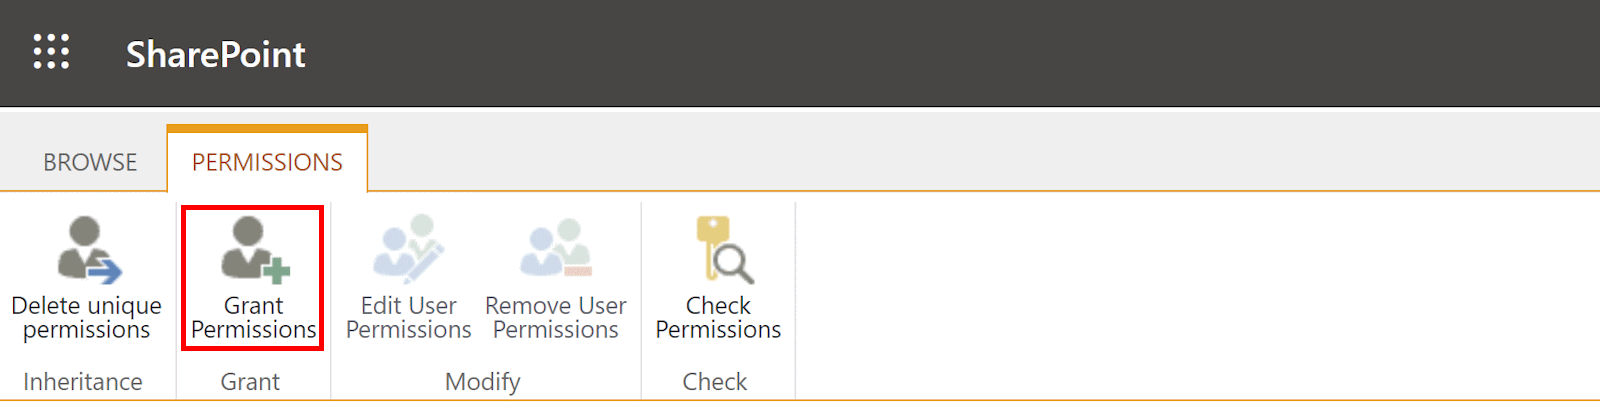
- Clicking on Grant Permissions will open a dialog.
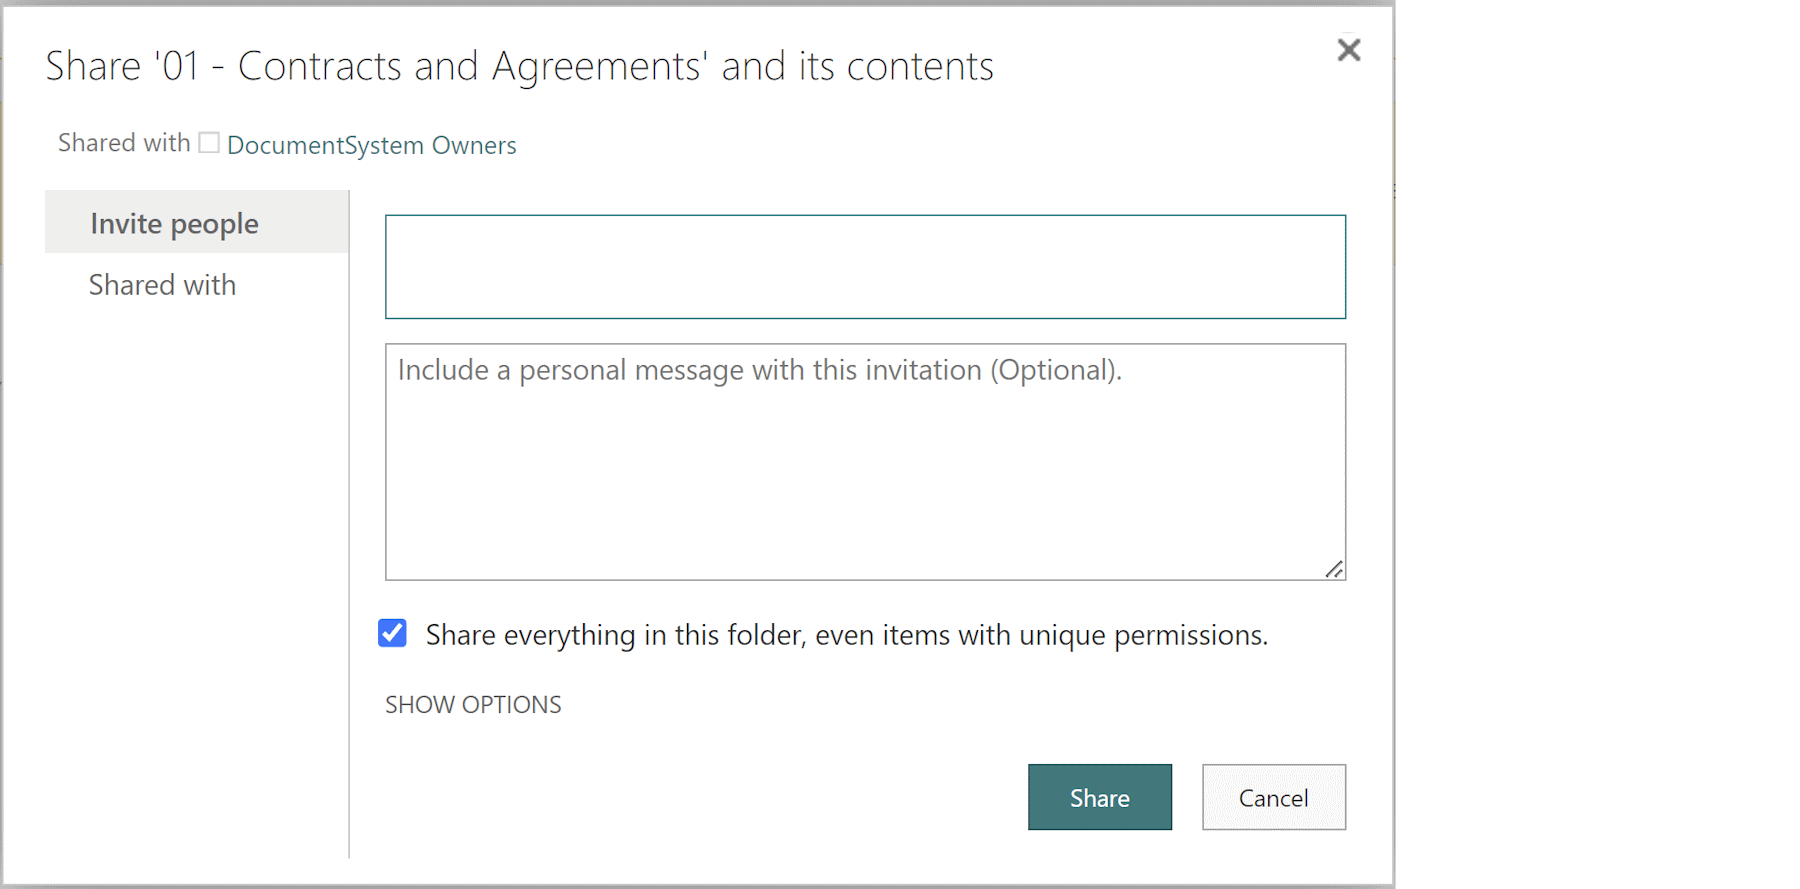
Type the name or email address of the user or group you want to add and select them from the suggestions. Click on Show options to choose the appropriate permission level from the available options.
Click Share to grant access to the selected users or groups.
Assigning Unique Permissions to Folders and Files
Along with customizing permissions at the document library level, SharePoint allows you to assign unique permissions to individual folders and files. This capability is particularly useful when you have sensitive documents that require restricted access even within a library.
To assign unique permissions to a folder or file within a SharePoint document library, follow these steps:
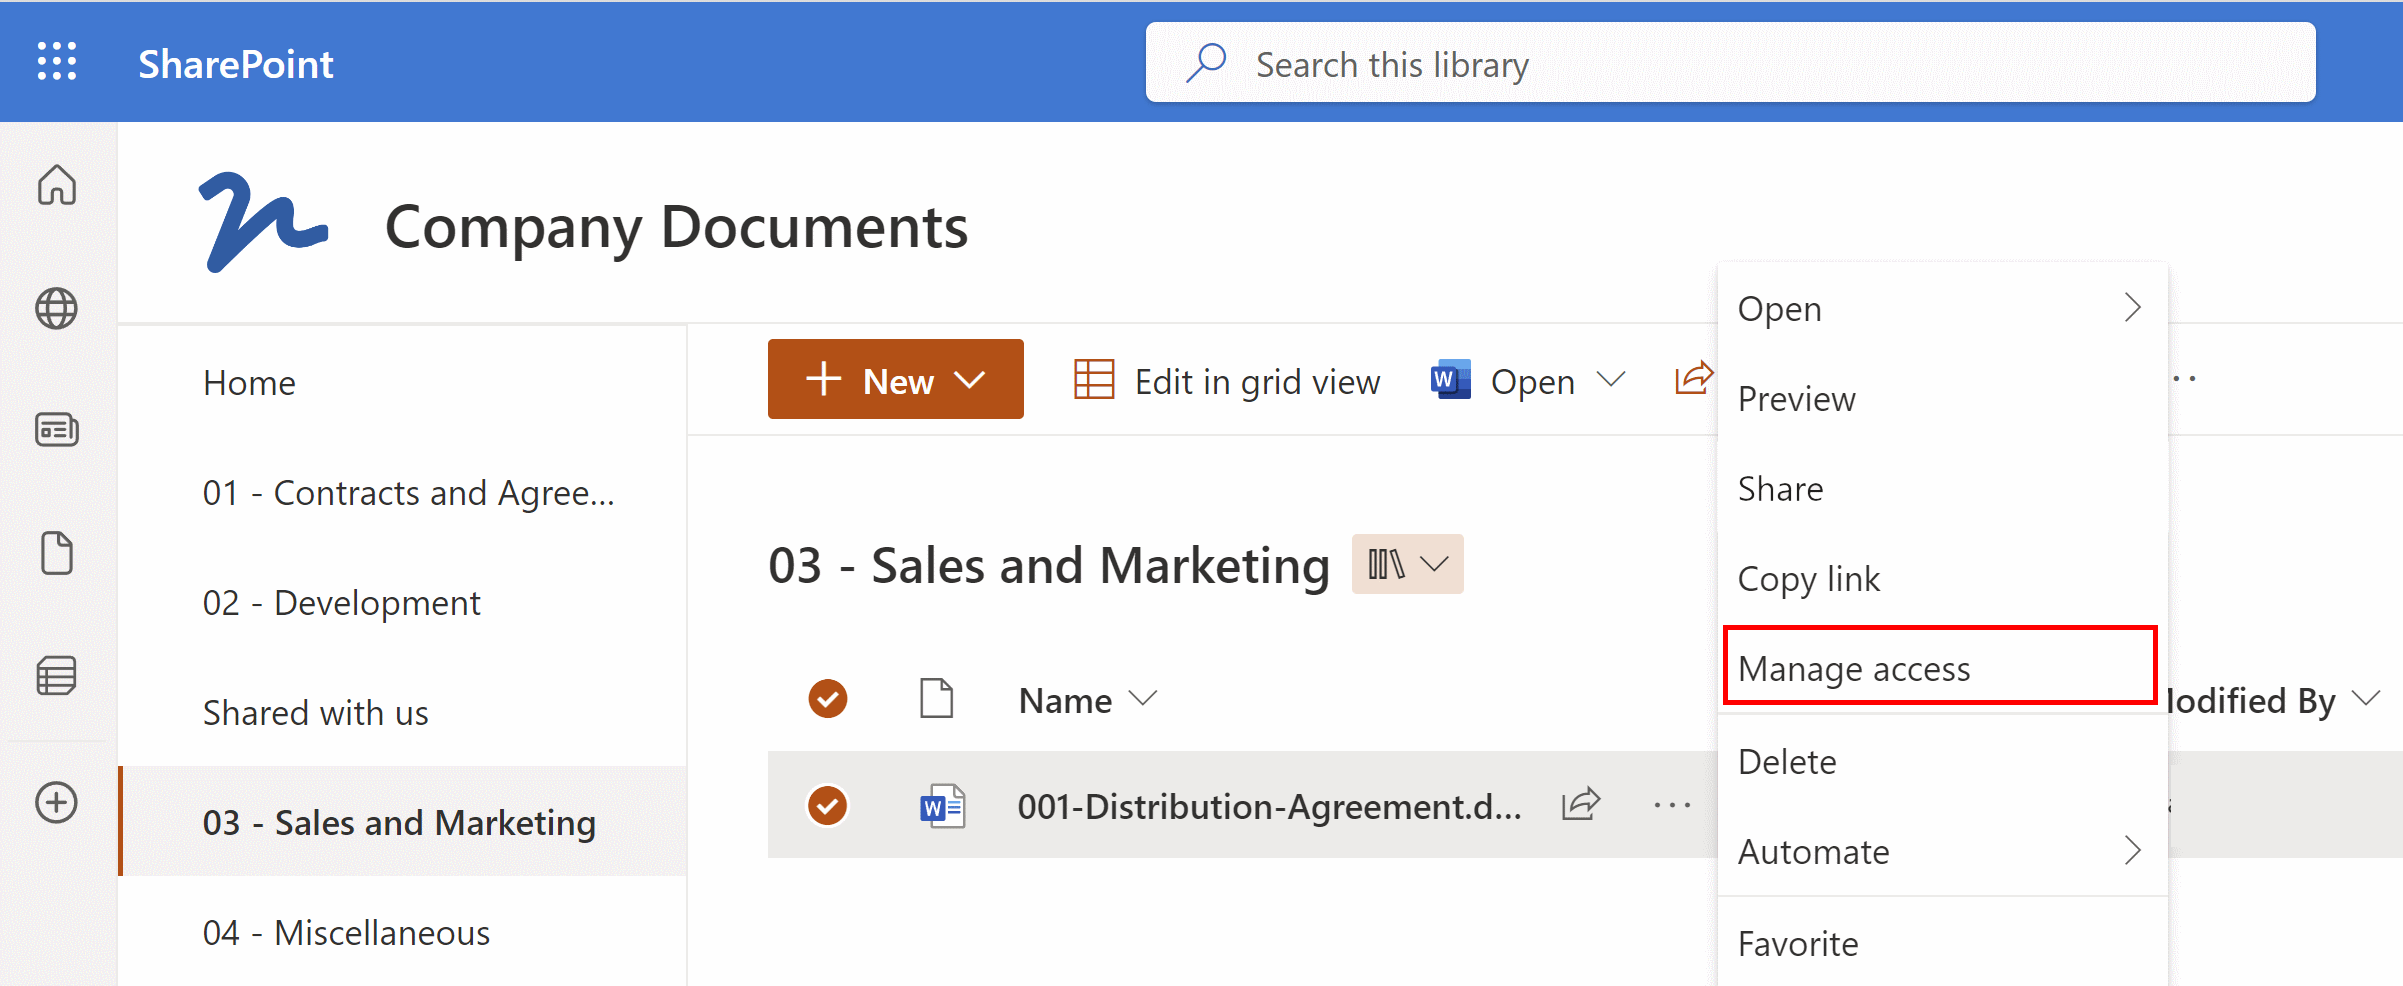
Navigate to the desired folder or file within the document library.
Hover over the folder or file and click the ellipsis (three dots) that appears. Select Manage Access from the menu.
Use the new dialog to share the file while still keeping inherited permissions. But if you would like to have unique permission on the file, click on the three dots button in top right corner and select Advanced settings.

On the Permissions pane, click on Stop Inheriting Permissions. SharePoint will warn you about the consequences of stopping inheritance. Click OK to proceed.
You can now add or remove users or groups with unique permissions using the Grant Permissions option in the ribbon.
Follow the same process as mentioned earlier to grant or revoke access to specific users or groups.
Best Practices for Customizing Permissions
While customizing permissions for a SharePoint document library, it's important to follow best practices to ensure the security and integrity of your data. Here are some guidelines to consider:
Use groups for managing permissions: Instead of assigning permissions individually to each user, create groups and assign permissions to the groups. This approach simplifies permission management and allows you to add or remove users from groups as needed.
Regularly review and update permissions: Periodically review the permissions assigned to users and groups in your document library. Remove permissions for users who no longer require access and audit the permissions of sensitive documents.
Minimize the use of unique permissions: While assigning unique permissions at the folder or file level provides granular control, it can also lead to complexity and difficulties in management. Use unique permissions sparingly and consolidate access control whenever possible.
Educate users about permissions: Ensure that users understand the permissions assigned to them and the responsibilities associated with those permissions. Educate them about best practices for data security and encourage adherence to company policies.
Conclusion
Customizing permissions for a SharePoint document library empowers you to control who can access, edit, and manage your files and folders. By following the steps outlined in this article, you can easily customize permissions at the document library, folder, and file levels. Remember to adhere to best practices for managing permissions and regularly review and update them to maintain data security within SharePoint.