Microsoft Word is a powerful word processing software that is widely used for creating and editing documents. Whether you are writing an essay, a report, or a research paper, knowing how to properly format your document is essential. One common formatting requirement is double spacing. In this article, we will guide you through the steps on how to double space in Word.
Double spacing is a formatting option that adds extra space between lines in your document. This makes it easier to read and allows for better organization of your content. Double spacing is commonly used in academic writing, as many institutions and publishers require it for readability purposes.
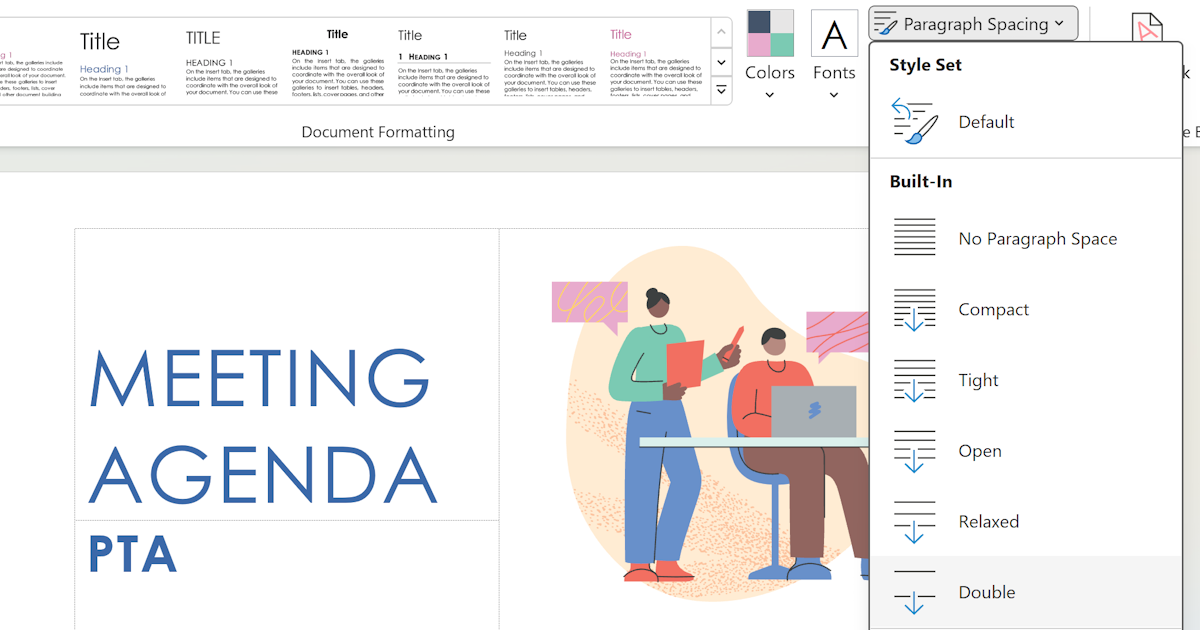
Start double spacing in Word document
To start double spacing your document, follow these steps:
Open Microsoft Word and open the document you want to double space.
Select the text you want to double space. If you want to double space the entire document, press "Ctrl + A" to select all the text.
Go to the "Home" tab in the toolbar at the top of the screen.
In the "Paragraph" section, you will find the line spacing options. By default, it is set to "1.0" for single spacing.
Click on the arrow next to the Line Spacing option to open a drop-down menu.
In the drop-down menu, you will see various options for line spacing. Select "2.0" for double spacing.
Once you have selected the double spacing option, the selected text or entire document will be double spaced.
Adjust line spacing for different pages
If you want to change the line spacing for different parts of your document, follow these steps:
Select the specific paragraphs or lines you want to change the line spacing for.
Right-click anywhere within the selected text and choose "Paragraph" from the drop-down menu. Alternatively, you can go to the "Home" tab and click on the small arrow in the bottom right corner of the "Paragraph" section.
In the "Paragraph" dialog box, go to the "Indents and Spacing" tab.
Under the "Line spacing" section, choose "Double" from the drop-down menu.
Click "OK" to apply the double spacing to the selected paragraphs.
Default line spacing
You can also set the default line spacing for all new documents in Microsoft Word by following these steps:
Open Microsoft Word and go to the "File" tab in the toolbar.
Click on "Options" to open the Word Options dialog box.
In the Word Options dialog box, go to the "Advanced" tab.
Scroll down to the "Editing options" section.
Next to "Line spacing," select "Double" from the drop-down menu.
Click "OK" to save the changes.
By setting the default line spacing to double, all new documents will automatically have double spacing applied. However, you can still change the line spacing for individual documents as needed.
In conclusion, knowing how to double space in Word is an essential skill for anyone working with documents, especially in academic and professional settings. By following the simple steps outlined in this article, you can easily format your documents with double spacing to enhance readability and meet specific formatting requirements. Whether you are writing an essay, a report, or a research paper, double spacing will make your document more professional and visually appealing.
