Have you ever needed to protect sensitive information in a Word document? Whether it's a confidential report, a personal diary, or any other type of document containing sensitive information, it's crucial to safeguard it from prying eyes. In this article, we will guide you on how to password protect a Word document, ensuring that only authorized individuals can access its contents.
Before we get started, please make sure you have Microsoft Word installed on your computer. Now, let's dive into the steps:
Step 1: Open the Word Document
First, open the Word document that you want to password protect. You can do this by double-clicking on the document's icon or navigating to it through the File Explorer and double-clicking to open it.
Step 2: Go to File > Info
Once the document is open, navigate to the "File" tab located at the top left corner of the Word window. Click on it to access a drop-down menu. From the menu, select "Info" to proceed to the next step.
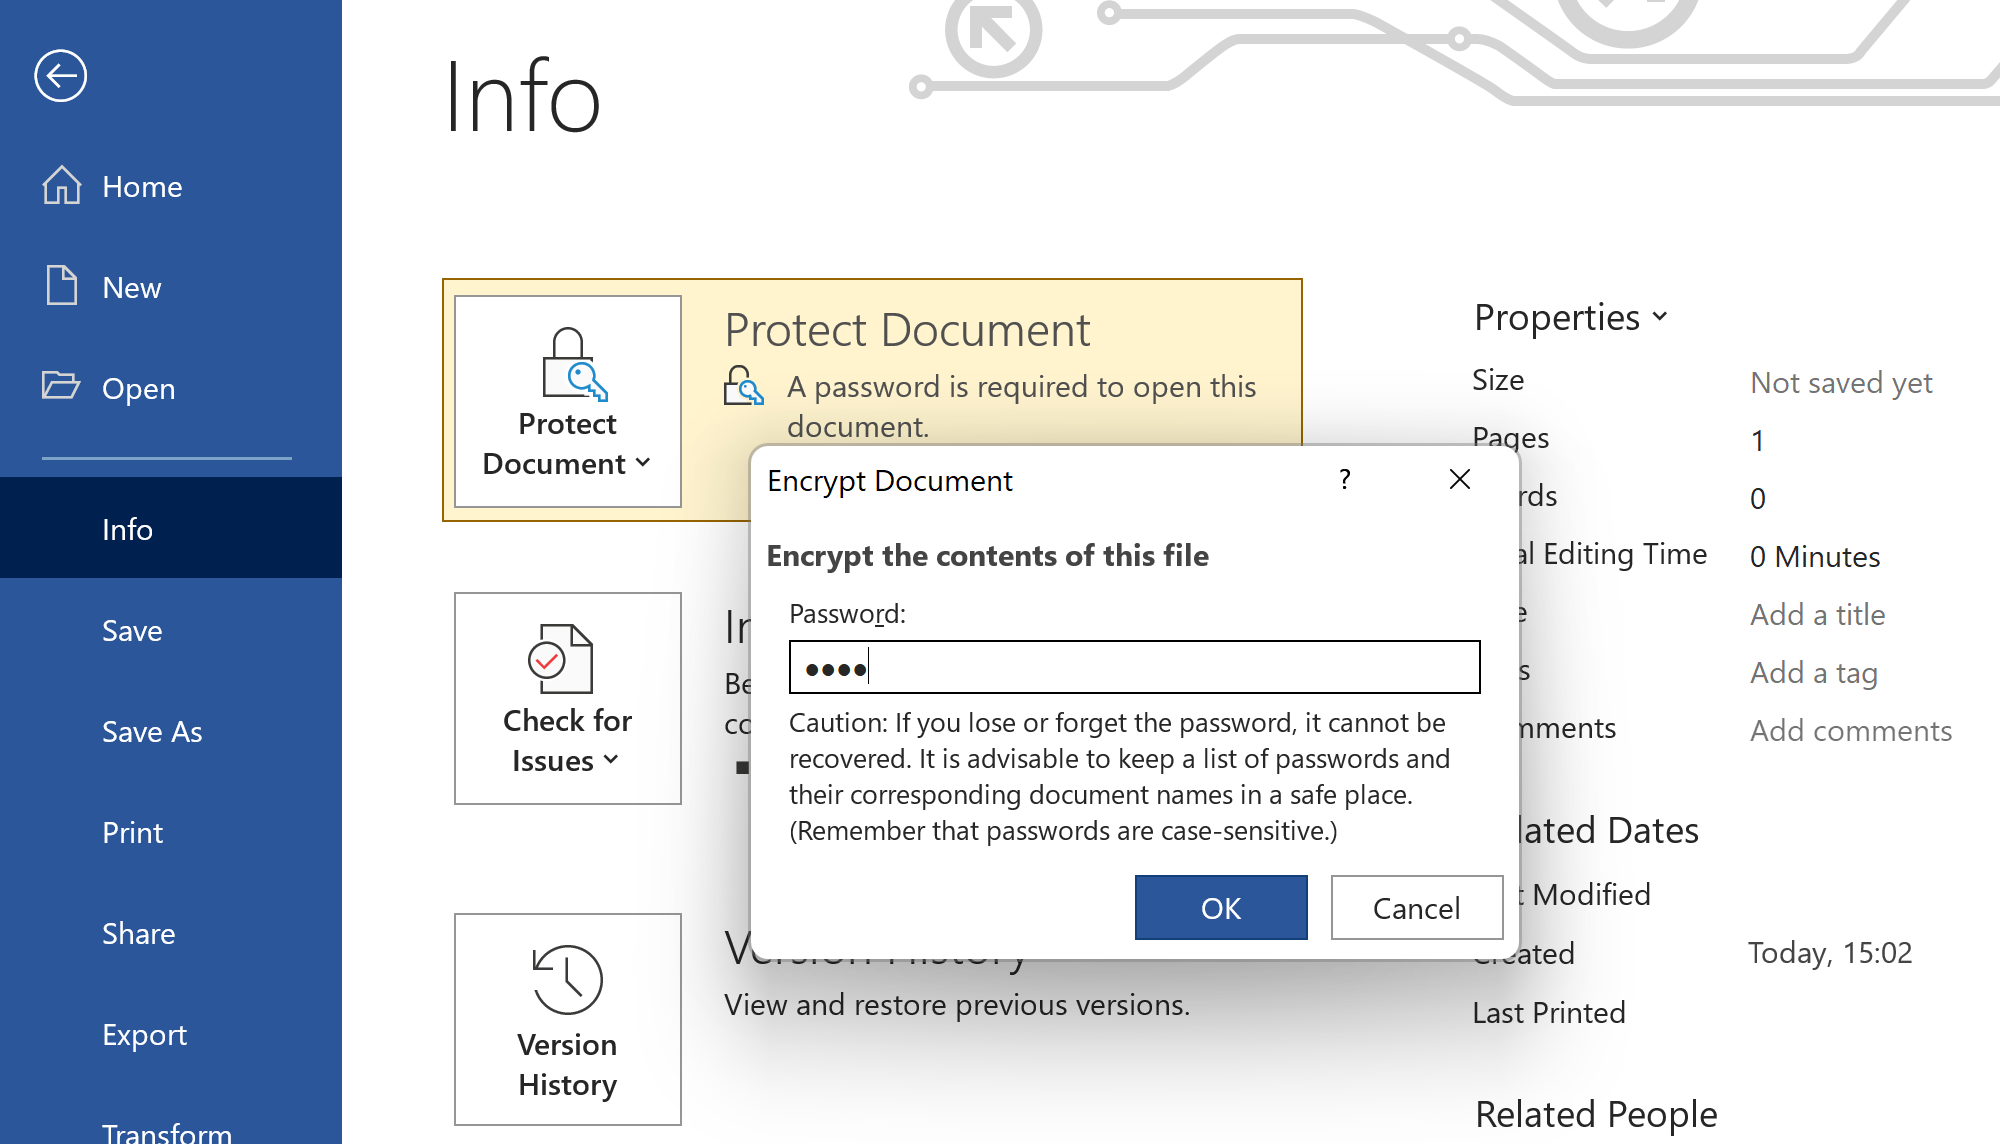
Step 3: Protect Document
In the "Info" section, you will find various options related to the document. Look for the "Protect Document" button and click on it. Another drop-down menu will appear with different options. From this menu, select "Encrypt with Password."
Step 4: Set a Password
After clicking on "Encrypt with Password," a pop-up window will appear, prompting you to enter a password. Choose a strong password that combines uppercase and lowercase letters, numbers, and special characters. Ensure that the password is unique and not easily guessable. After entering the password, click on the "OK" button to proceed.
Step 5: Re-enter the Password
To confirm the password, a second pop-up window will appear, asking you to re-enter the password. Type the same password that you set in the previous step, and then click on the "OK" button to continue.
Step 6: Save the Document
Now that you have set a password for the Word document, it's time to save it. Go to the "File" tab again and select "Save" or press "Ctrl + S" on your keyboard. Choose a location on your computer where you want to save the document, provide a suitable name, and click on the "Save" button.
Congratulations! You have successfully password protected your Word document. From now on, when someone tries to open the document, they will be prompted to enter the correct password. Without it, they won't be able to access the document's contents.
Tips for a Strong Password:
- Avoid using obvious passwords such as your name, birthdate, or 123456.
- Use a combination of uppercase and lowercase letters, numbers, and special characters.
- Make the password at least eight characters long.
- Consider using a password manager to securely store your passwords.
In conclusion, password protecting a Word document is a vital step in safeguarding sensitive information from unauthorized access. By following the steps outlined in this article, you can ensure that only authorized users can view and modify the document's contents. Remember to choose a strong and unique password to maximize the protection of your important files.
