Have you ever struggled with numbering in Microsoft Word? Whether you're creating a simple list or a complex document with multiple sections, getting the numbers to appear correctly can be a frustrating task. But fear not! In this article, we will explore the ins and outs of numbering in Word, so you can master this essential tool and create professional-looking documents with ease.
Understanding Numbering Styles in Word
Before we dive into the details, let's first understand the different types of numbering styles available in Word. Word offers three main styles of numbering: bulleted lists, numbered lists, and multilevel lists.

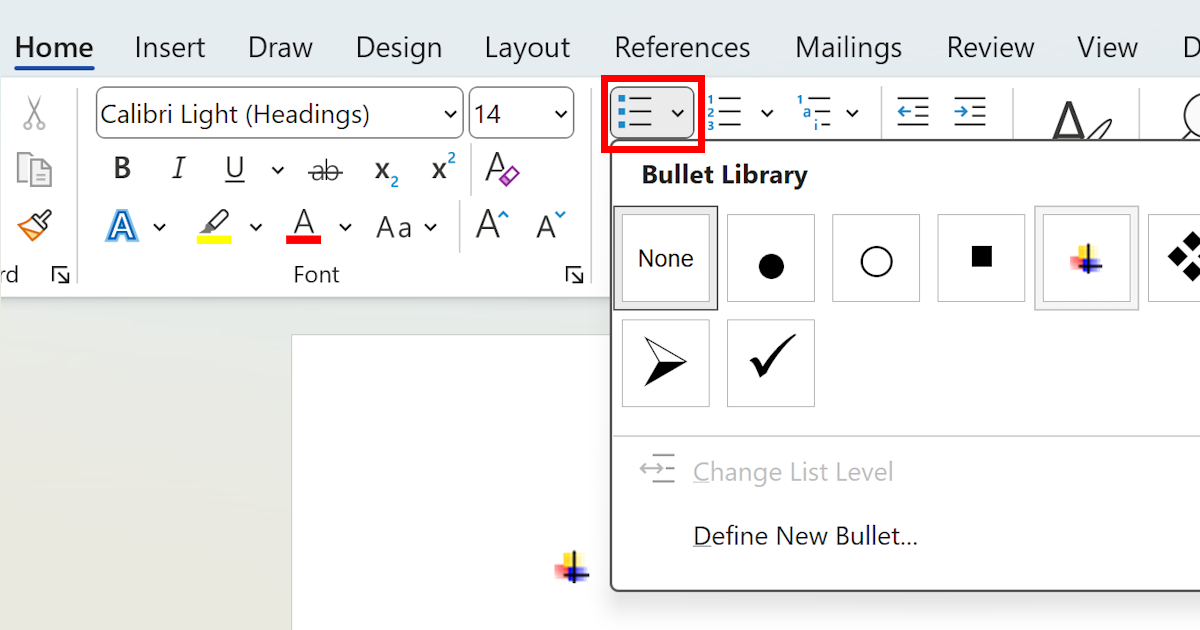
Bulleted Lists: Bulleted lists are used when you want to present a series of items in no particular order. The items are preceded by bullets, such as dots or small icons, to provide visual emphasis.
Numbered Lists: Numbered lists, on the other hand, are used when you want to present a series of items in a specific order. Each item is preceded by a number, allowing readers to easily follow the sequence.
Multilevel Lists: Multilevel lists are a combination of both bulleted and numbered lists. They are commonly used when you need to create a hierarchical structure, such as an outline or a table of contents.
Now that we have a basic understanding of the different numbering styles, let's explore how to apply and customize them in Word.
Applying Numbering to Text
To apply numbering to text, follow these steps:
Select the text you wish to format. This can be a single word, a sentence, or multiple paragraphs.
On the Home tab, locate the Paragraph group.
Click on the Numbering button, represented by a series of numbered bullets.
By default, Word will apply the standard numbering style to the selected text. However, you can customize the numbering style to meet your specific requirements.
Customizing Numbering Styles
To customize the numbering style, follow these steps:
Select the numbered text you wish to format.
Right-click on the selected text and choose the 'Adjust List Indents' option.
In the 'List Library' section, click on the 'Define New Multilevel List' option.
Here, you can define the appearance and behavior of your numbered list. You can choose different numbering formats, modify the alignment, and even add prefixes or suffixes to the numbers.
Once you've made the desired changes, click the 'OK' button to apply the custom numbering style to your text.
Modifying Numbering Format
Word allows you to modify the numbering format of your lists as per your preferences. You can easily change the style, the starting number, and even add or remove sub-levels.
To modify the numbering format, follow these steps:
Select the numbered text you wish to modify.
Right-click on the selected text and choose the 'Numbering' option.
In the 'Numbering Library' section, you can select a different numbering format from the available options.
If you want to change the starting number, click on the 'Set Numbering Value' option and enter the desired number.
To add or remove sub-levels, click on the 'More' option in the 'Numbering Library' section, and then choose the 'Define New Multilevel List' option. From here, you can add or remove levels as needed.
Creating a Multilevel List
Multilevel lists are particularly useful when you want to create a hierarchical structure in your document. For example, if you're writing an outline or a table of contents, multilevel lists can help you organize your content effectively.
To create a multilevel list, follow these steps:
Select the text you want to convert into a multilevel list.
On the Home tab, locate the Paragraph group.
Click on the Numbering button and choose the 'Define New Multilevel List' option.
In the 'List Library' section, you can define the appearance and behavior of your multilevel list. You can choose different numbering formats for each level, modify the alignment, and even add prefixes or suffixes.
Once you've defined the list structure, click the 'OK' button to apply the multilevel list to your text.
Troubleshooting Numbering Issues
Despite Word's powerful formatting options, numbering issues can still occur. Here are a few common problems you may encounter and how to fix them:
Restarting Numbering: If you want to restart numbering at a specific point within your document, select the text where you want the numbering to restart, right-click, and choose the 'Restart at 1' option.
Changing Numbering Style: If you need to change the numbering style of a list, select the list, right-click, and choose the 'Change List Level' option. From here, you can select a different numbering style.
Fixing Indentation: To adjust the indentation of your list items, select the list, right-click, and choose the 'Adjust List Indents' option. Here, you can modify the left and right indentation to your liking.
Hierarchical Structure: If you're working with a multilevel list and need to reorganize the structure, you can use the 'Increase Indent' and 'Decrease Indent' buttons in the Paragraph group on the Home tab.
Conclusion
Mastering numbering in Word is essential for creating professional-looking documents with ease. Whether you're creating simple lists or complex multilevel structures, understanding the different numbering styles and customizing them to suit your needs will save you time and frustration.
Remember to apply the numbering styles correctly, customize them as per your preferences, and troubleshoot any issues that may arise. With practice, you'll become a pro at numbering in Word and create polished documents that impress your readers.
 WordFields
