Have you ever been working on a Word document and found yourself in need of inserting a page break? Whether you're writing a report, creating a professional document, or designing a brochure, understanding how to insert a page break in Microsoft Word is a crucial skill. In this article, we will guide you step-by-step on how to insert a page break in Word and provide some helpful tips along the way.
But first, let's start with the basics ...
What is a Page Break?
A page break is a divider inserted in a document that tells Word to start a new page. This feature allows you to control exactly where each page begins, ensuring your content is organized and visually appealing. By inserting page breaks strategically, you can prevent awkward page breaks and make your document flow seamlessly.
Inserting a Page Break in Microsoft Word
There are two main methods to insert a page break in Microsoft Word: using the keyboard shortcut or accessing the feature through the toolbar. Let's explore both options.
Using the Keyboard Shortcut
The quickest way to insert a page break is by using the keyboard shortcut "Ctrl + Enter". Simply place your cursor at the desired location where you want the page break to occur and press the shortcut. A new page will be created, starting from that point.
Accessing the Feature Through the Toolbar
If you prefer using the toolbar, follow these steps:
- Place your cursor at the location where you want to insert the page break.
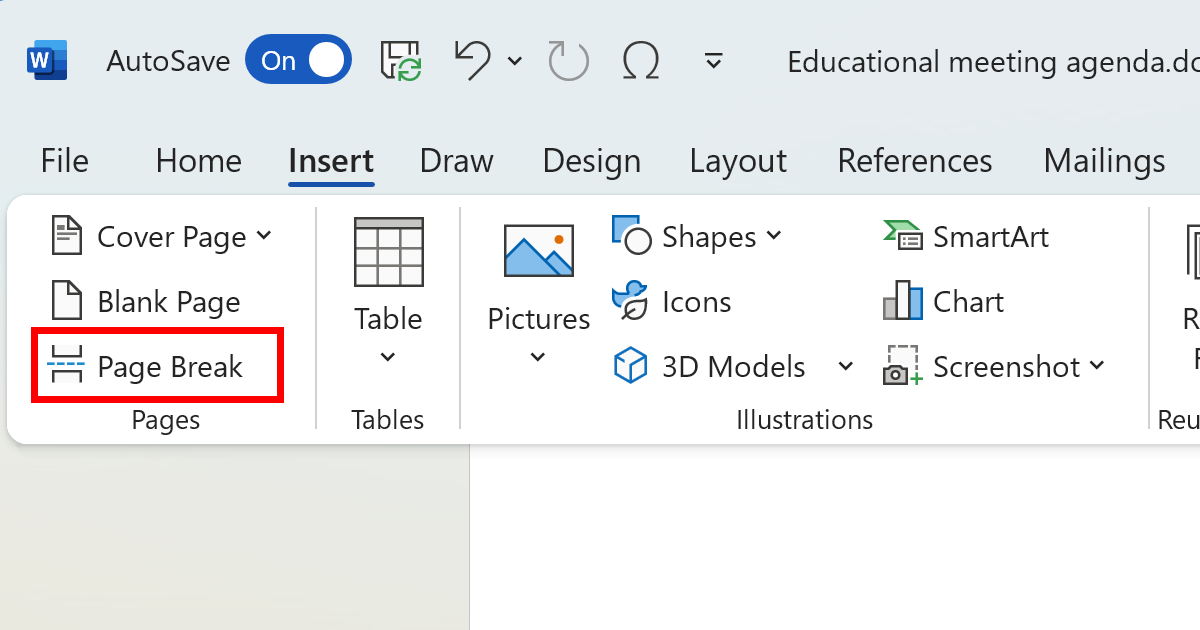
- Navigate to the "Insert" tab at the top of the Word window.
- Look for the "Pages" group on the toolbar. In this group, you will find the "Page Break" option.
- Click the "Page Break" button. A new page will be inserted at the cursor's position.
Understanding Different Types of Page Breaks
Microsoft Word offers different types of page breaks to suit your specific needs. Let's explore the two main types:
Automatic Page Breaks
Automatic page breaks are inserted automatically by Word based on factors such as margins, font size, and content length. When the content exceeds the page's available space, Word automatically inserts a page break to continue the text on the next page. These breaks are dynamic and adjust as you modify the content.
Manual Page Breaks
Manual page breaks are inserted by the user to have more control over the document's layout. By manually inserting page breaks, you can determine precisely where each page begins, regardless of the content's length. This type of page break is especially useful when you want to start a new section or chapter on a fresh page.
Tips for Using Page Breaks Effectively
Now that you know how to insert page breaks, let's look at some tips for using them effectively in your Word documents:
Prevent Widows and Orphans
Widows and orphans are terms used to describe single lines at the beginning or end of a paragraph that appear on a separate page. They can disrupt the flow of your document and make it look unprofessional. By inserting page breaks strategically, you can avoid widows and orphans and ensure that paragraphs stay together.
Create Section Breaks
In addition to page breaks, Word also allows you to insert section breaks. Section breaks are useful when you want different sections of your document to have different formatting, headers, footers, or page numbers. By inserting section breaks, you can apply specific formatting to a section without affecting the rest of the document.
Use Page Break Preview
If you want to visualize how the page breaks affect your document's layout, you can use the Page Break Preview feature in Word. To access this feature, click on the "View" tab in the toolbar and select "Page Break Preview." This view will display your document with colored lines representing the page breaks, making it easier to adjust them if needed.
Remove Page Breaks
If you no longer need a page break in your document, you can easily remove it. Simply place your cursor just before the page break you want to delete and press the "Delete" key on your keyboard. The page break will be removed, and the content will merge onto the previous page.
Conclusion
Inserting page breaks in Microsoft Word is a fundamental skill that helps you maintain control over your document's layout. Whether you're writing a report, crafting a professional document, or designing marketing materials, understanding how to insert page breaks allows you to organize your content effectively and present it in an appealing manner. By following the steps outlined in this article, you can confidently insert page breaks in Word and take your document formatting to the next level.
