Microsoft Word is a powerful word processing tool that allows users to create and edit documents with ease. One of the great features of Word is the ability to add text boxes, which can be useful for a variety of purposes. In this article, we will discuss how to add a text box in Word and explore some tips and tricks to make the most out of this feature.
A text box in Word is a rectangular container that can hold text, images, or other elements. It provides a way to separate and highlight specific content within a document. Whether you want to create a caption for an image, insert a sidebar with additional information, or simply organize your content in a visually appealing way, text boxes can be a valuable tool.
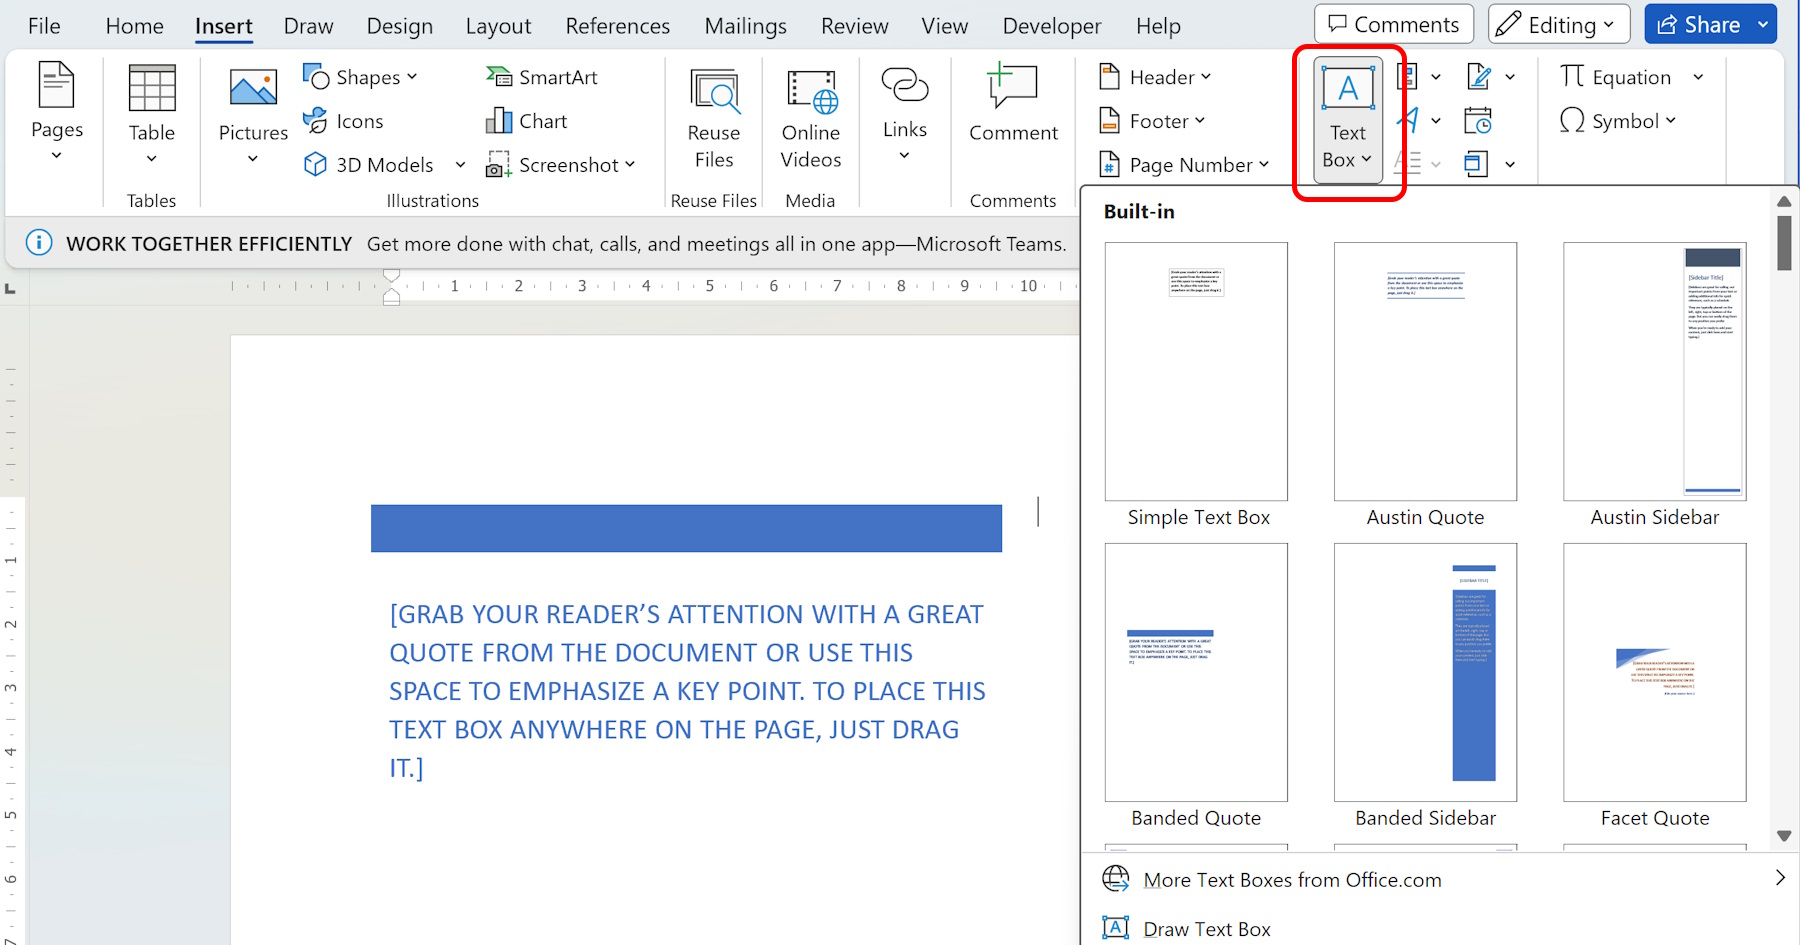
Add a text box in Word
To add a text box in Word, follow these simple steps:
- Open Microsoft Word and navigate to the page where you want to add the text box.
- Click on the "Insert" tab located in the upper menu.
- In the "Text" section, click on the "Text Box" button.
- A dropdown menu will appear with various predefined text box styles. Choose the style that suits your needs, or click on "Draw Text Box" at the bottom of the menu to create a custom text box.
- Click and drag your mouse on the page to create the text box. You can adjust the size and position later if needed.
- Start typing within the text box to add your desired text.
Once you have added a text box, you can customize it further to enhance the appearance and functionality. Here are a few tips and tricks to make the most out of text boxes in Word:
Formatting: Just like regular text, you can change the font, size, color, and other formatting options for the text within the text box. Select the text and use the formatting tools provided in the toolbar to make the desired changes.
Positioning: Text boxes can be moved around the page by clicking and dragging them. You can also resize them by clicking and dragging the handles located on the sides and corners. To align multiple text boxes, select them by holding down the Shift key and then use the alignment options in the toolbar.
Wrapping: By default, text boxes are set to have text wrap around them. However, you can change this setting by right-clicking on the text box, selecting "Wrap Text", and choosing the desired wrapping style. This is particularly useful when you want to insert a text box within a paragraph but don't want the text to wrap around it.
Styling: Text boxes can be styled to match the overall design of your document. Right-click on the text box, select "Format Shape", and explore the various options available. You can change the fill color, add borders, apply gradients, and even add special effects to make the text box stand out.
Linking: In some cases, you may want to link multiple text boxes together to create a flow of text across different areas of the document. To do this, click on the text box where you want the flow to start, go to the "Format" tab, click on the "Create Link" button, and then click on the next text box where you want the flow to continue. Repeat this process for each connected text box.
Grouping: If you have multiple text boxes that you want to treat as a single unit, you can group them together. Hold down the Shift key and click on each text box to select them, then right-click and choose "Group" from the context menu. This can be useful when you want to move or resize multiple text boxes as a whole.
Adding text boxes in Word can greatly enhance the visual appeal and organization of your documents. By following the simple steps outlined in this article and exploring the various customization options available, you can create professional and visually appealing documents with ease.
In conclusion, text boxes are a versatile and powerful tool in Microsoft Word. They allow you to add emphasis, organization, and visual appeal to your documents. By following the steps provided, you can easily add and customize text boxes to suit your specific needs. So go ahead and give it a try, and watch as your Word documents come to life with the addition of text boxes.
