Have you ever found yourself repeatedly copying and modifying Microsoft Word documents to create new contracts, receipts, reports, or letters? In this article, you'll discover the step-by-step process of creating a form in Word that others can easily fill out. Say goodbye to the manual editing hassles and hello to efficient document creation!

Create a fillable form in Word
To begin, let's dive into the method of creating a form in Word:
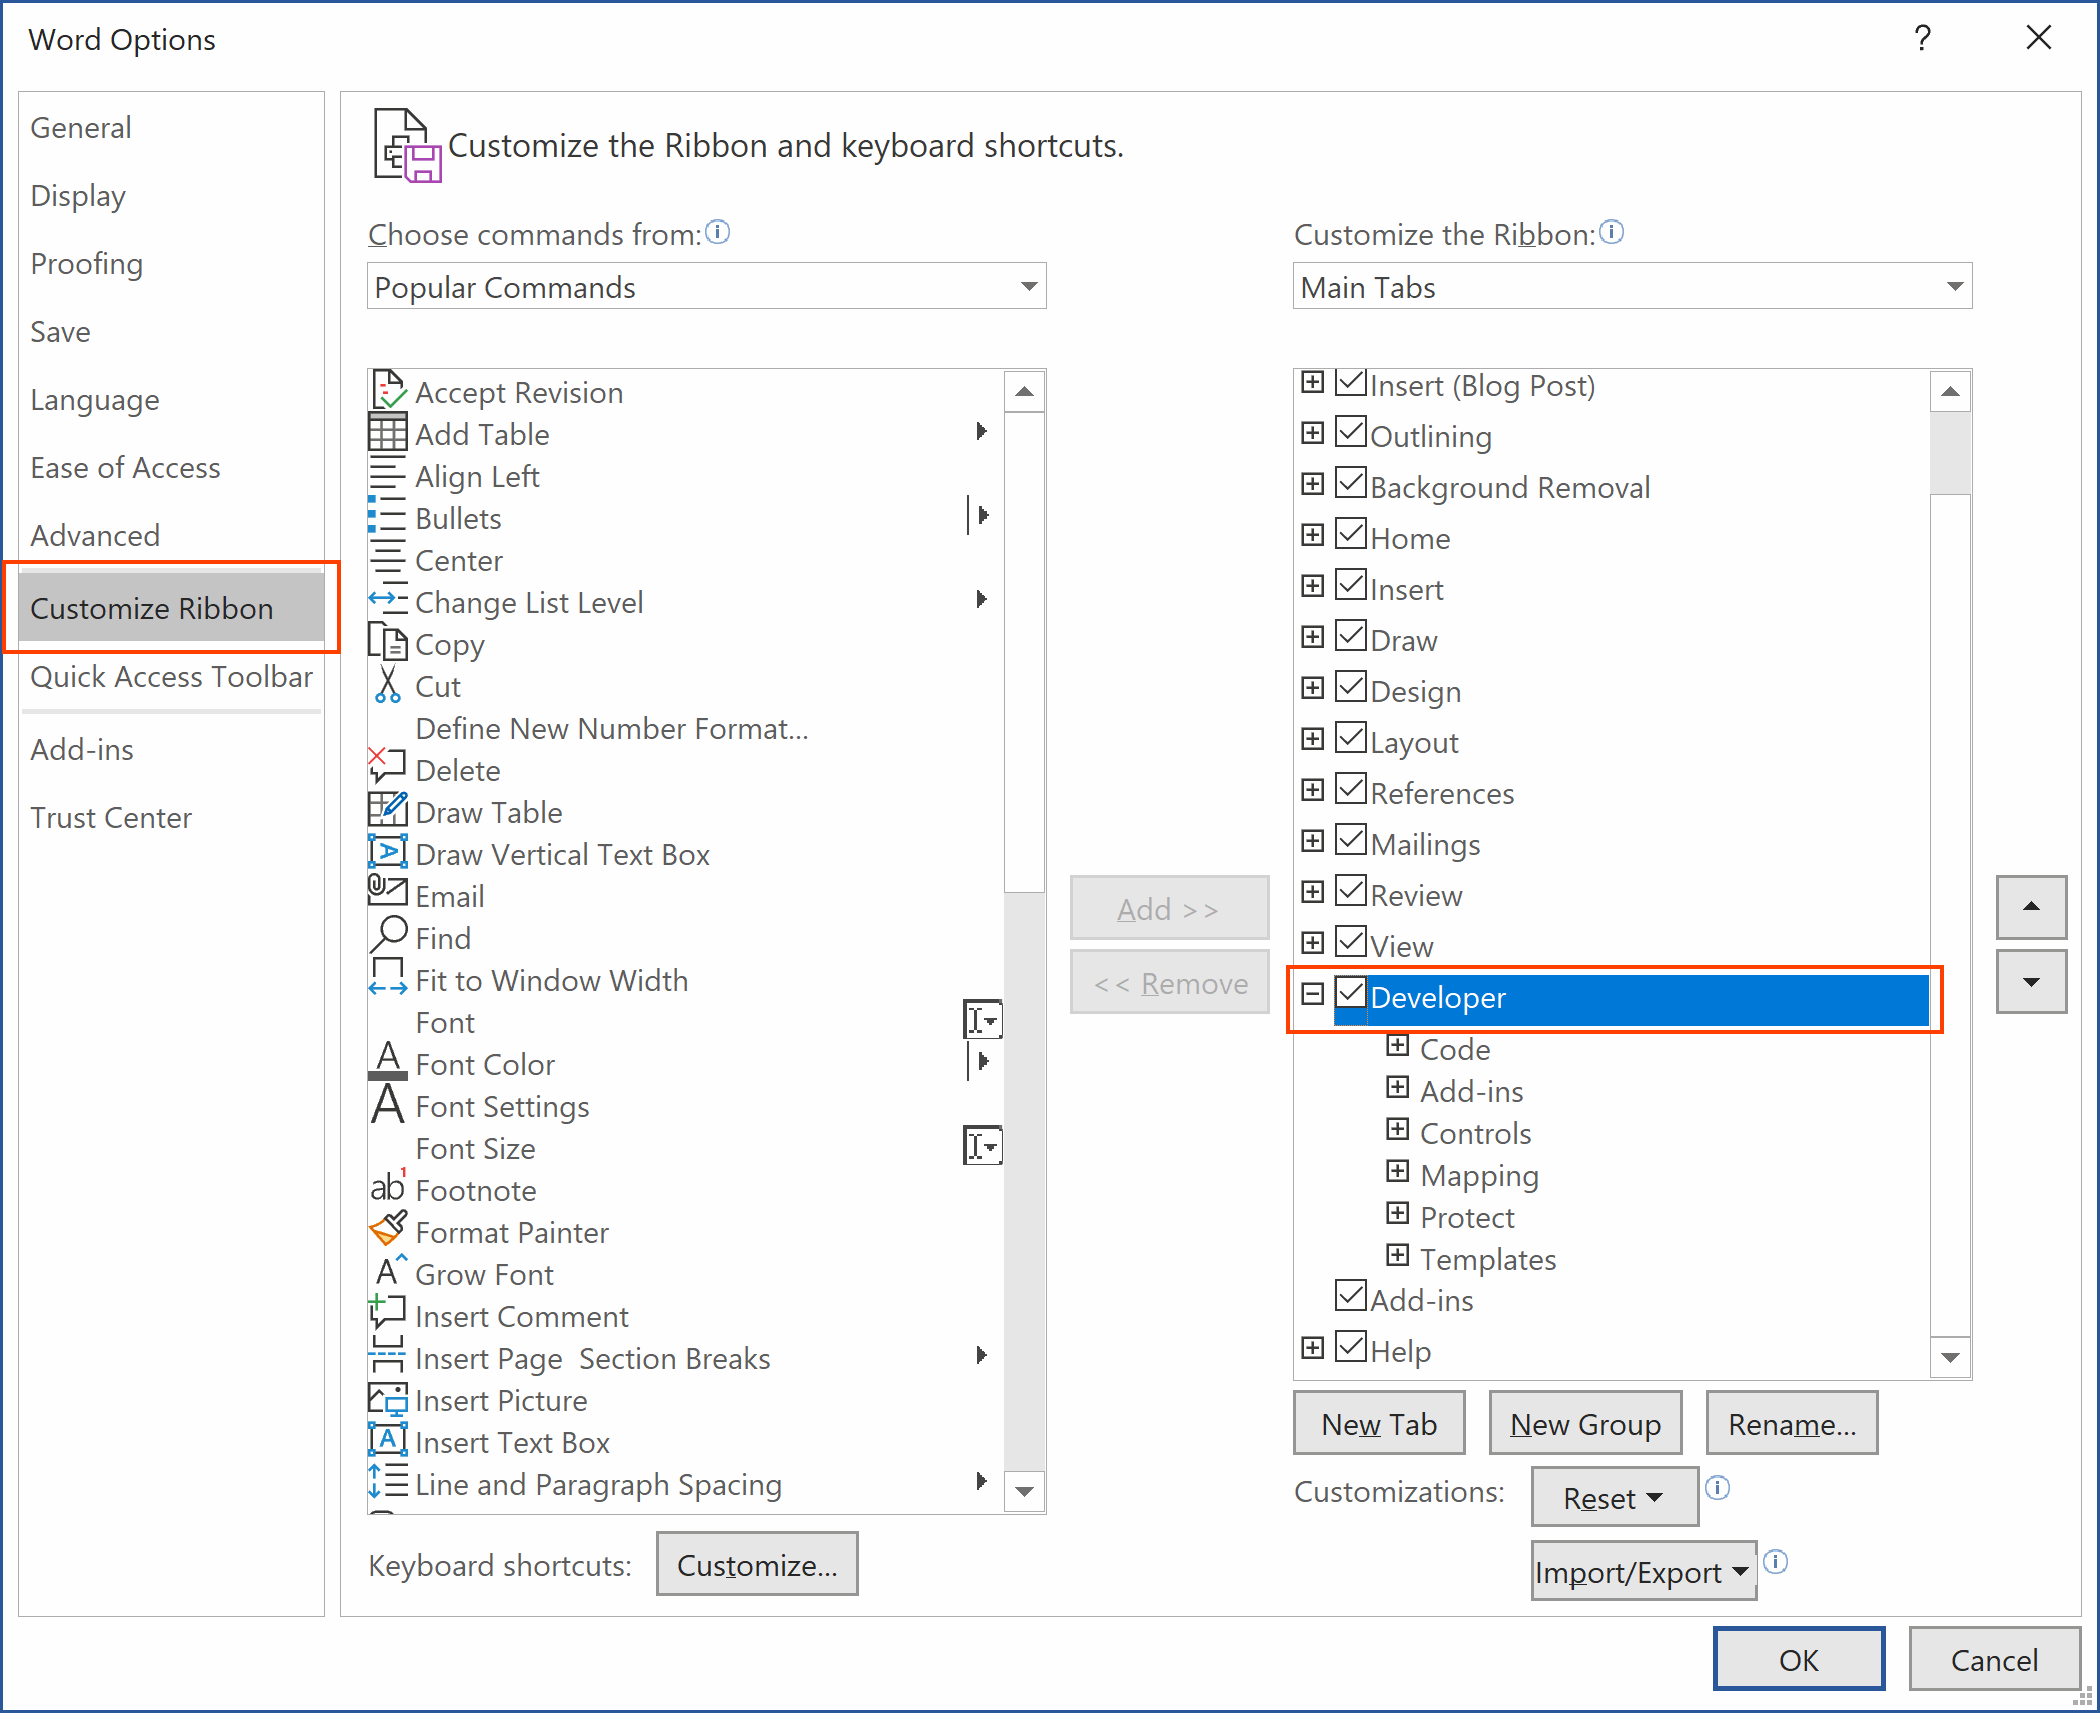
Check for the "Developer" Tab: First and foremost, check if you have the "Developer" tab in your Word ribbon. If not, simply right-click anywhere on the ribbon and select "Customize the Ribbon" from the menu. Alternatively, you can click on the "File" tab, choose "Options," and then navigate to the "Customize Ribbon" tab within the dialog box.

Select the Developer Checkbox: In the "Customize Ribbon" dialog box, locate the "Developer" checkbox in the list of tabs on the right-hand side. Ensure that it is checked, and then click the "OK" button to close the dialog box. Voila! You now have the "Developer" tab in your ribbon.

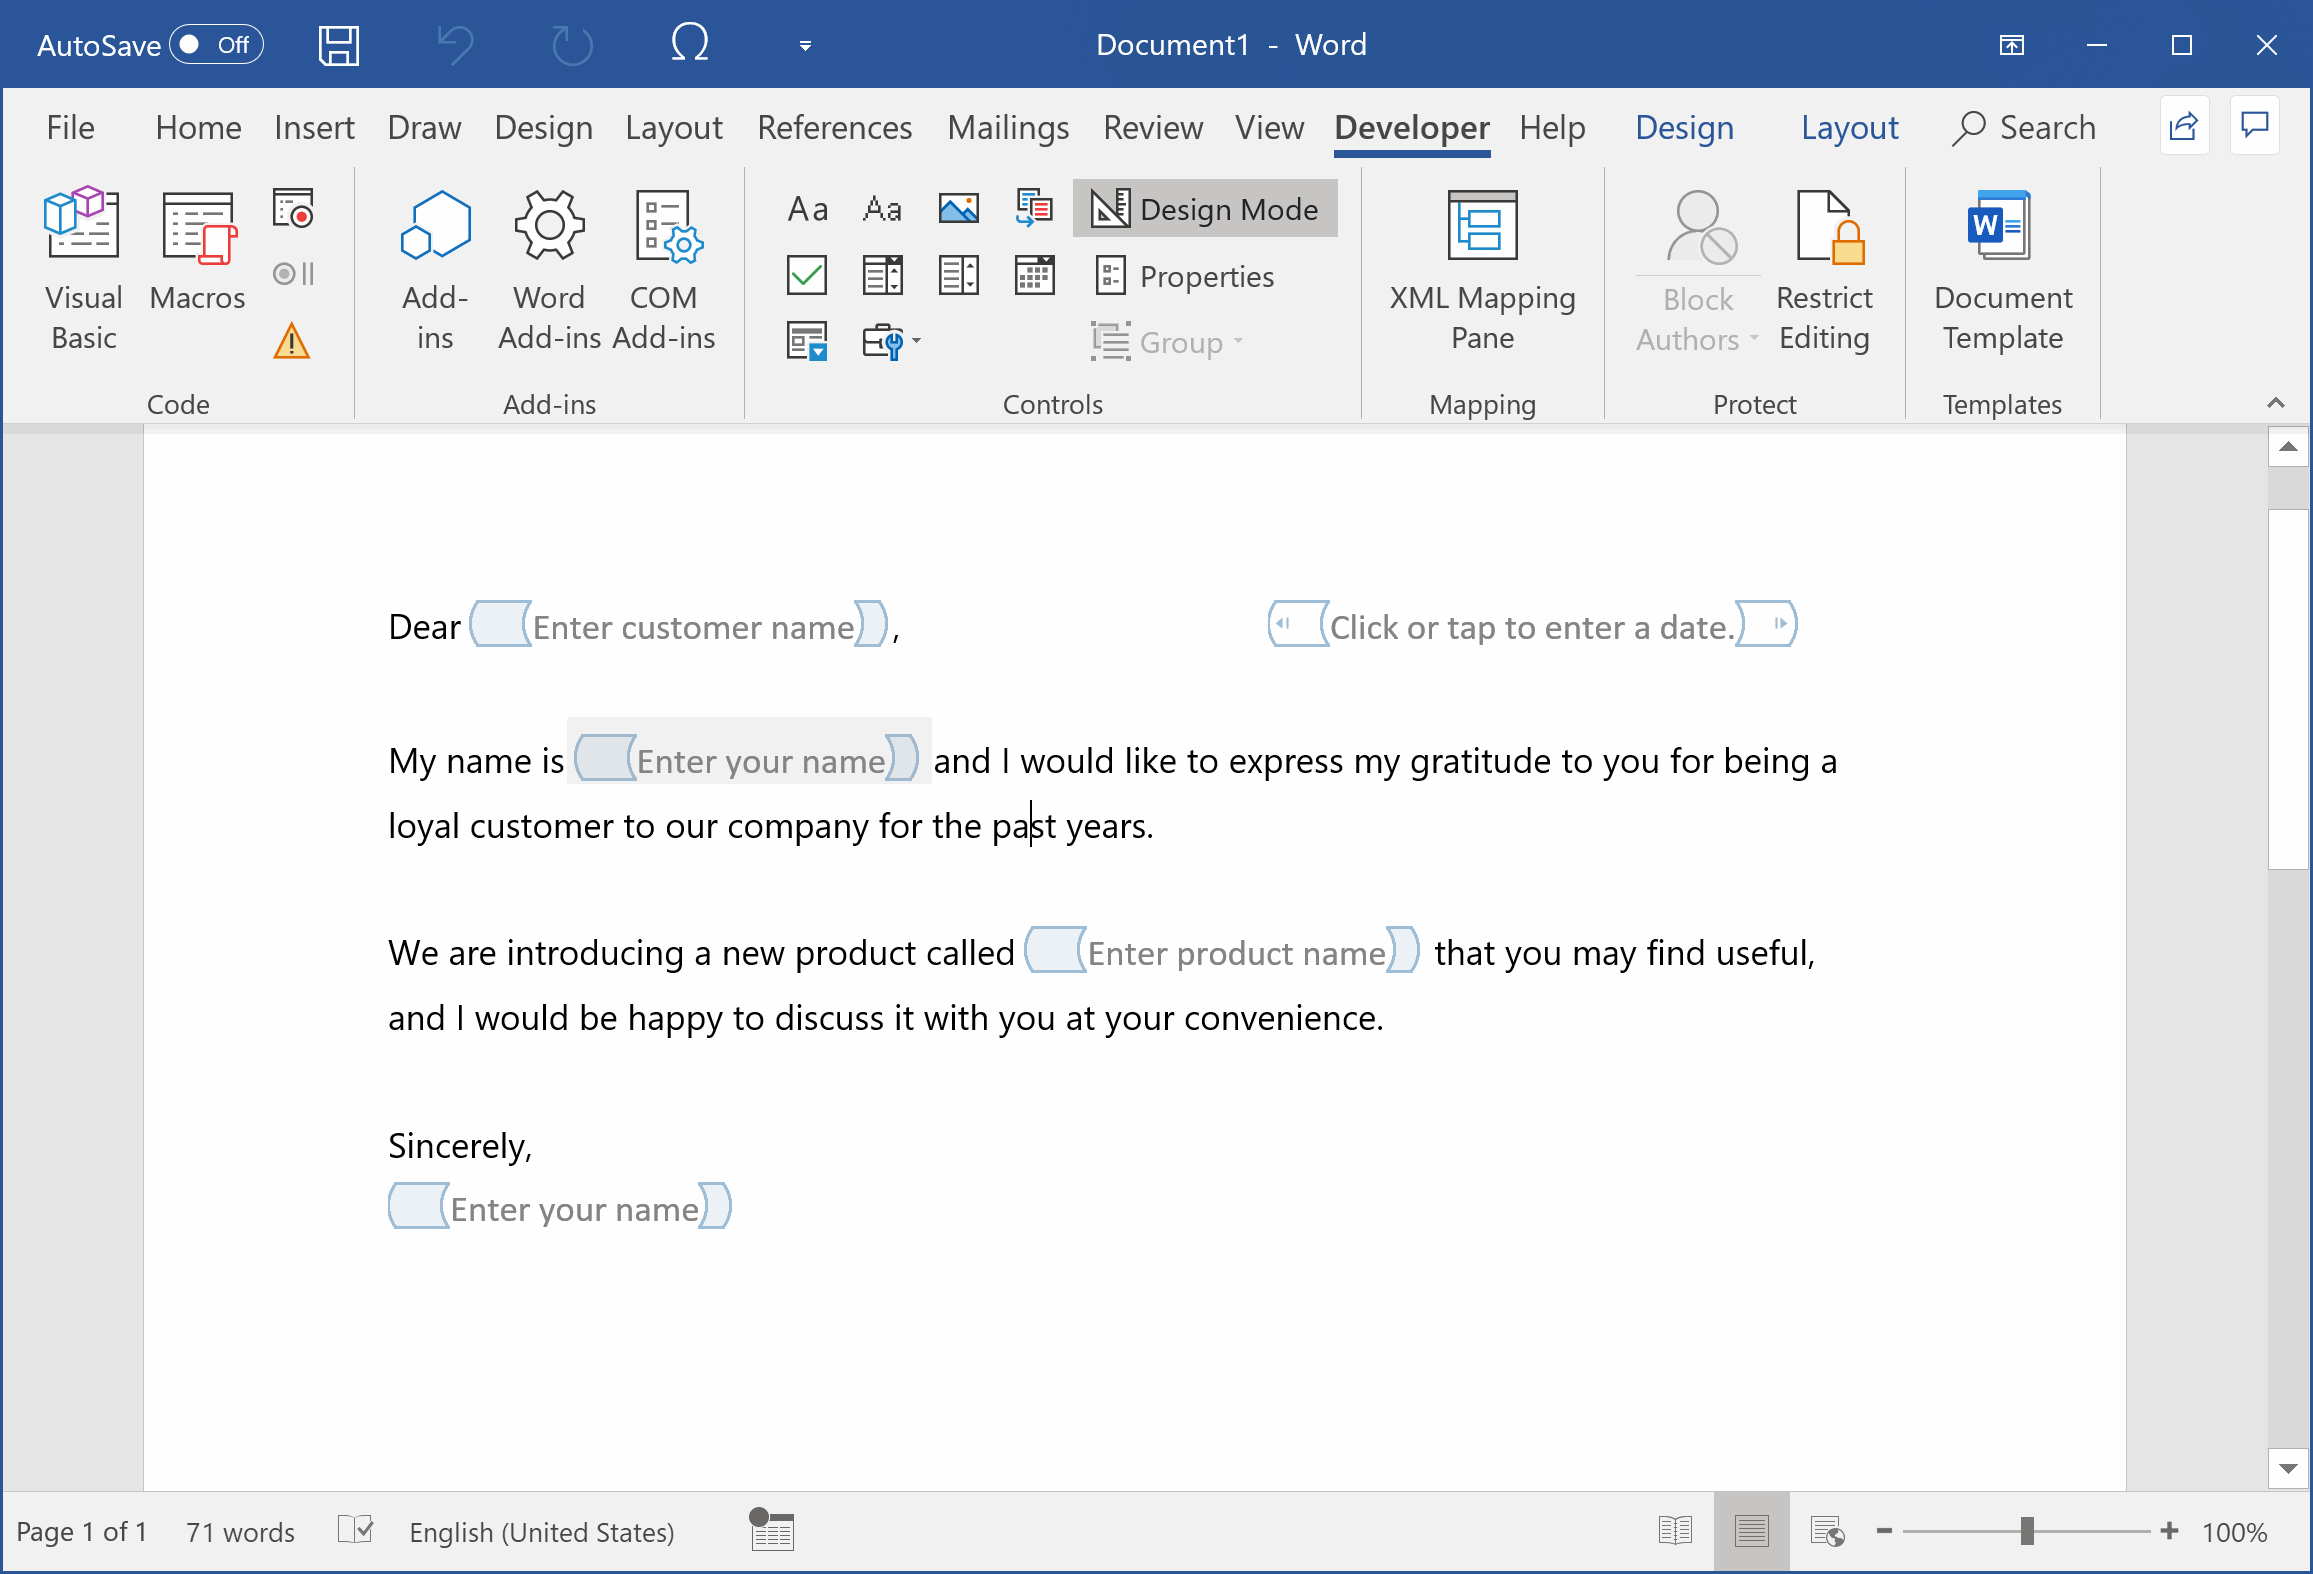
Design Your Form: Once you have the "Developer" tab, you can start designing your form using content controls. These controls serve as placeholders where users can enter text, numbers, dates, or select options from predefined lists.

The "Developer" tab provides a variety of content control icons. Simply click on any icon to add the corresponding control to your document. You can hover your mouse over each icon to view a tooltip explaining its function.
Here are some commonly used content control commands for creating your form:
Rich Text Content Control: Enables users to enter richly formatted text, such as bold, italic, or different fonts.
Plain Text Content Control: Allows users to enter plain text only.
Picture Content Control: Enables the insertion of pictures into your document.
Check Box Content Control: Provides users with a binary choice (e.g., Yes/No or True/False).
Combo Box Content Control: Combines an input text field with a list of options.
Drop-Down List Content Control: Presents users with a list of options from which they can select one.
Date Picker Content Control: Offers a convenient way to select a valid date.
Customize Your Content Controls: If you wish to customize a particular content control, simply click on it and then in the Controls section of Developer toolbar click on Properties.
Protect the document: To avoid accidental alterations to the fillable fields, you have the option to protect the form. This guarantees that users are only able to input information and edit the designated sections. Read about Protect a Word Document From Editing.
Enter Design Mode
To turn on Design Mode, click on the button inside Developer tab. This will enable you to enter placeholder text for your content controls and make them more visually distinct.

Don't forget to turn off Design Mode if you wish to fill out the form and enter actual text.
If you've followed the steps above you should be able to create your fill-out forms in Word. However, if you find the content control method less user-friendly, fret not. We have an alternative solution for you!
Is there an easier way to create a form in Word?
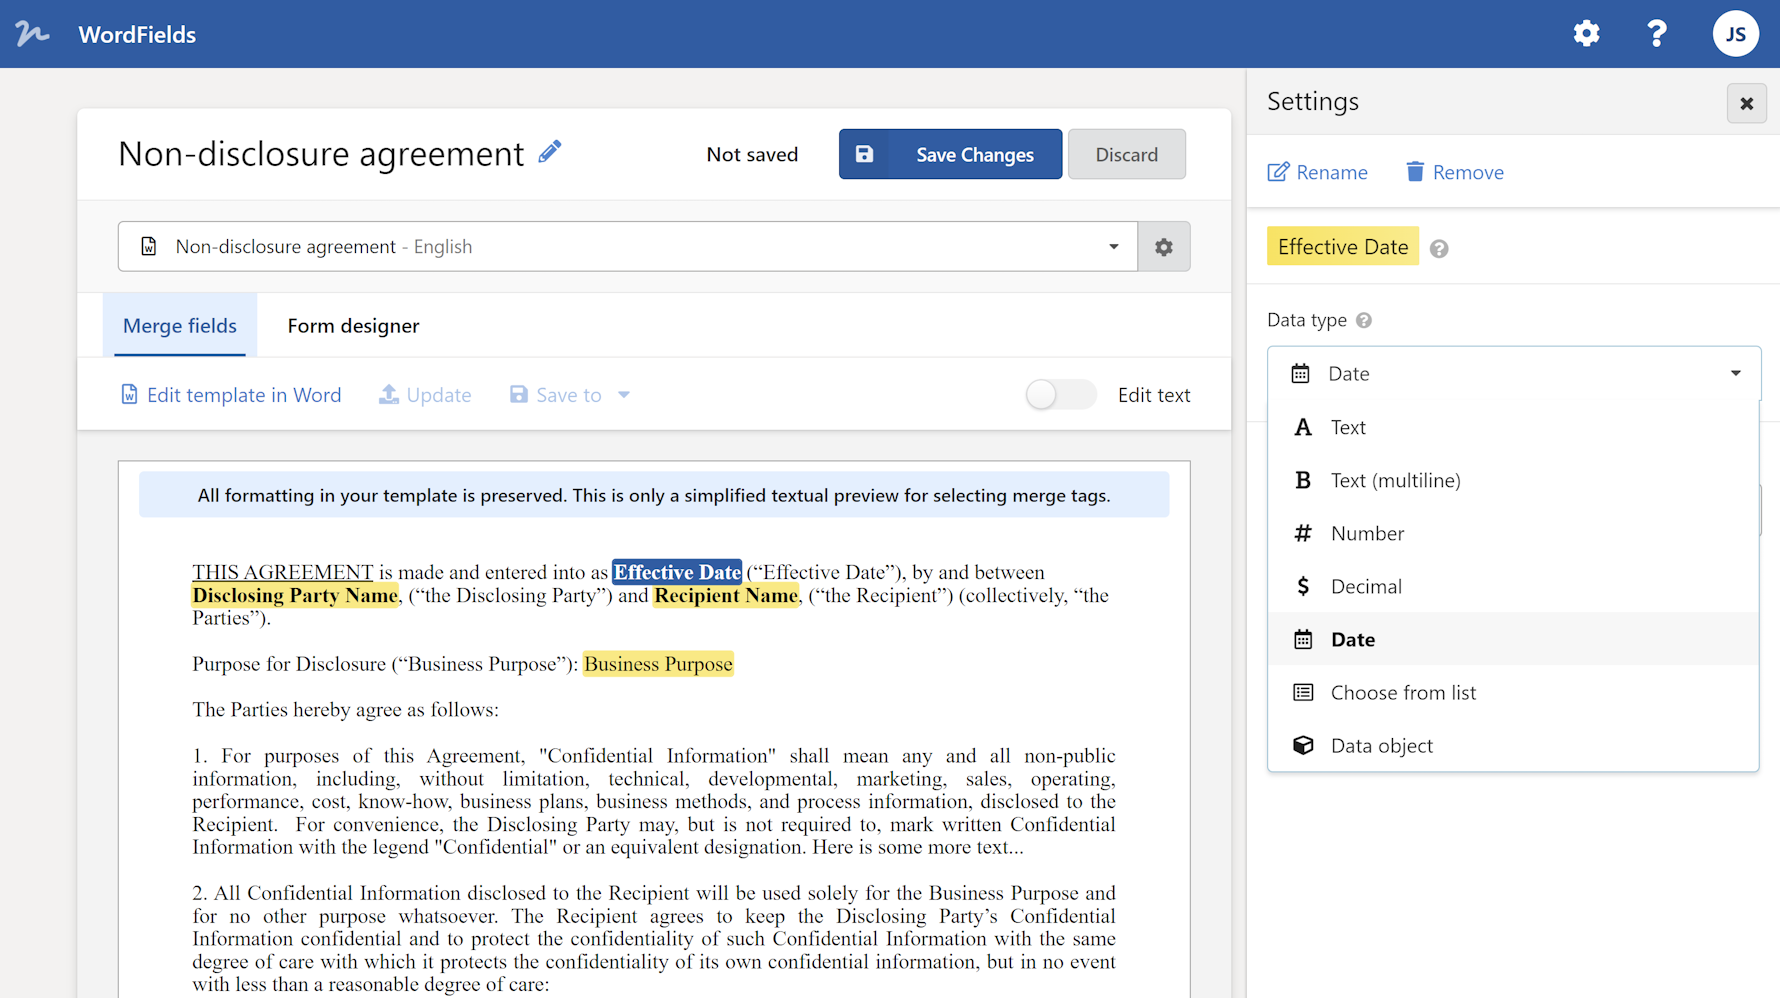
Introducing WordFields, an app designed to simplify the process of creating Word forms while providing additional functionality like easy sharing. With WordFields, you can save ample time and effort, as it eliminates the need to use content controls or navigate advanced Word features. Plus, its intuitive interface ensures that your team can quickly create new documents without any confusion.

Give WordFields a try and experience the convenience of creating fillable forms effortlessly. Sign up for free and try it today!
In conclusion, whether you choose to create a form using the content control method within Word or explore the time-saving capabilities of WordFields, document creation has never been easier. So, bid adieu to manual editing and embrace the power of simplified form design in Word!
 WordFields
