Have you ever received a document that required you to manually fill in information? It can be a tedious and time-consuming task, especially if you need to distribute the document to multiple recipients. The good news is that you can create fillable fields in Microsoft Word to streamline this process and make it easier for both the sender and the recipient. In this article, we will guide you through the process of making fillable fields in Word, ensuring a smoother and more efficient document workflow.
Why Create Fillable Fields in Word?
Before we dive into the step-by-step guide, let’s take a moment to understand the benefits of creating fillable fields in Word.
- Saves Time: By creating fillable fields, you eliminate the need for manual entry. Recipients can simply tab through the form and enter their information effortlessly, saving time for both parties involved.
- Consistency: Fillable fields ensure that the required information is captured accurately and consistently. This reduces the chances of errors and ensures uniformity across multiple recipients.
- Professionalism: Using fillable fields gives your documents a polished and professional look. It shows that you value efficiency and allows you to maintain a consistent brand image.
- Improved Data Collection: When you create fillable fields, you can easily collect and analyze data. This can be particularly useful when you need to extract information from a large number of forms.
- Easy Distribution: Fillable fields allow you to distribute your forms digitally. Instead of printing and mailing physical copies, you can simply email the form to the recipients, reducing paper waste and saving costs.
Now that you understand the advantages of creating fillable fields, let’s proceed with the step-by-step guide.
Step 1: Open Microsoft Word and Create a New Document
To begin, open Microsoft Word on your computer and create a new document. You can start from a blank document or use an existing template, depending on your specific needs.
Step 2: Setup the Developer Tab
The Developer tab contains all the tools you need to create fillable fields in Word. By default, it is not displayed on the ribbon. Here’s how you can enable it:
- Go to the File tab.
- Click on Options.
- In the Word Options dialog box, select Customize Ribbon from the left-hand side menu.
- Under the Customize the Ribbon section on the right side, make sure the box next to Developer is checked.
- Click OK to save the changes.
Once you’ve enabled the Developer tab, you will see it on the ribbon.
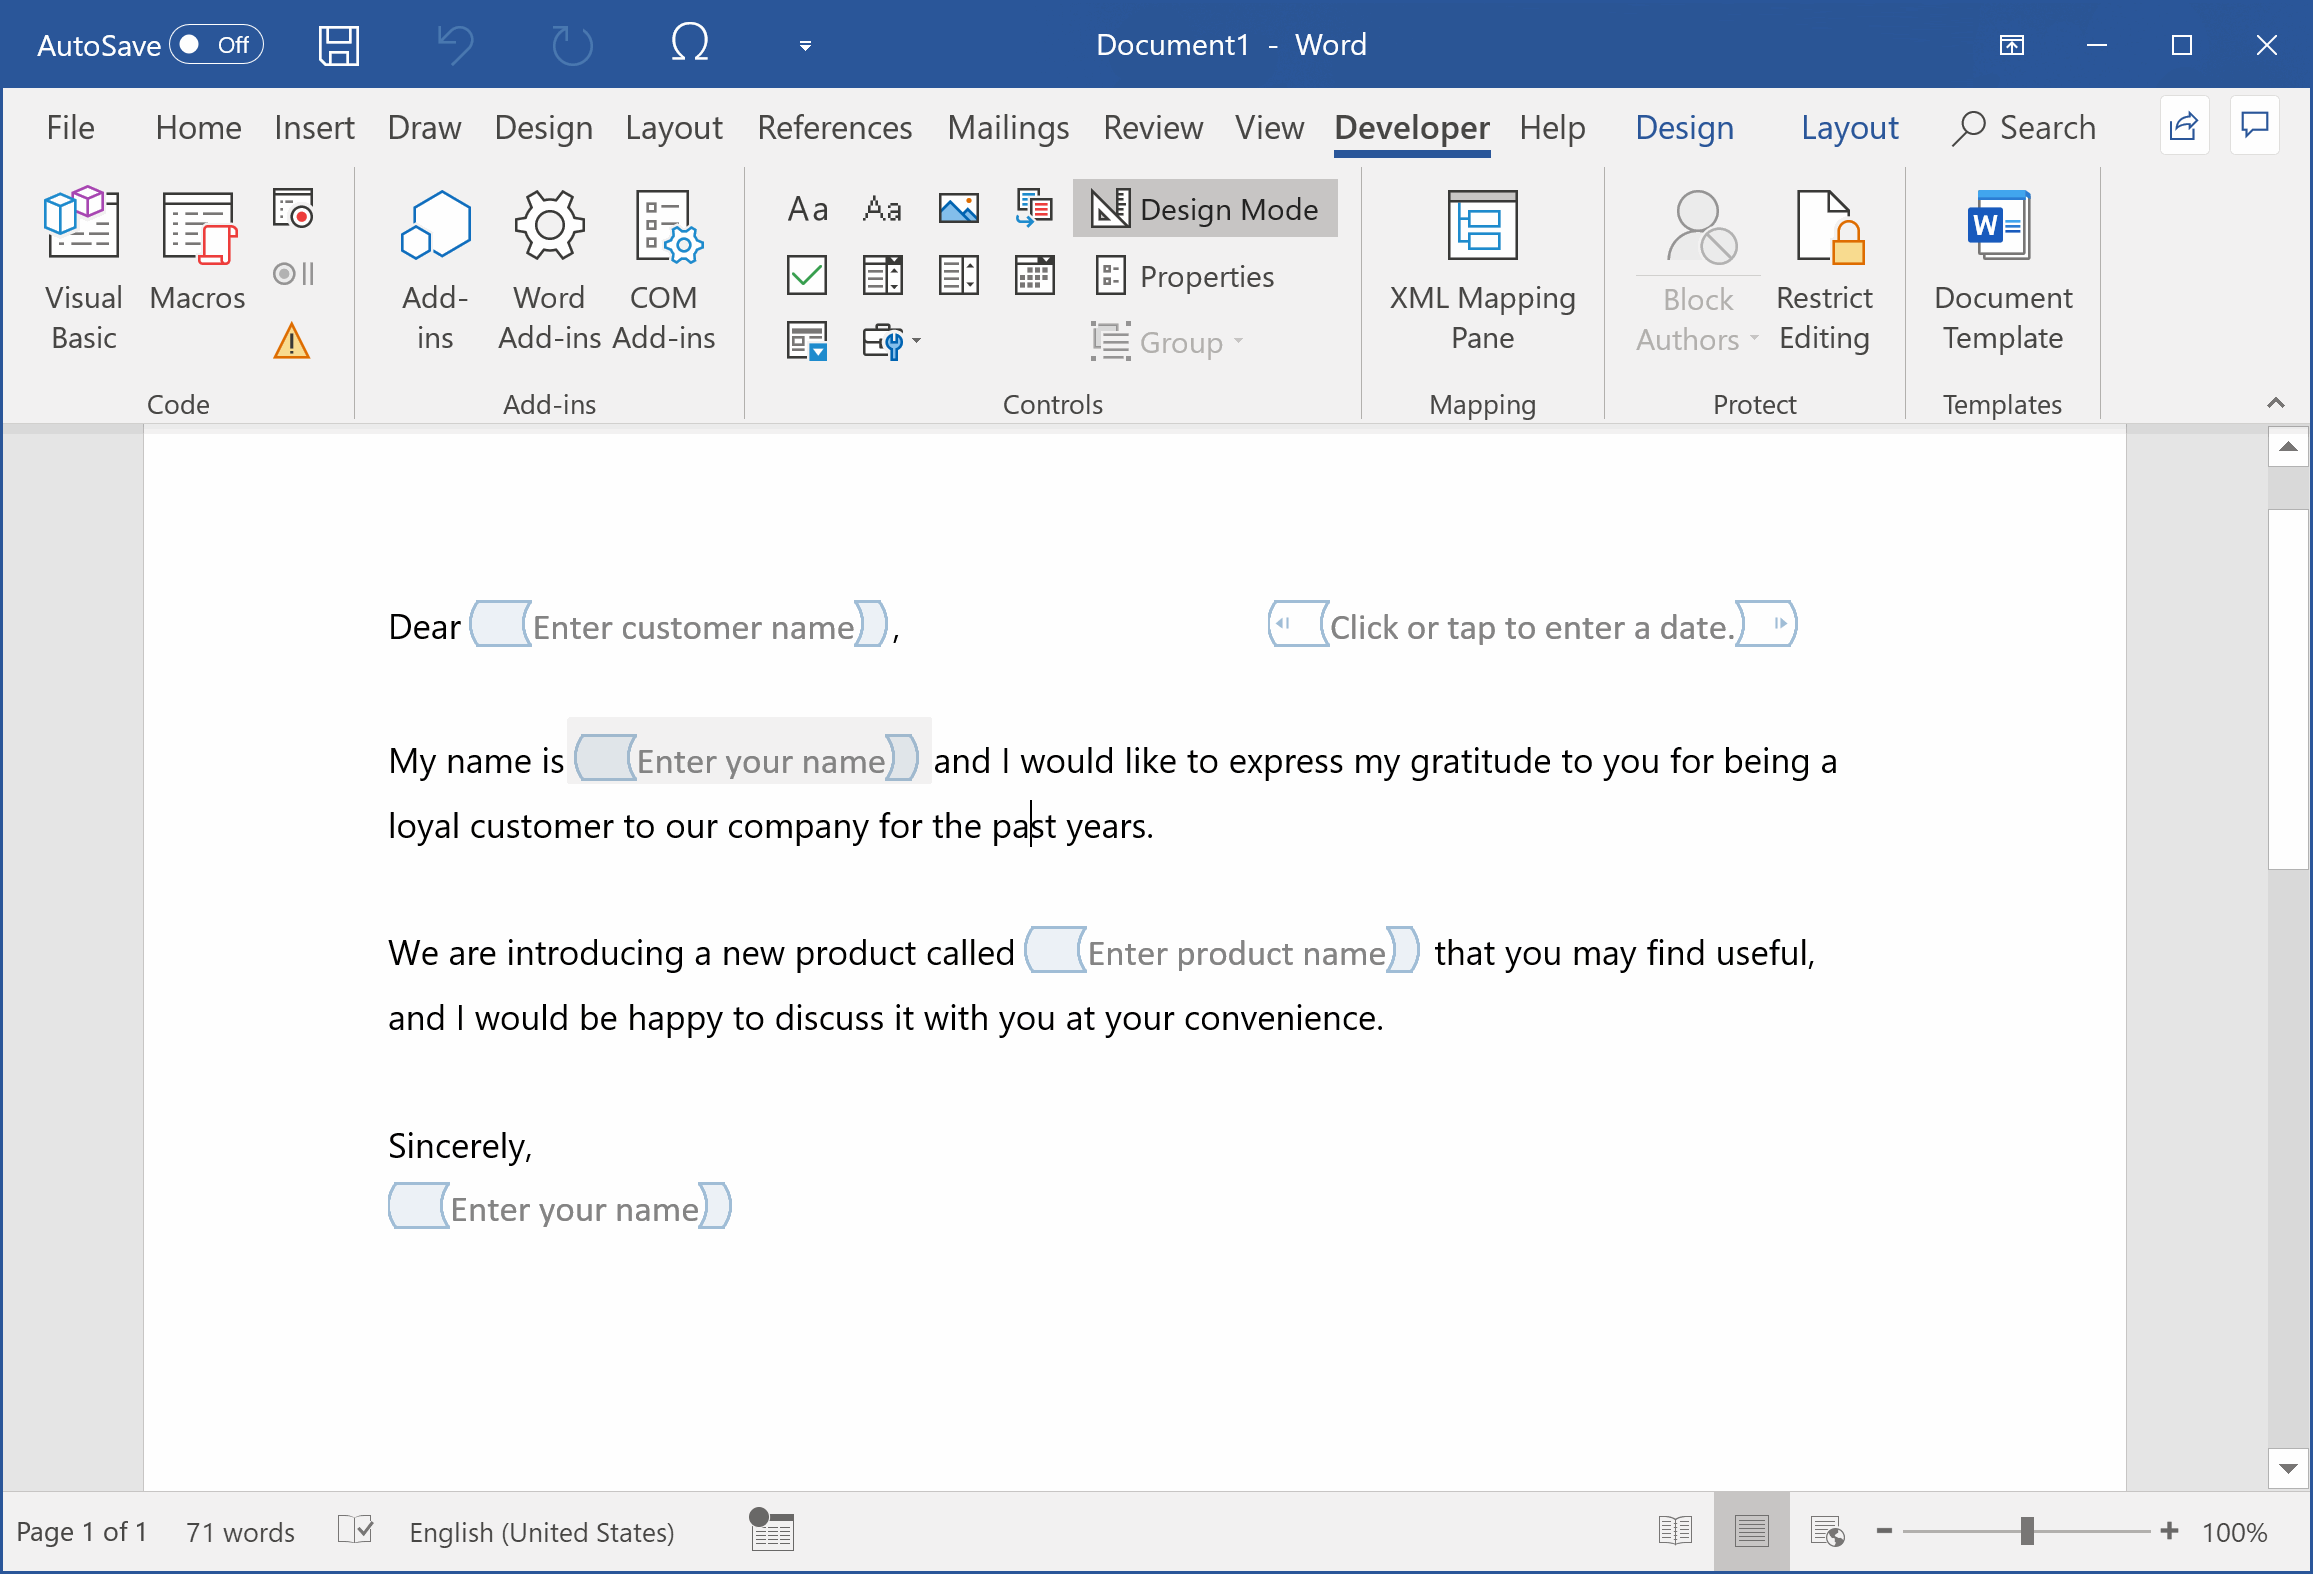
Step 3: Insert Form Controls
Now, let's add fillable fields. You can use different types of controls, such as text boxes, check boxes, or drop-down lists. In this example, we’ll focus on text controls. Here’s how to insert a text control:
- Position your cursor in the document where you would like to add a fillable field.
- Click on the Developer tab.
- In the Controls group, click on either Rich Text Content Control or Plain Text Content Control to add it to the document.
You can add multiple controls to your Word document.
Step 4: Customize the Text Control
Once you’ve inserted a text control, you can customize its properties. Click on one of the inserted controls, then click on the Properties button in the Developer tab in the Controls section. In the properties window, you can specify the title text, tag, color, styling of the control, and other options according to your requirements.
Step 5: Repeat Steps 4 and 5 for Additional Fillable Fields
If your form requires multiple fillable fields, you can repeat steps 4 and 5 for each field. This allows you to create a comprehensive and interactive form that captures all the necessary information.
Step 7: Protect the Form
To prevent accidental modifications to the fillable fields, you can protect the form. This ensures that users can only enter and edit the designated areas. To protect the form, follow these steps:
- Click on the Developer tab.
- In the Protect group, click on the Protect Document button.
- From the drop-down menu, select Restrict Editing.
- In the Restrict Editing pane, check the box next to Allow only this type of editing in the document.
- From the drop-down menu, select Filling in forms.
- Click Yes, Start Enforcing Protection.
- Set a password if required and click OK.
- Do not forget the password you’ve entered!
Step 8: Test the Fillable Fields
Before finalizing your form, it’s important to test the fillable fields to ensure they work as intended. Save the document and open it in the view mode. Try entering information into the fields and verify that everything functions correctly.
Conclusion
Creating fillable fields in Microsoft Word can greatly enhance your document workflow, saving time and improving data collection. By following the step-by-step guide outlined in this article, you can easily create professional-looking forms that streamline the information-gathering process. So next time you need to distribute a document that requires manual input, remember to utilize fillable fields in Word for a seamless experience.
