Microsoft Word is a powerful tool that allows users to create and edit documents with ease. However, there may be times when you want to restrict editing in Word documents. This could be to protect sensitive information, prevent accidental changes, or ensure document integrity. In this article, we will explore how to turn off editing in Word. Whether you're using the latest version of Word or an older one, these steps will guide you through the process.
To begin, open the Word document that you want to disable editing on. Let's dive into the various methods you can employ to turn off editing in Word.
Method 1: Using the Mark as Final feature in Word
- Open the Word document that you want to mark as final.
- Click on the "File" tab at the top-left corner of the Word window.
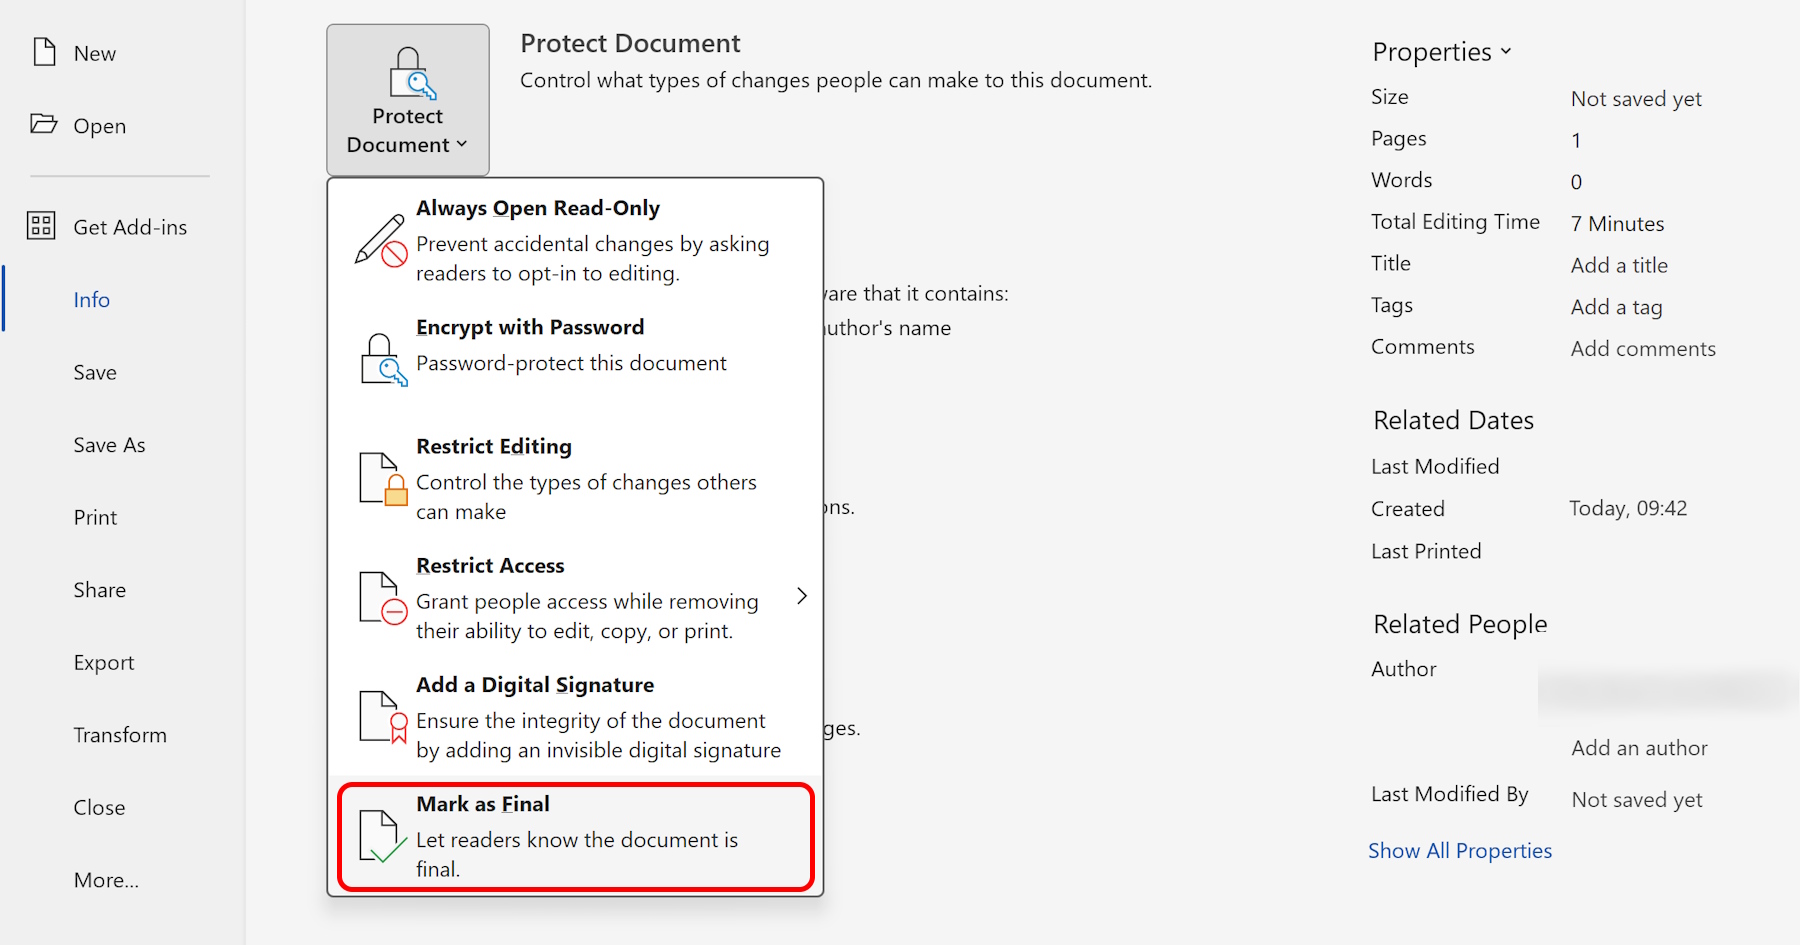
- In the backstage view, select "Info" from the left-hand menu.
- Under the "Protect Document" section, click on the "Mark as Final" option.
- A confirmation prompt will appear, informing you that the document will be marked as final and saved. Click on the "OK" button to proceed.
- Word will add a notification bar at the top of the document, indicating that it is now read-only.
Method 2: Using the Restrict Editing feature
- Click on the "Review" tab in the ribbon menu at the top of the Word window.
- Look for the "Protect" group, and click on the "Restrict Editing" button.
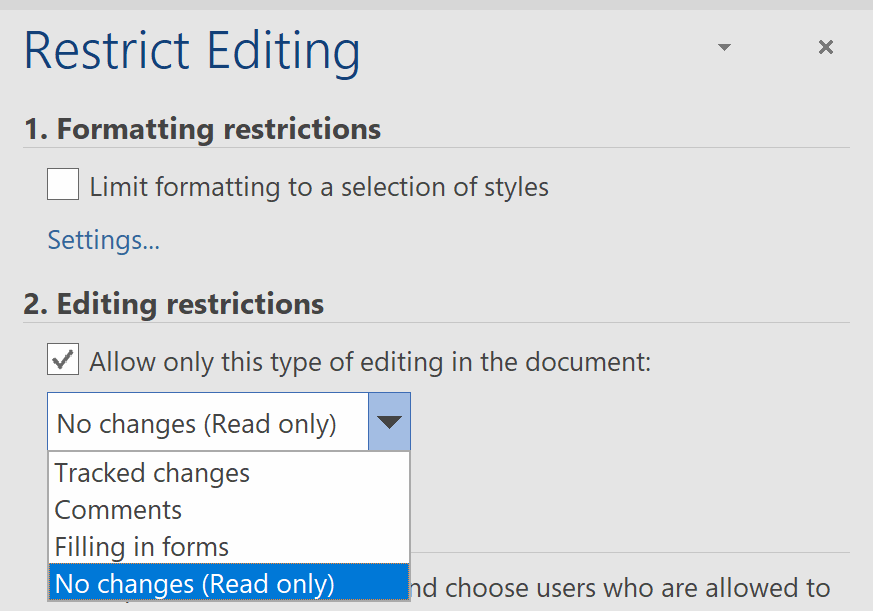
- A sidebar will appear on the right-hand side of the document. Check the box that says "Allow only this type of editing in the document."
- From the drop-down menu, select "No changes (Read only)."
- If you want to apply additional restrictions such as formatting or commenting, click on the "Yes, Start Enforcing Protection" button.
- A dialog box will appear prompting you to enter a password. Choose a password and confirm it.
- Click on the "OK" button to protect the document. Now, the document is locked, and users can only view its contents.
Method 3: Converting the Word document to PDF format
- If you want to prevent editing and maintain the visual integrity of the document, converting it to PDF can be an effective solution.
- Open the Word document that you want to convert.
- Click on the "File" tab at the top-left corner of the Word window.
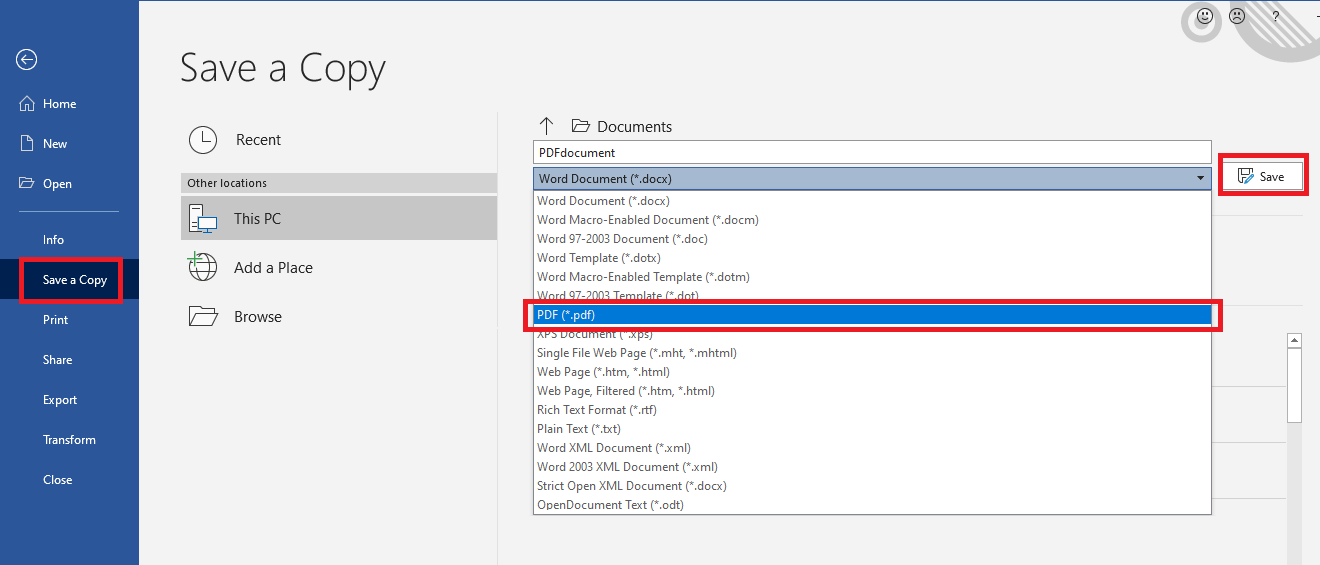
- In the backstage view, select "Save As" from the left-hand menu.
- Choose the destination folder where you want to save the PDF file.
- In the "Save as type" dropdown, select "PDF (*.pdf)."
- Click on the "Save" button, and Word will convert the document to PDF format.
- The resulting PDF file will be read-only by default, preventing any changes.
In conclusion, there are multiple ways to turn off editing in Microsoft Word, depending on your specific requirements. Whether you choose to use the Restrict Editing feature, mark the document as final, or convert it to PDF, these methods effectively restrict editing capabilities. Remember to save a backup copy of the original document and ensure that you have the necessary permissions to apply these restrictions. By employing these techniques, you can maintain document integrity and prevent any unauthorized modifications.
