Templates in WordFields are built from your existing documents — upload a Word, Excel, or text file and turn it into a reusable template with fillable fields so your team can generate consistent documents in seconds.
Note
You can turn any existing document into a template — contracts, invoices, service agreements, meeting minutes, proposals, HR letters, and more. You'll need an Admin or Manager role in your workspace and a .docx, .xlsx, or plain text file ready to upload.
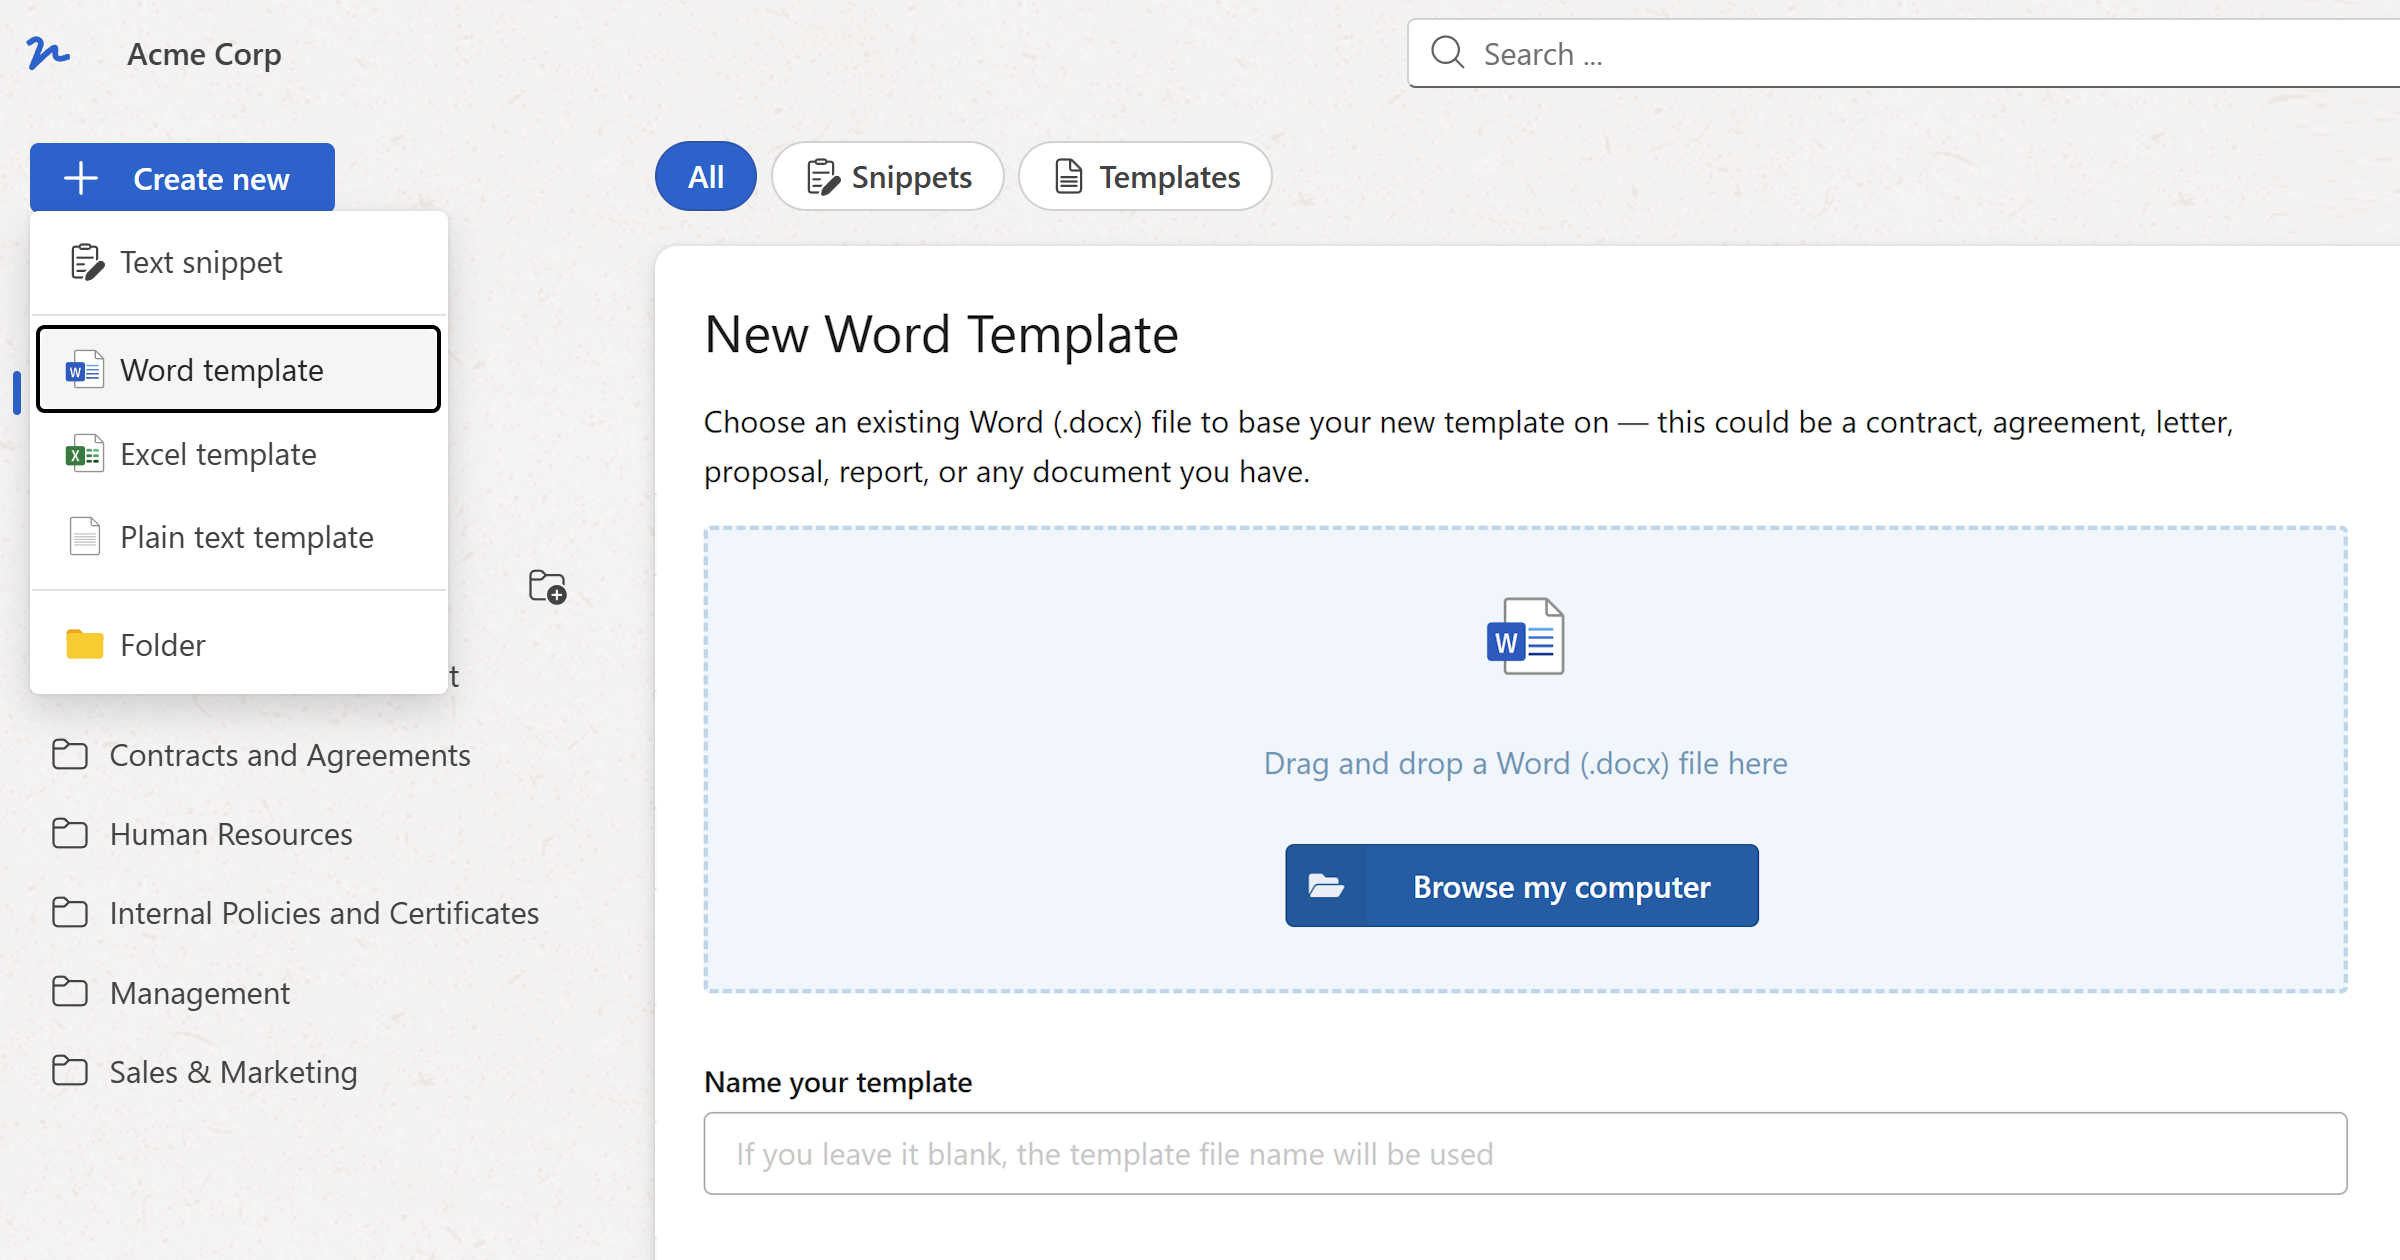
Step 1: Start a new template
- In the left sidebar, click
+ Create new. - From the menu, select the template type that matches your file:
Word template— for.docxfilesExcel template— for.xlsxfilesPlain text template— for.txt,.json, or.mdMarkdown files
Tip
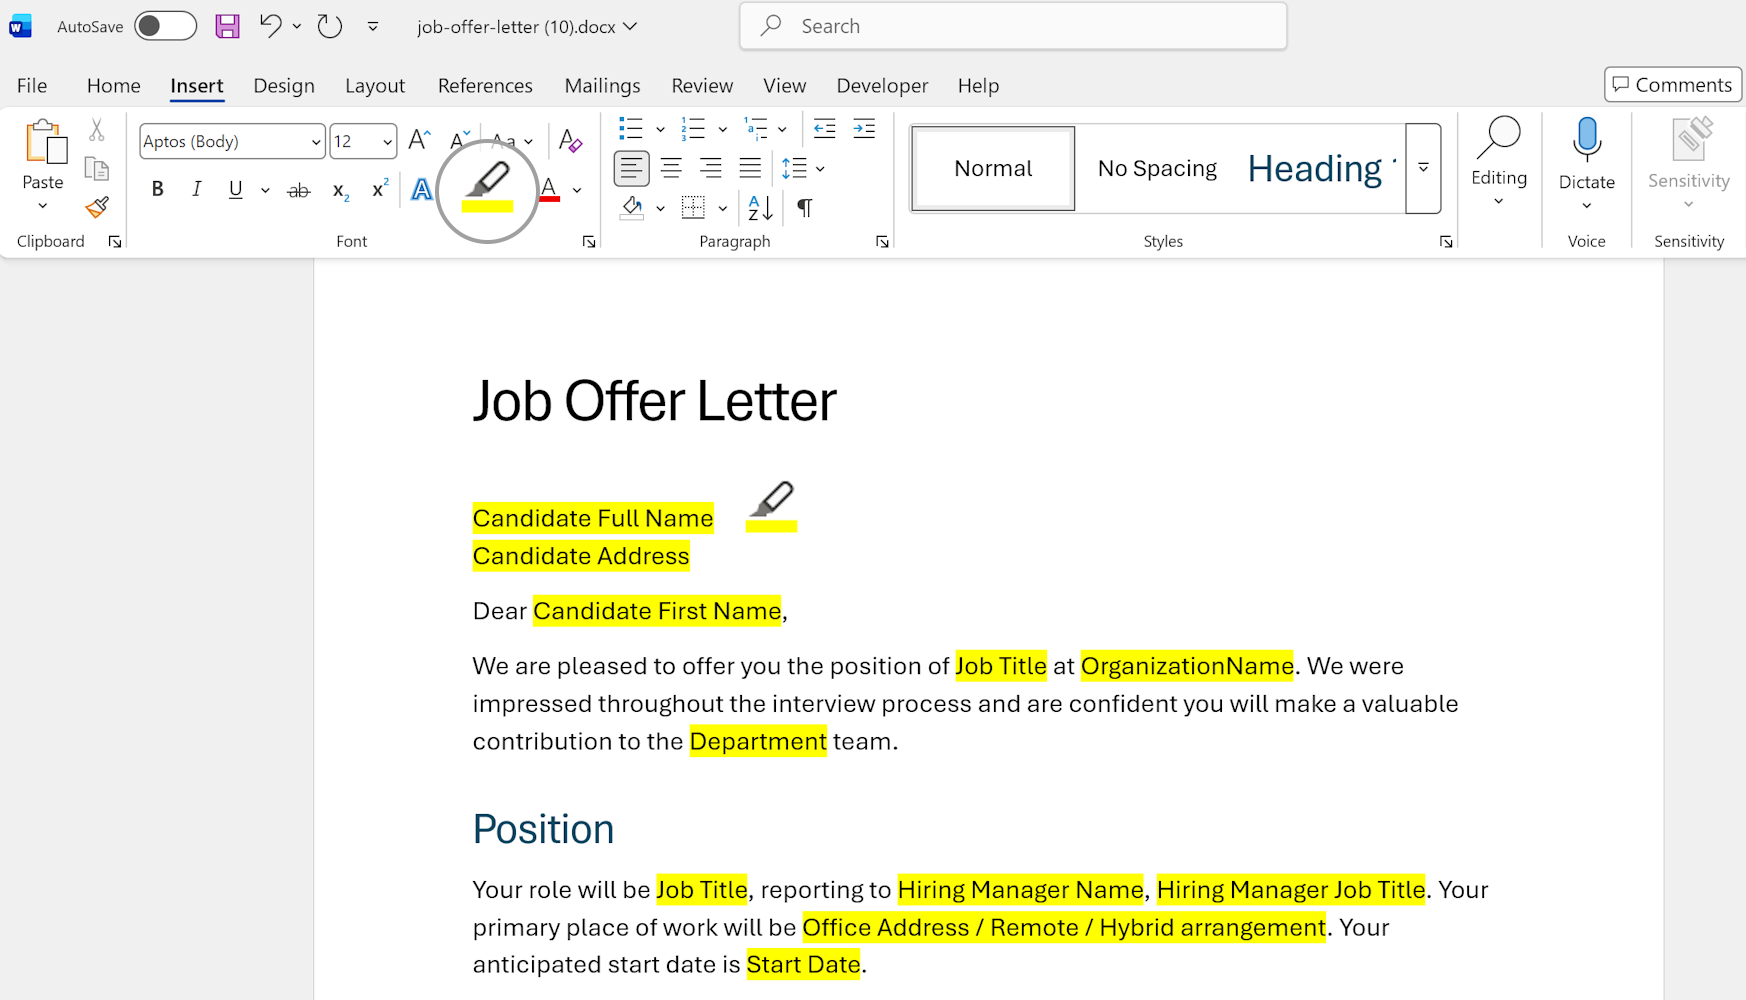
Before uploading, open your document in Word and highlight the parts that change in yellow — a client name, a date, a contract clause. WordFields detects highlighted text automatically and converts it to fillable fields in one step, saving you the manual selection work in the editor.
Step 2: Upload your document
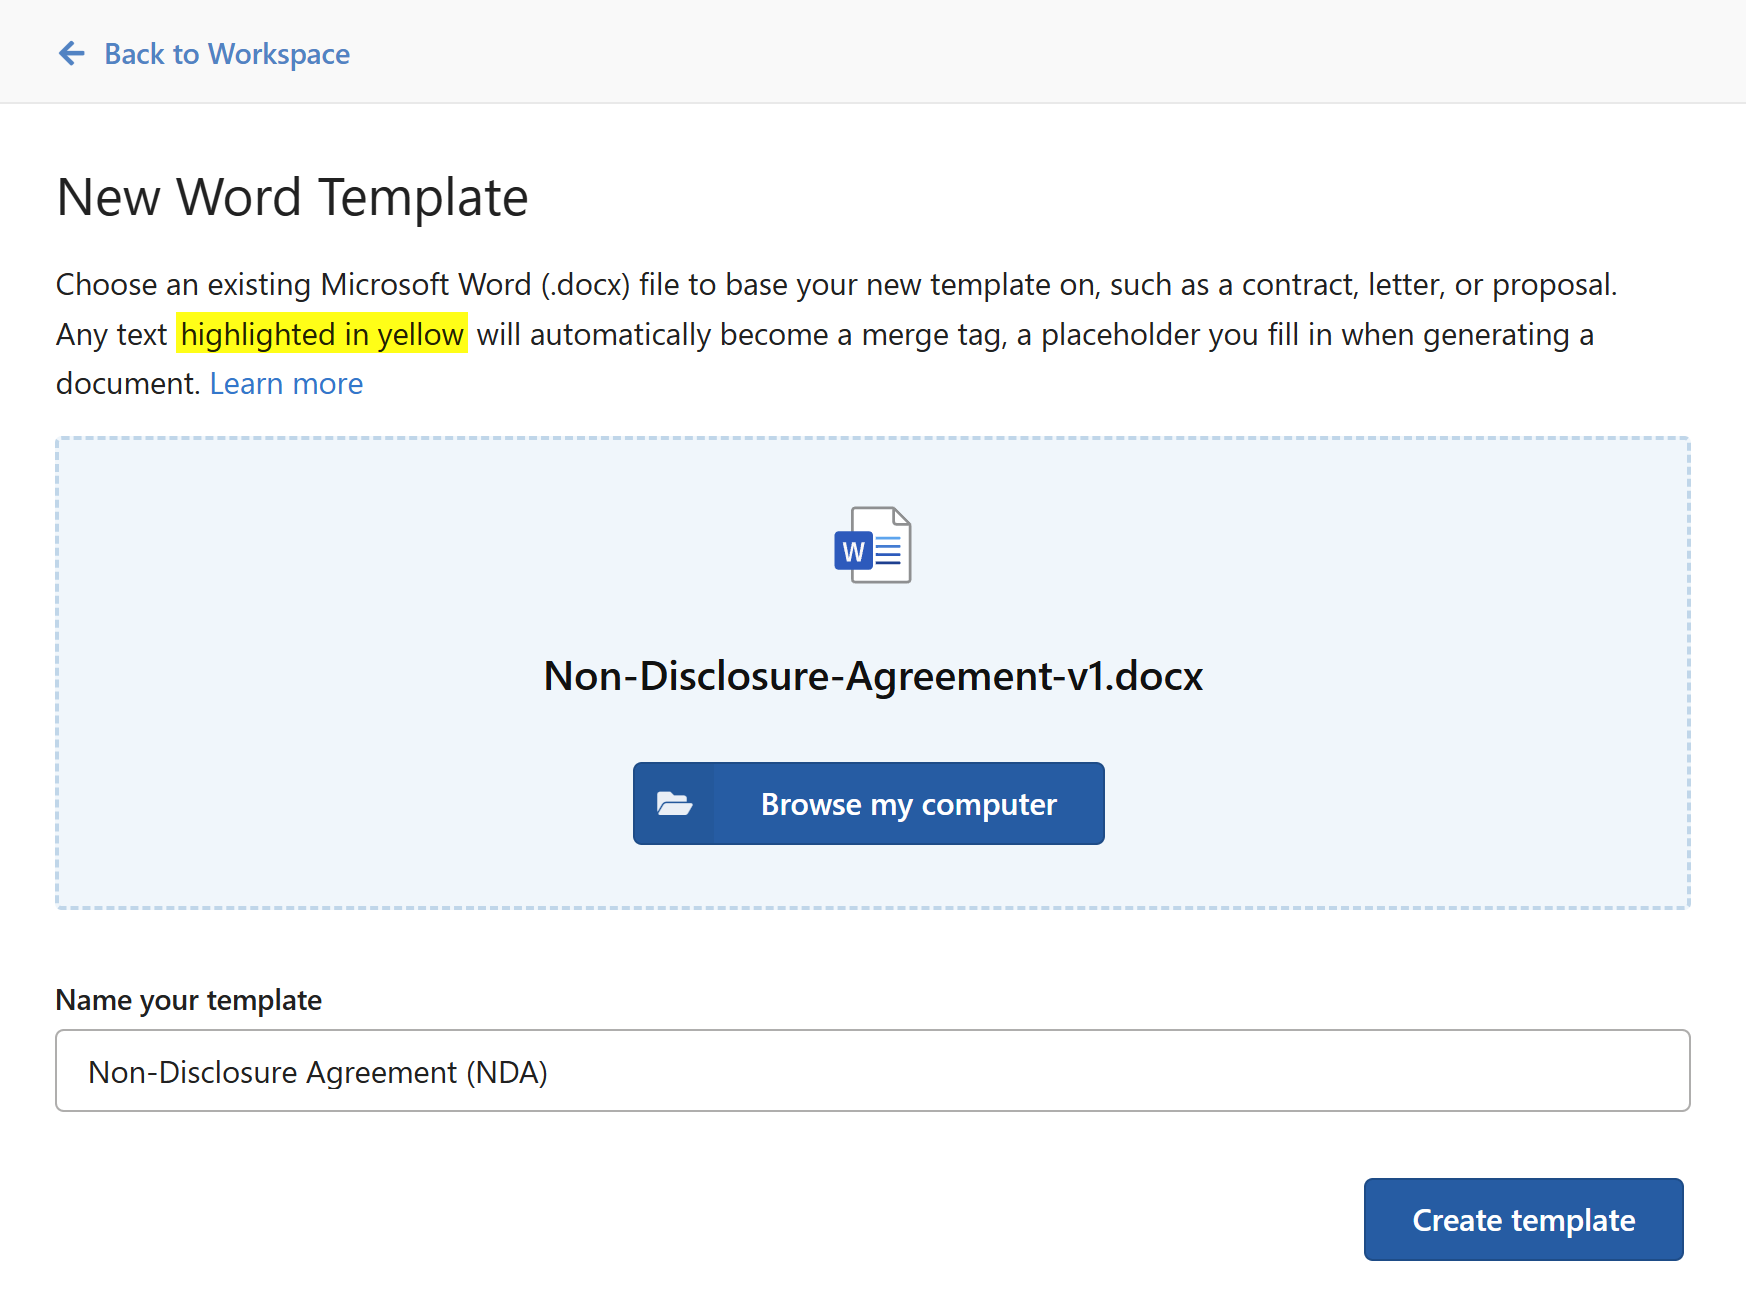
The New Template screen opens with a large upload area in the center.
- Drag and drop your file into the upload area, or click
Browse my computerto locate it manually. - In the
Name your templatefield below the upload area, type a name for this template. If you leave it blank, the filename will be used.
Note
Choose a name your team will recognize at a glance — something like "Client service agreement" or "Monthly expense report" works better than a filename like "doc_v3_final."
- Click
Create template.
The button stays greyed out until a file is uploaded, so if it's not clickable yet, check that the upload completed successfully.
Step 3: Add fillable fields in the template editor
Once the template is created, you'll land in the template editor. This is where you define which parts of the document should be filled in each time someone creates a new document.
The editor has two panels:
- Center panel — a simplified preview of your document
- Right sidebar — tools for inserting fields and placeholders
To mark something as a fillable field:
- Click and drag to select any text in the document preview — a word, phrase, or value you want users to fill in (for example, "John Smith" where a client name should go).
- In the right sidebar, click
Fill-in Fieldunder the Insert section.
The selected text is replaced with a placeholder. WordFields will use the text you selected as the default field name.
Note
You can also type a field directly into the document. Place your cursor where you want the field, then type ${FieldName} — for example, ${ClientName}. WordFields will recognize it as a merge field automatically.
Repeat steps 6–7 for each part of the document that should be dynamic.
- When you're done, click
Save changesin the top-right corner to save your work. To discard unsaved edits, clickDiscard.
Step 4: Preview how the template will look to users
At the top of the editor, there's a status dropdown showing the current view mode. It's set to Editing by default.
- Click the status dropdown and select
Creatingto switch to the document creation view.
This shows you exactly what your team members will see when they go to create a new document — a form on the left with all the fillable fields, and a live preview on the right.
- To return to editing the template, switch the dropdown back to
Editing.
Tip
It's worth doing a quick test run in Creating mode before sharing the template with your team. Fill in the form fields and check that the preview looks right.
Once saved, your template will appear in the workspace and inside whichever folder you've placed it in. Team members with access can click it to open the document creation form and generate a new file straight away.