When you sign up for WordFields, the first thing you'll do is create a workspace. This takes less than a minute — you just need a name for it and you're in.
Note
If a colleague has already set up a workspace and invited you by email, you don't need to create one. Follow the link in the invitation email instead and you'll be taken straight to their workspace.
Creating a workspace
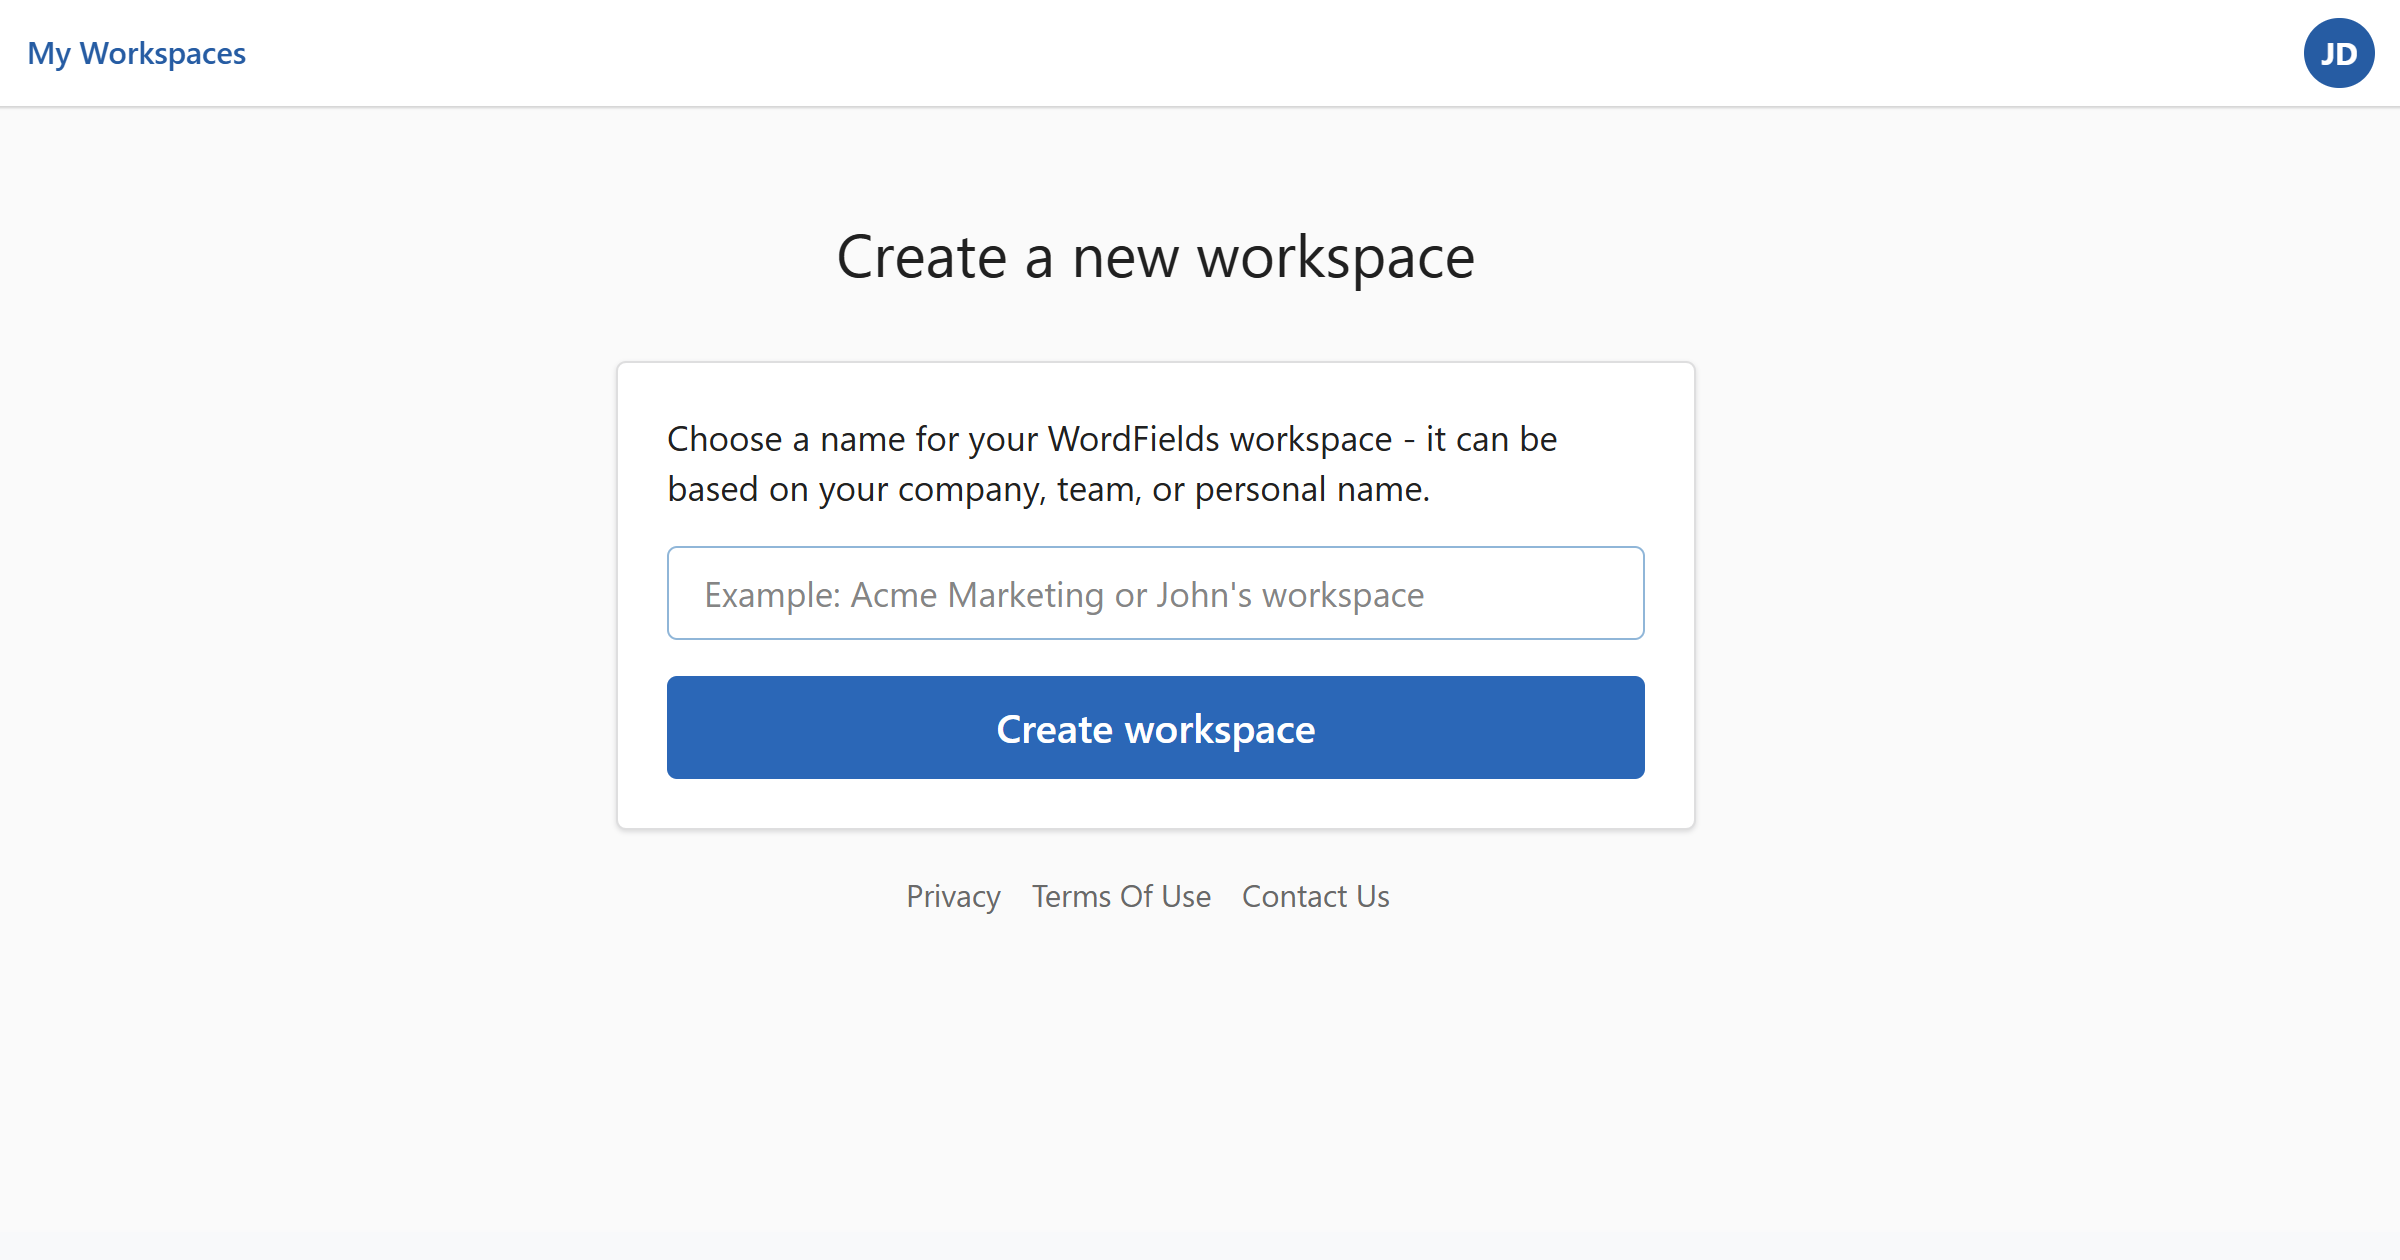
- After signing up, a dialog appears prompting you to set up your workspace.
- Enter a workspace name — this is typically your company name, team name, or your own name if you're using WordFields individually.
- Click
Create workspace.
Your workspace is created and you're taken there immediately. You're automatically assigned the Admin role, which gives you full control over settings, content, and who gets access.
Tip
If you're setting up WordFields for professional use, sign up with your company email address. This makes it easier to manage your workspace and invite teammates later.
Joining a workspace
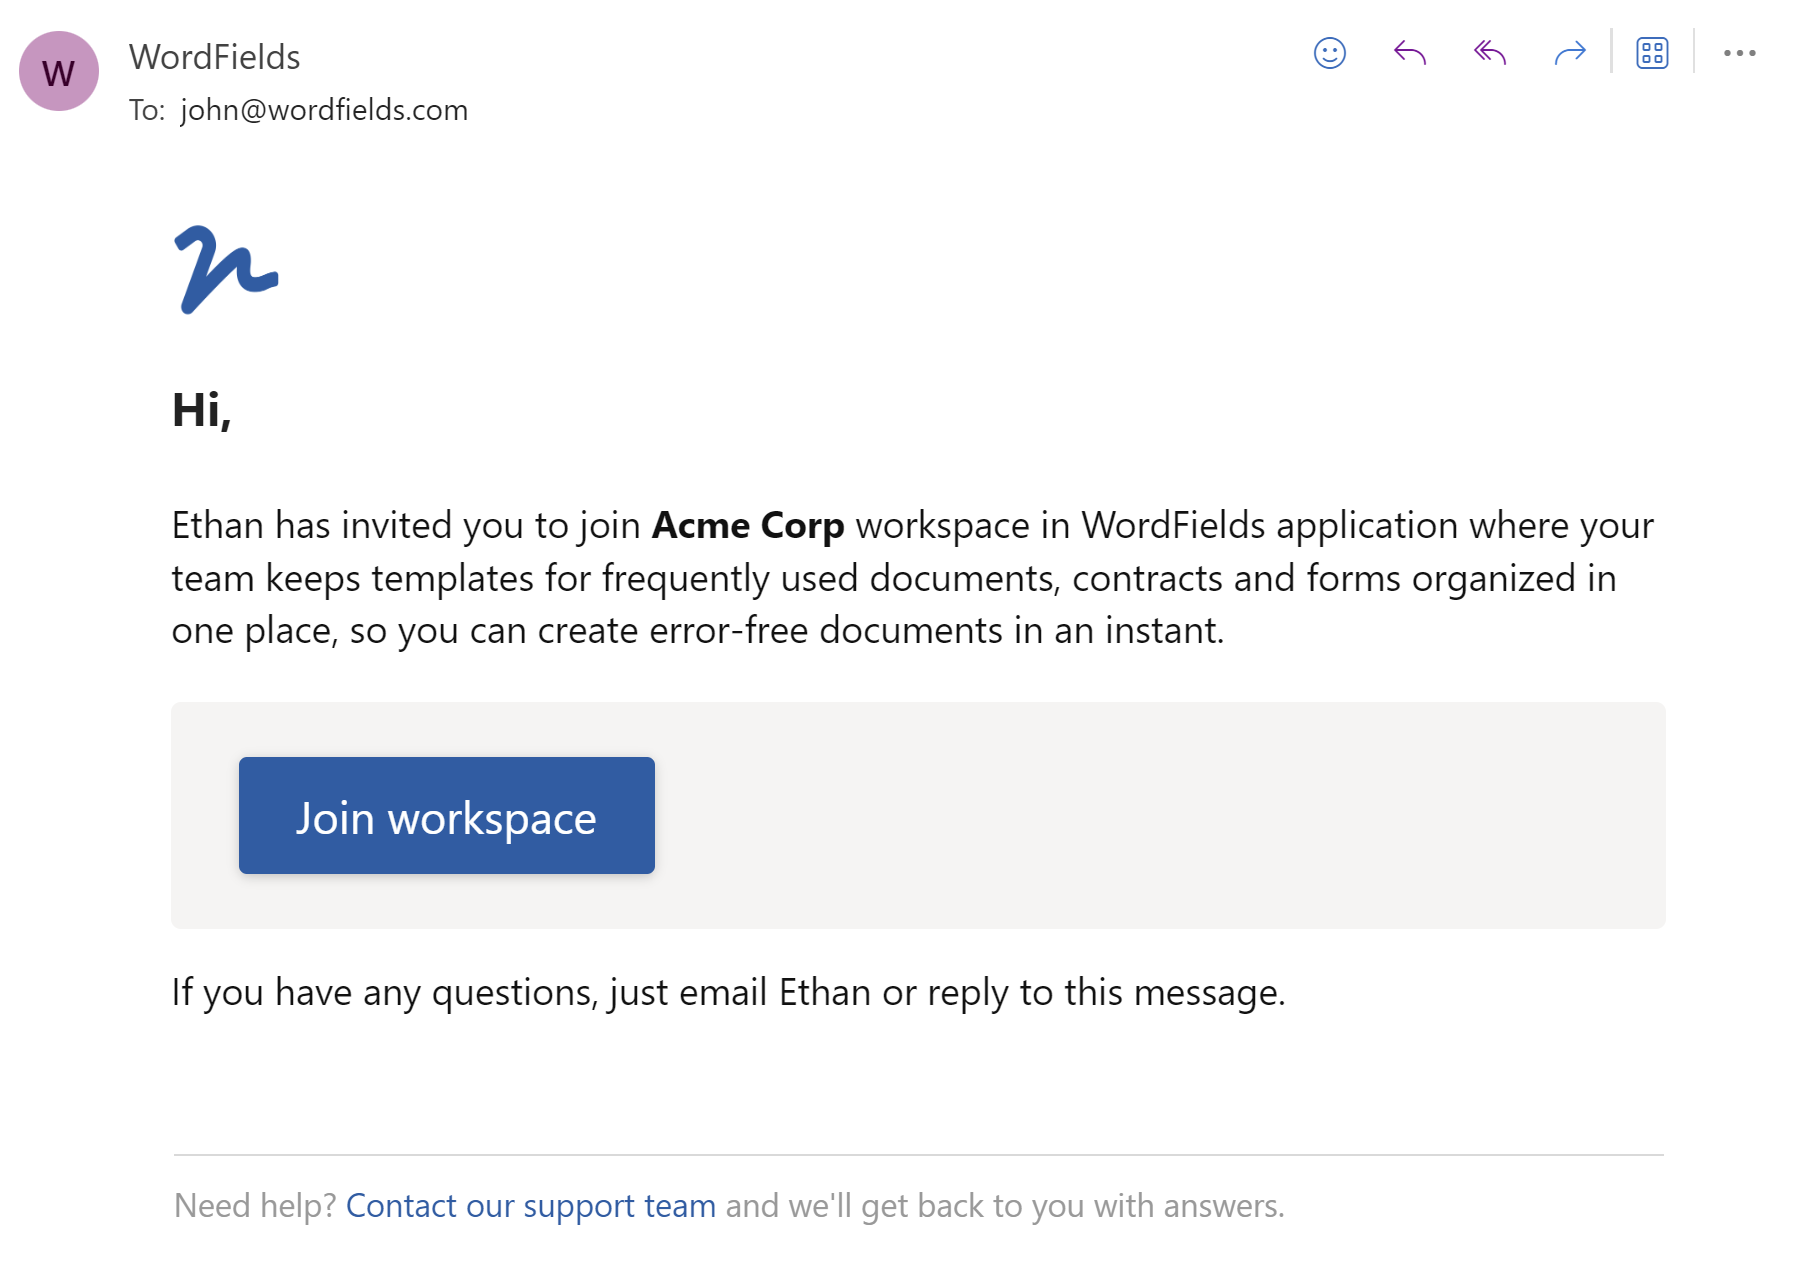
There are two ways to get into a workspace — you either create one when you sign up, or a colleague with Admin access invites you by email. Either way, what you can see and do inside the workspace depends on the role you've been assigned.
Note
Your access in a workspace depends on your role. Members can only see content in folders they've been given access to. Managers can also edit snippets and templates in those folders. Admins have full visibility and can manage everything across the workspace.