Learn how to add fillable fields to your snippets so your team can personalize them with names, dates, numbers, and dropdown selections each time they're used.
Fillable fields
Fields turn a static snippet into something interactive. Instead of every team member manually editing a snippet before they send it, fields mark the exact spots that need to change — a recipient's name, a price, a deadline — and prompt the user to fill them in at the moment of use.
To get started open an existing snippet for editing, or create a new one via + Create new → Text snippet.
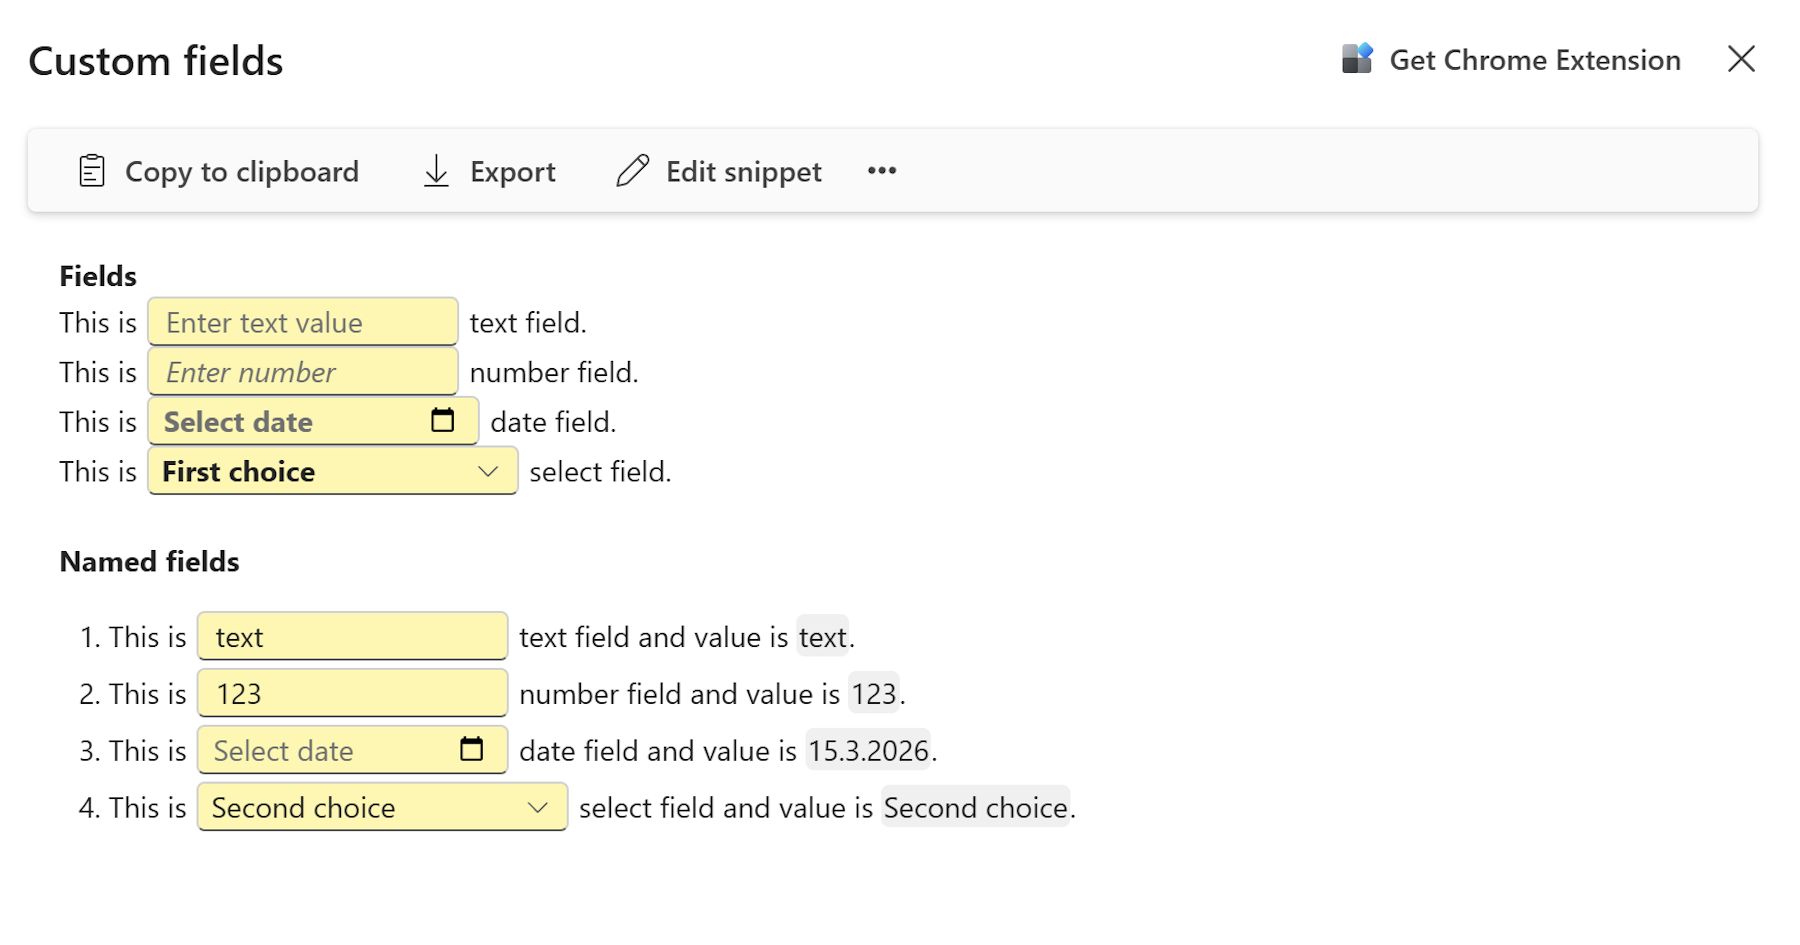
Text field
Use a text field for any open-ended value — a person's name, a company, a subject line, a short custom message.
To insert a text field:
- Place your cursor in the snippet body where the field should appear.
- Click the Insert text field button in the toolbar, or press
Ctrl+M. - A text field appears inline. Type a default value directly into it, or leave it empty.
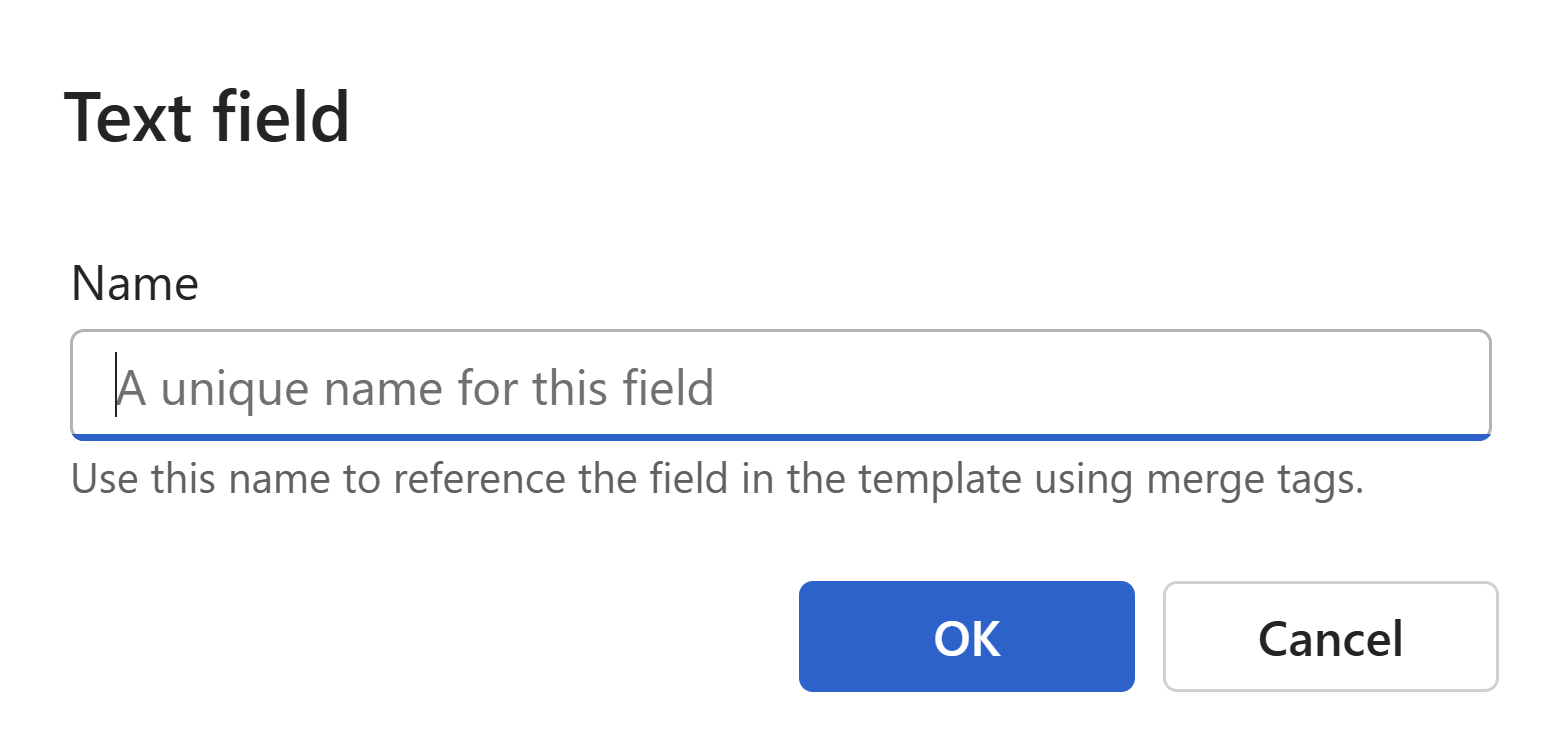
- Click the
...button next to the field to open the Text field dialog. - Enter a Name if you want to reference this field's value elsewhere in the snippet using a merge tag.
- Click to confirm and close the dialog.
Tip
Default values are shown to the user when they open the snippet. Use them as hints — for example, Enter customer name — to reduce guesswork.
Number field

Use a number field when the value needs to be numeric — a price, a quantity, a discount percentage. You can control exactly how the number is displayed.
To insert a number field:
- Place your cursor where the number should appear.
- Click the Insert number field button in the toolbar.
- A number field appears inline. Type a default number directly into it if needed.
- Click the
...button to open the Number field dialog. - Use the Display number as dropdown to choose a format — for example, no decimals (
1235) or two decimal places (1234.57). - Optionally enter a Name to reference this field via merge tag.
- Click to confirm and close the dialog.
Date field
Use a date field when the user needs to select a specific date — a contract date, a follow-up deadline, a start date. The field always defaults to today's date when the snippet is opened.
To insert a date field:
- Place your cursor where the date should appear.
- Click the Insert date field button in the toolbar.
- A date field appears inline showing today's date.
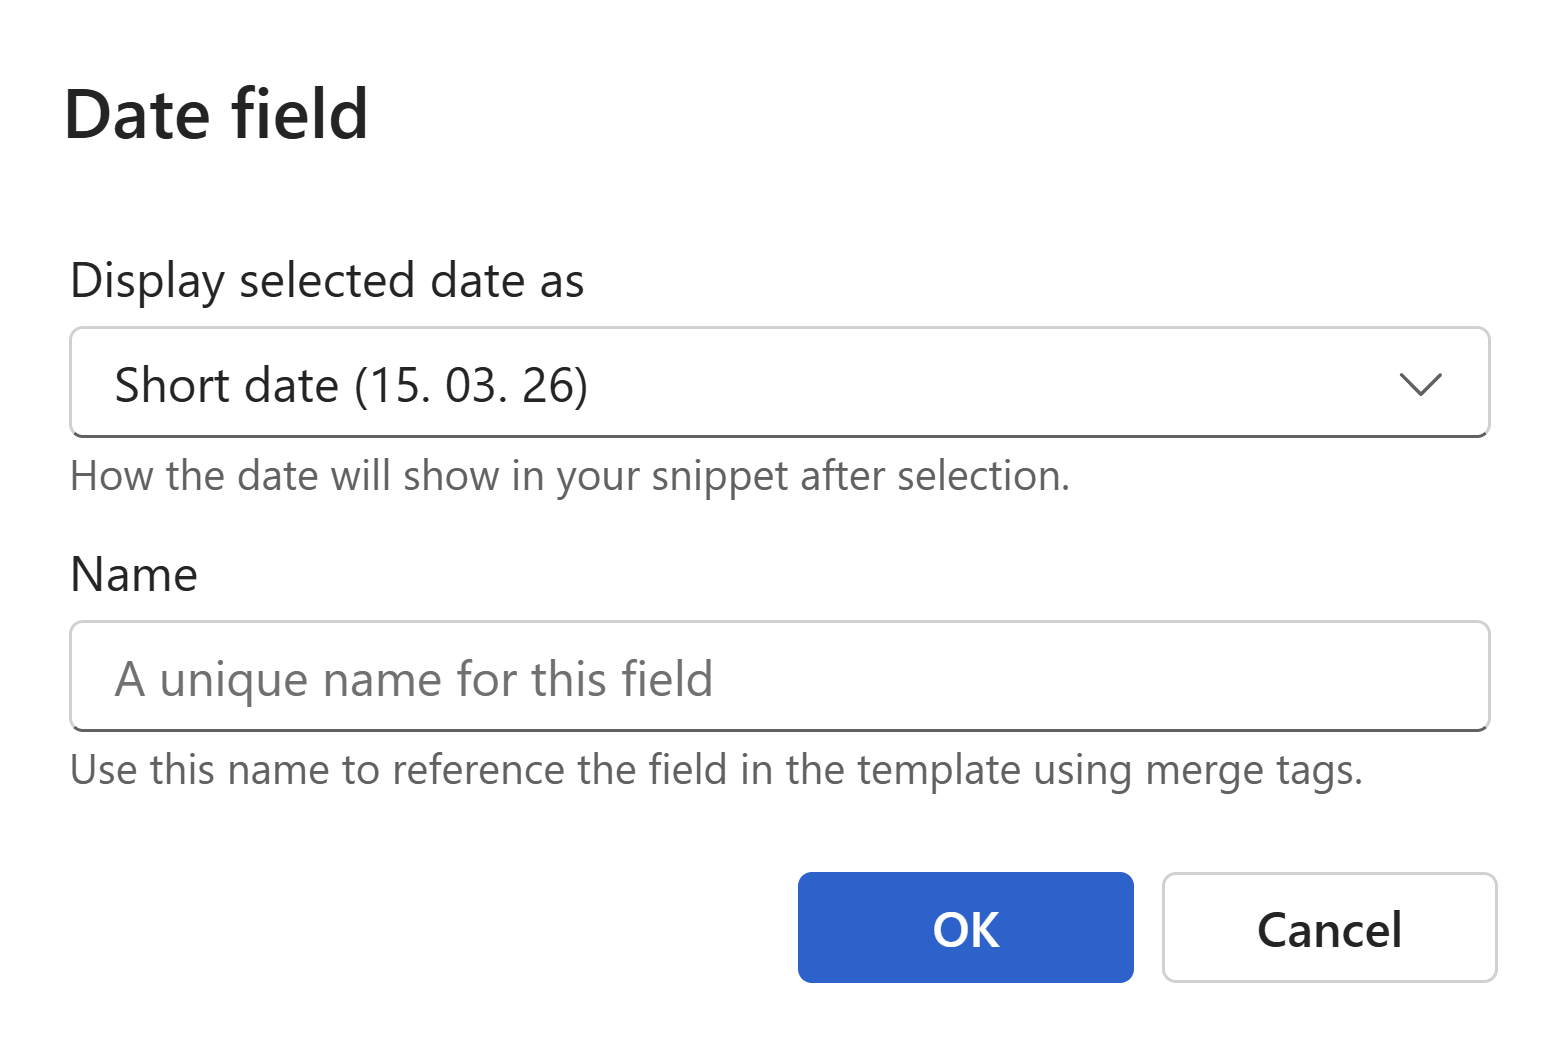
- Click the
...button to open the Date field dialog. - Use the Display selected date as dropdown to choose how the date will appear — for example, short date, long date, or month with day.
- Optionally enter a Name to reference this field via merge tag.
- Click to confirm and close the dialog.
Note
The date field is for user-selected dates. If you want to automatically insert today's date without any user input, use the Insert date button in the toolbar instead (or press Alt+Shift+D). That date updates automatically every time the snippet is opened.
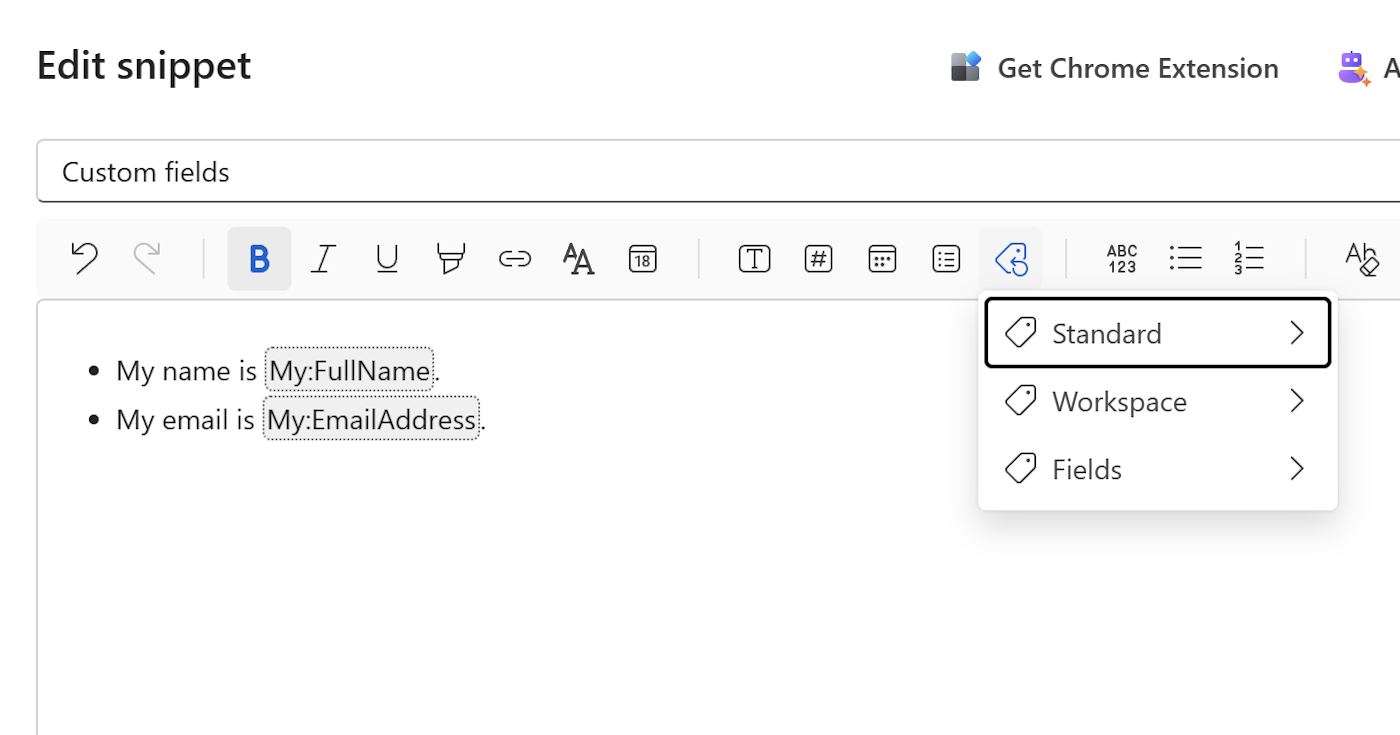
Select field (dropdown)
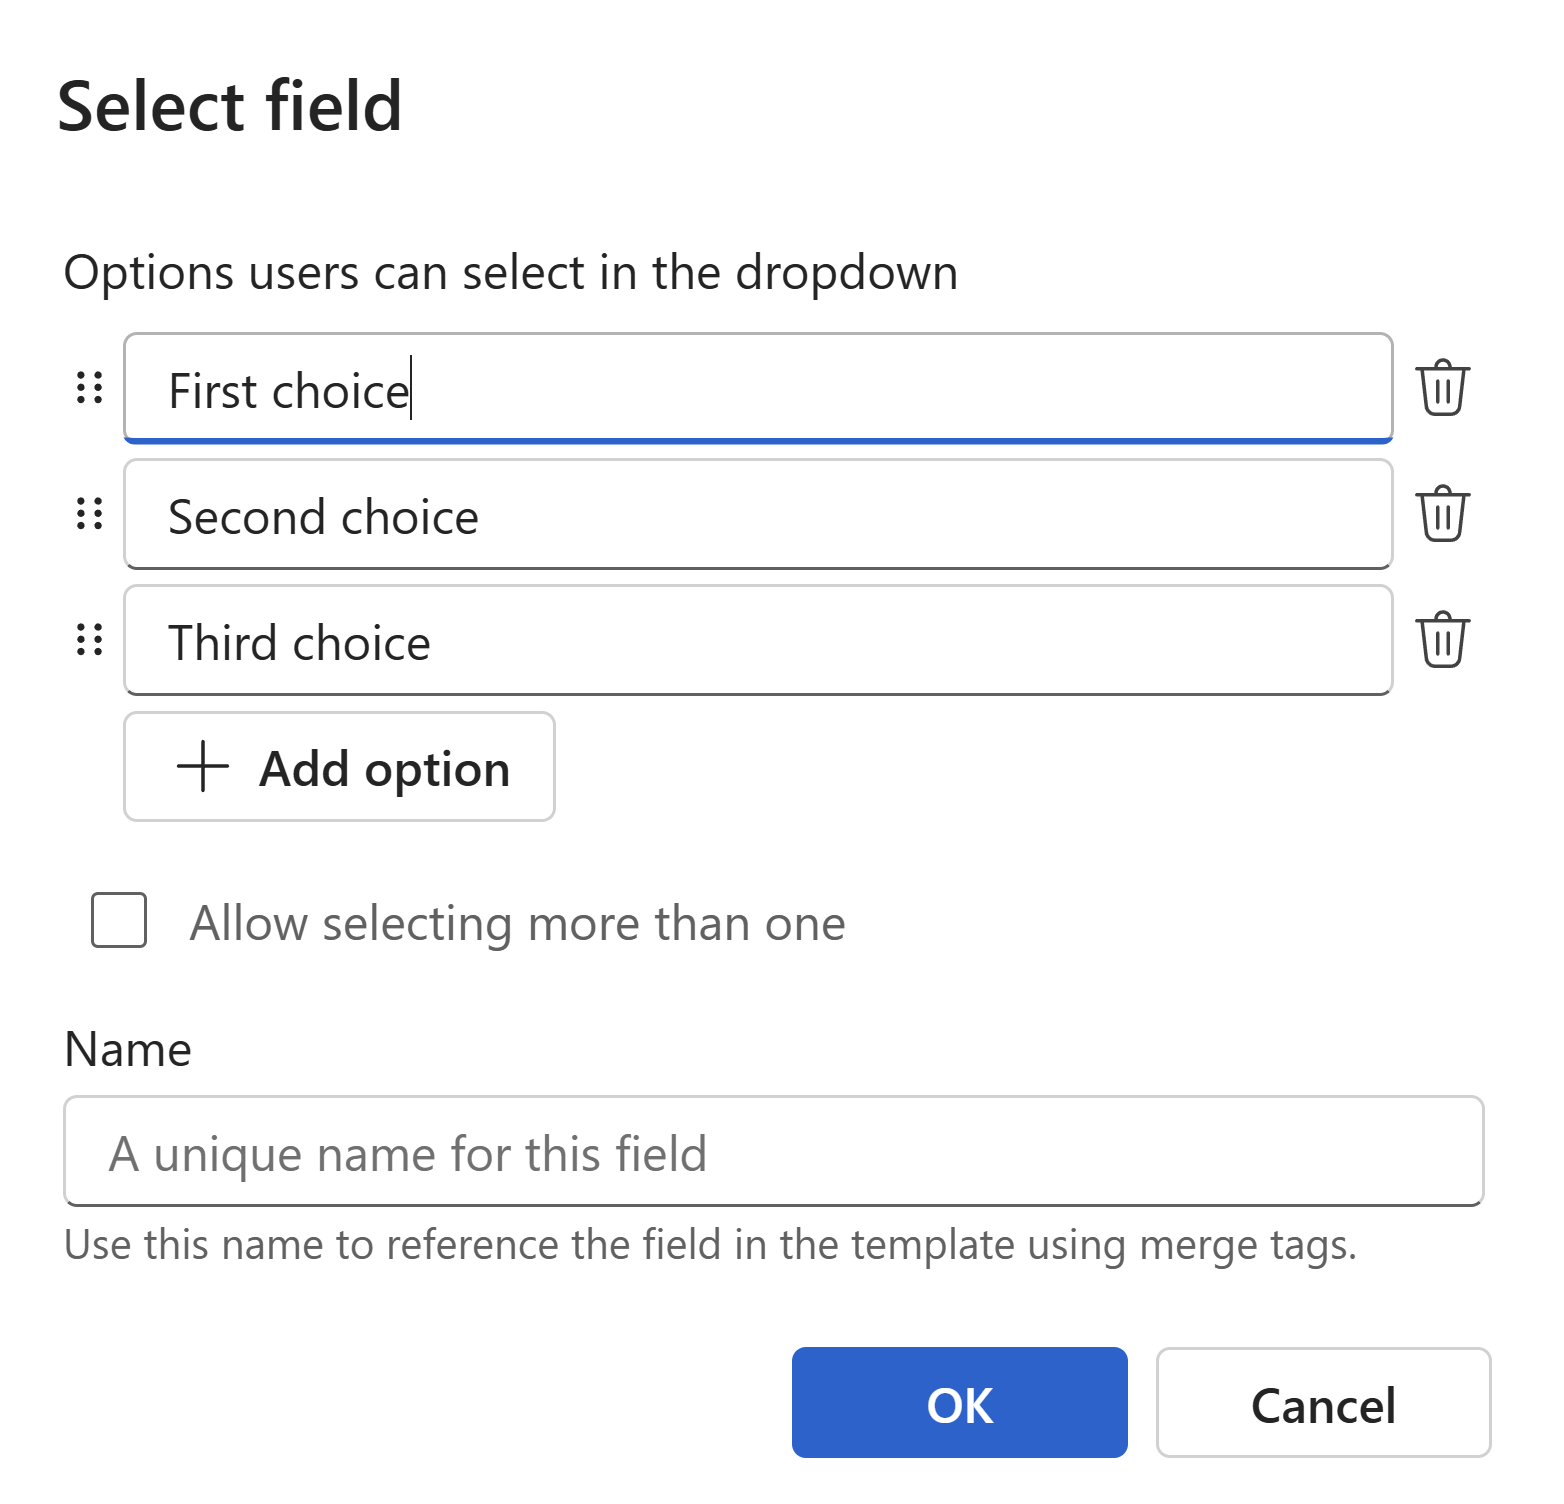
Use a select field when the value must come from a fixed list of options — a product tier, a department name, a response category. It keeps input consistent across your team.
To insert a select field:
- Place your cursor where the dropdown should appear.
- Click the Insert select field button in the toolbar.
- A select field appears inline.
- Click the
...button to open the Select field dialog. - Click
+ Add optionto add each item to the list. Drag the handle on the left of any item to reorder it. Click the bin icon on the right to remove an item. - Check Allow selecting more than one if users should be able to pick multiple values from the list.
- Optionally enter a Name to reference this field via merge tag.
- Click to confirm and close the dialog.
Tip
Put the most commonly chosen option first in the list — it saves your team a click every time.
Naming fields
Every field type has an optional Name setting in its dialog. On their own, fields work fine without a name. But if you want the value a user enters in one field to automatically appear somewhere else in the same snippet, you'll need to name it and reference it using a merge tag.
For example: a user fills in a Text field named CustomerName at the top of a snippet. By inserting a Fields → CustomerName merge tag elsewhere in the body, that same value appears in both places automatically — the user only types it once.