The snippet editor is where you write, format, and build reusable text —from basic text styling to fully dynamic template with fillable fields and auto-populated values.
Opening the editor
To create a new snippet, click + Create new in the left sidebar and select Text snippet. The editor opens as a dialog with a name field at the top and the editor body below.
To edit an existing snippet, open it from the content list and click Edit snippet in the toolbar. This button is only visible to Admins and Managers.
Text formatting
Highlight any text in the editor to reveal the inline formatting options, or use the toolbar buttons at the top of the editor:
- Bold —
Ctrl+B - Italic —
Ctrl+I - Underline —
Ctrl+U - Highlight — Marks selected text with a yellow background —
Ctrl+Shift+H
Links
To insert a hyperlink:
- Place your cursor where the link should appear, or highlight the text you want to turn into a link.
- Click the Link button in the toolbar, or press
Ctrl+K. - In the Insert link dialog, enter the Display as text and the Web address (URL).
- Click
OK.
Text and background color
To change the color of text or its background:
- Highlight the text you want to color.
- Click the Text color button in the toolbar.
- A menu appears with two sections: Text color and Background color. Each shows a 5×2 grid of colors to choose from.
- Click a color to apply it.
Paragraph styles
To change the style of a paragraph or heading, click anywhere inside the text block and click the Paragraph button in the toolbar. A submenu lets you choose from:
- Paragraph —
Ctrl+Shift+Space - Heading 1 —
Ctrl+Opt+1 - Heading 2 —
Ctrl+Opt+2 - Heading 3 —
Ctrl+Opt+3 - Heading 4, Heading 5, Heading 6
- Quote — Formats the block as a pull quote
Tip
Use headings to break up longer snippets into scannable sections — especially useful for onboarding messages or multi-step instructions.
Lists
- Bulleted list — Click the bulleted list button in the toolbar to start an unordered list. Press
Tabto nest items andShift+Tabto outdent them. - Numbered list — Click the numbered list button to start an ordered list. Nesting works the same way as bulleted lists.
Inserting a date
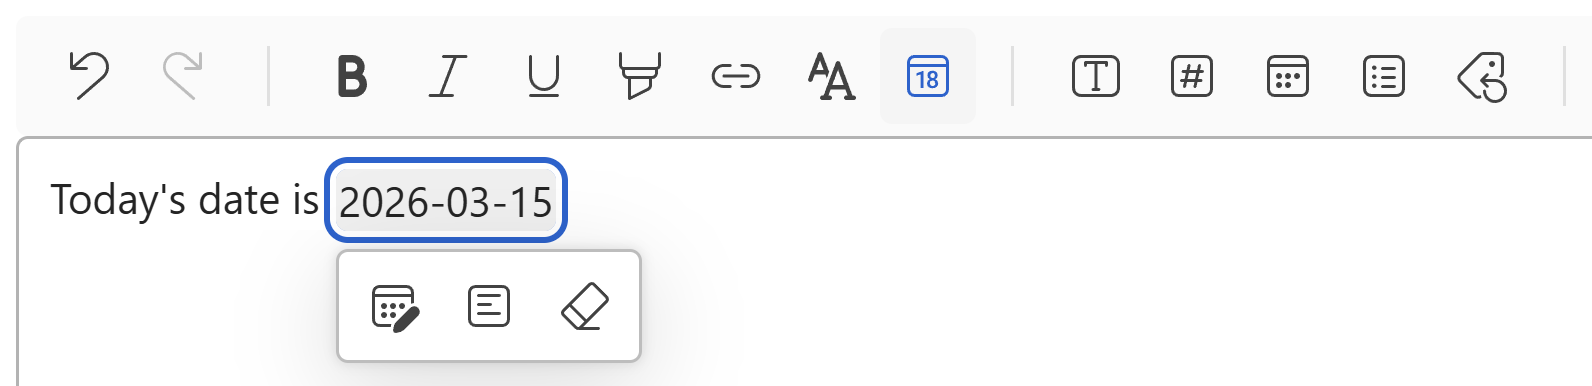
WordFields lets you insert a dynamic date that always reflects the current date when the snippet is opened — useful for correspondence, timestamps, and time-sensitive replies.
- Place your cursor where the date should appear.
- Click the Insert date button in the toolbar, or press
Alt+Shift+D.
The current date is inserted automatically. To change how it's formatted, click on the date in the editor and select Modify date from the inline menu. The Date dialog lets you choose your preferred display format.
Note
This is different from a date field, which prompts the user to pick a specific date when using the snippet. See Fillable fields in snippets for the distinction.
Fillable fields
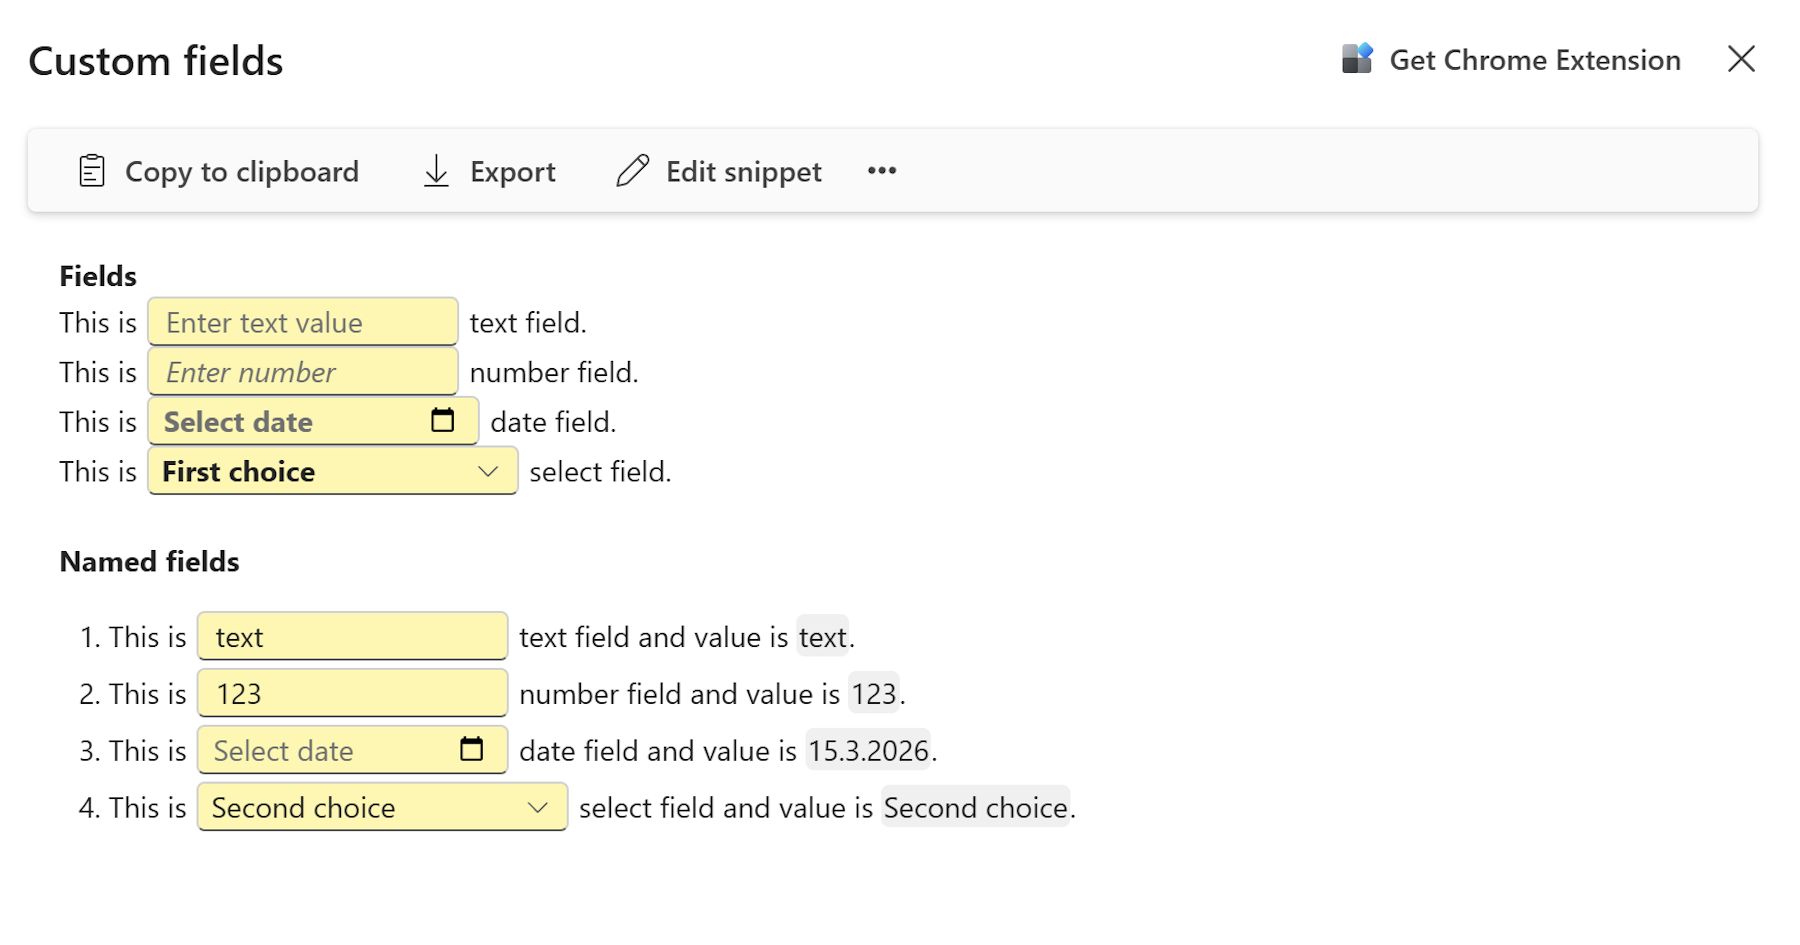
Fields mark the parts of a snippet that change each time it's used — a name, a number, a date, a choice from a list. When a team member uses the snippet, they fill those spots in before inserting it.
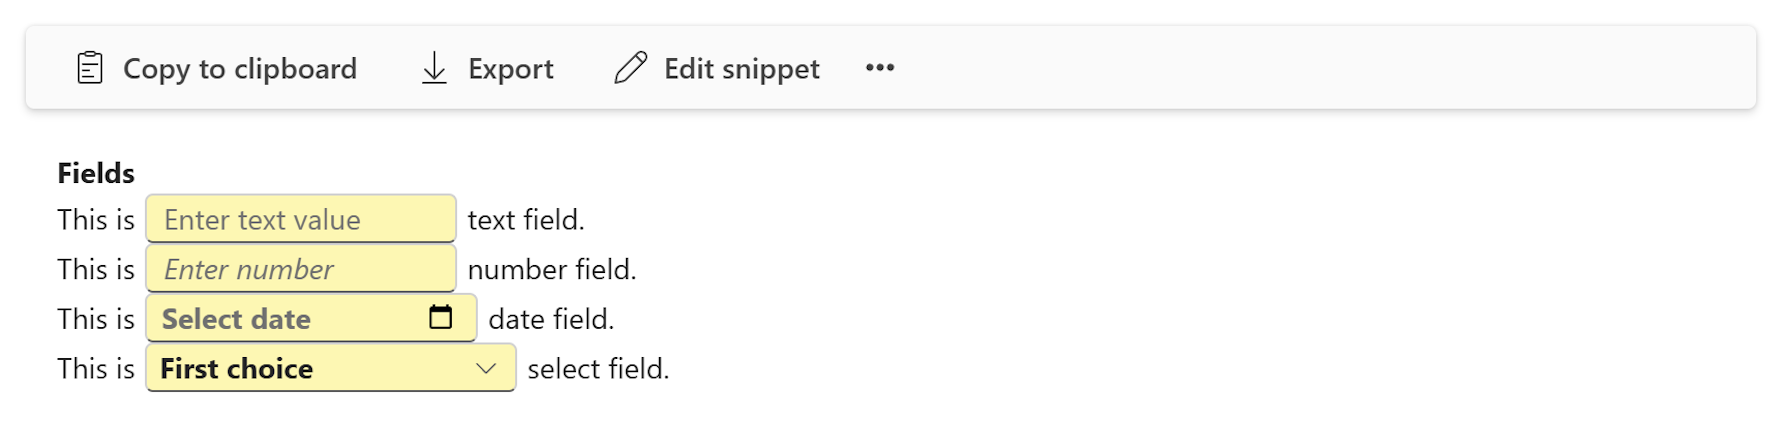
There are four field types:
- Text field
Ctrl+M— For any open-ended text input: names, subject lines, custom messages. - Number field — For numeric values with formatting options (e.g., no decimals, two decimal places).
- Date field — A date picker that defaults to today. Lets users select a specific date.
- Select field — A dropdown with a fixed list of options you define. Can allow single or multiple selections.
To insert any field, place your cursor where it should appear and click the corresponding button in the toolbar. Click the ... button next to any inserted field to configure it — set a display format, define dropdown options, or give the field a name so it can be referenced elsewhere via a merge tag.
For a full walkthrough of each field type, see Fillable fields in snippets.
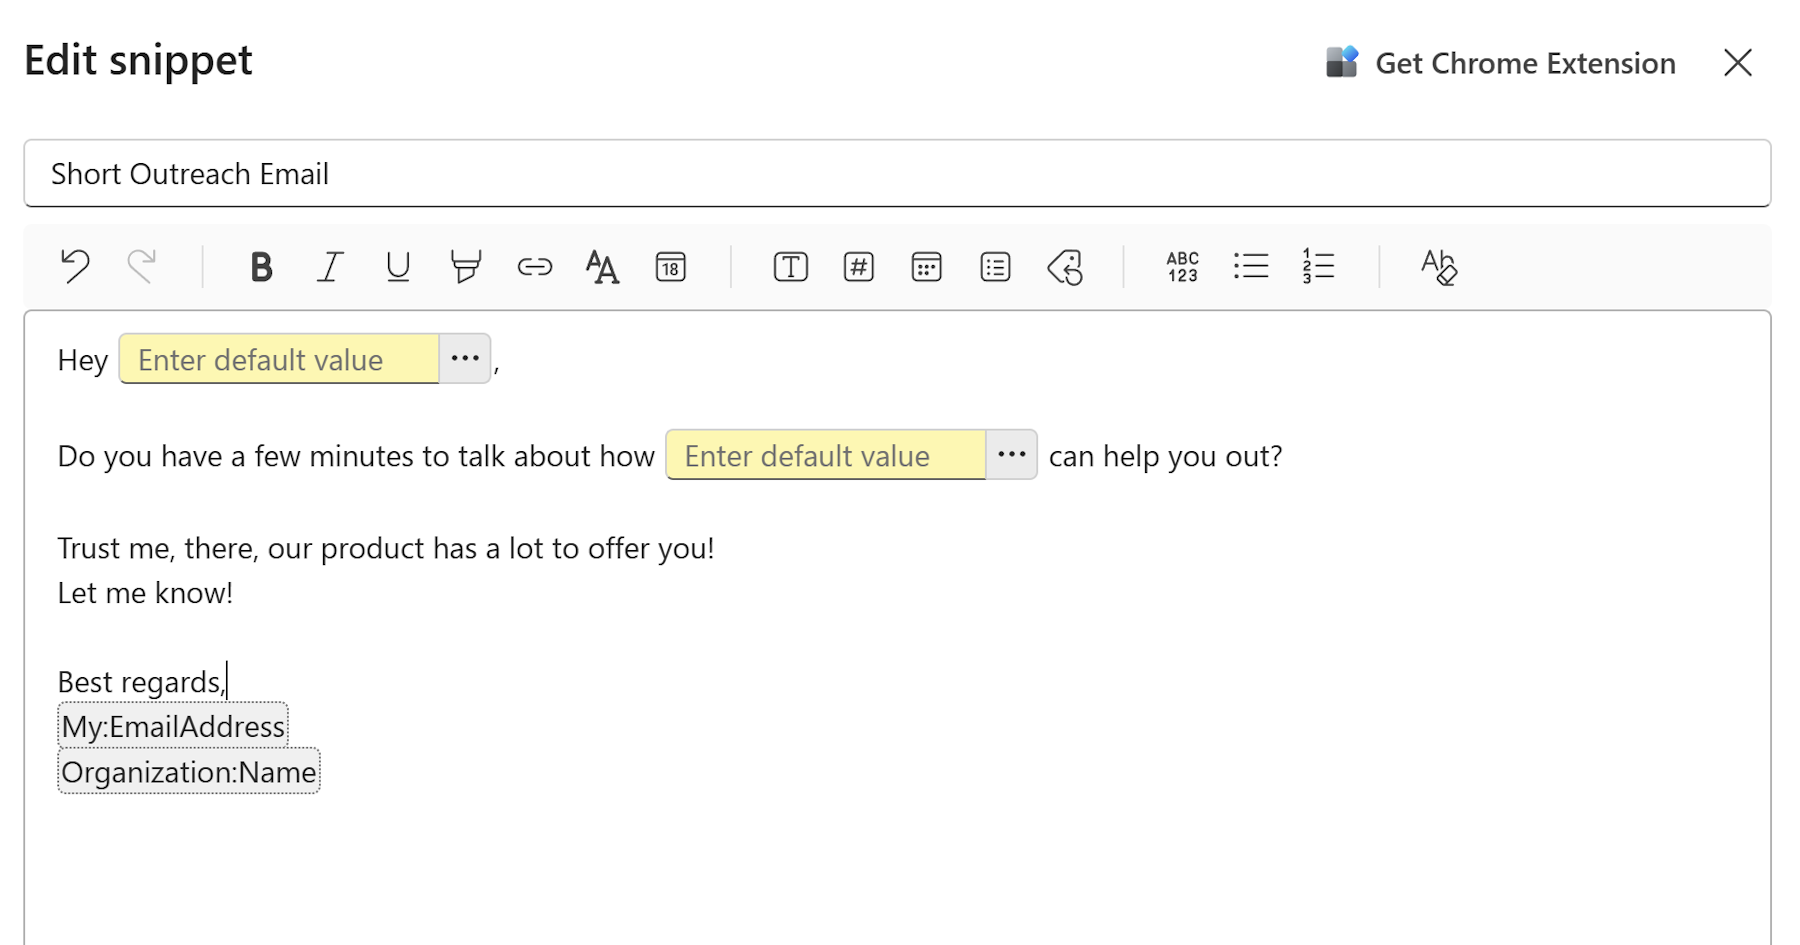
Merge tags
Merge tags are placeholders that fill in automatically — no user input needed. They pull in known values at the moment the snippet is used.
To insert a merge tag:
- Place your cursor where the value should appear.
- Click the Insert merge tag button in the toolbar (the tag icon).
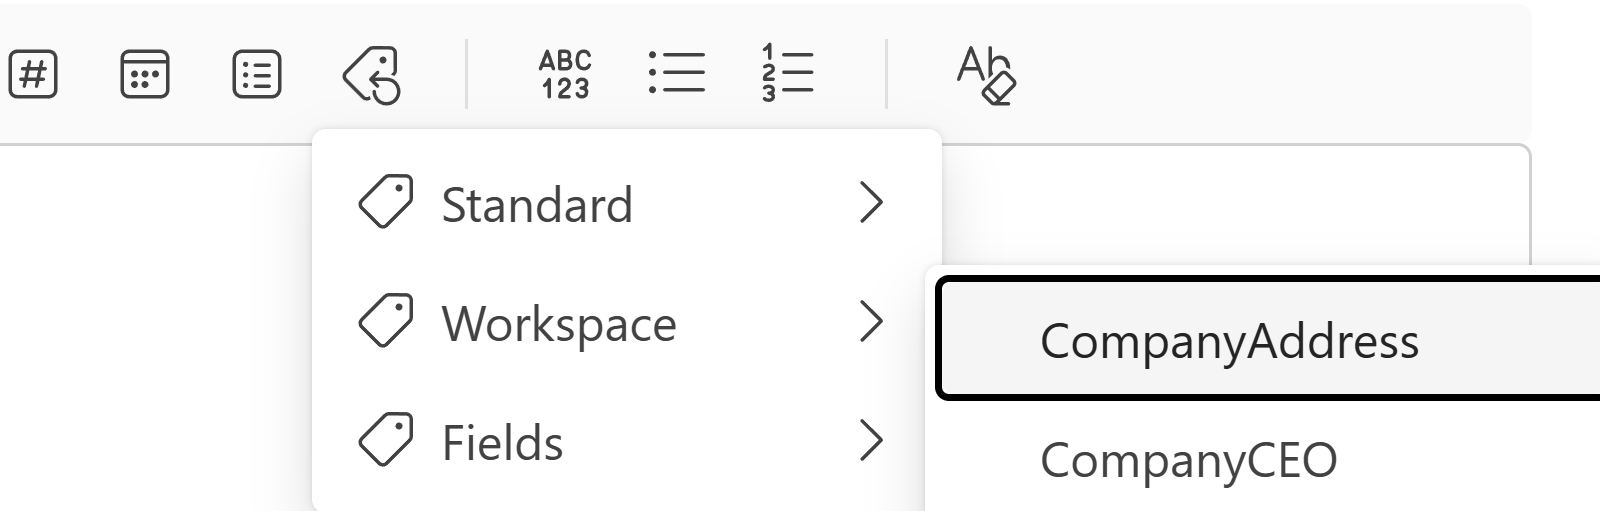
- Choose from the submenu:
Standard — Auto-populated from the user's account:
My:FullName— Full name of the person using the snippetMy:EmailAddress— Email address of the person using the snippetOrganization:Name— Organization name from workspace settings
Workspace — Shared values defined by your Admin (e.g., company address, support number). Admins can manage these under Administration → General → Workspace values.
Fields — References the value entered into a named field elsewhere in the same snippet. Only fields that have been given a name appear here.
For a full explanation of each tag type, see Merge tags in snippets.
Clear formatting
To strip all formatting from selected text — including bold, italic, underline, color, and highlight — highlight the text and click the Clear formatting button in the toolbar.