Fillable fields mark the parts of your document that change each time — like a name, date, or amount. Once added, WordFields turns them into a form your team fills out to generate a new document.
Fillable fields in a template

Fillable fields are placeholders in your document that users fill in each time they create a new document. You define them once in the template editor, and WordFields builds a form from them automatically.
Note
If you haven't set up a template yet, click + Create new in the left sidebar, select your template type, and upload your document. For a full walkthrough, see Create a template.
Adding a field
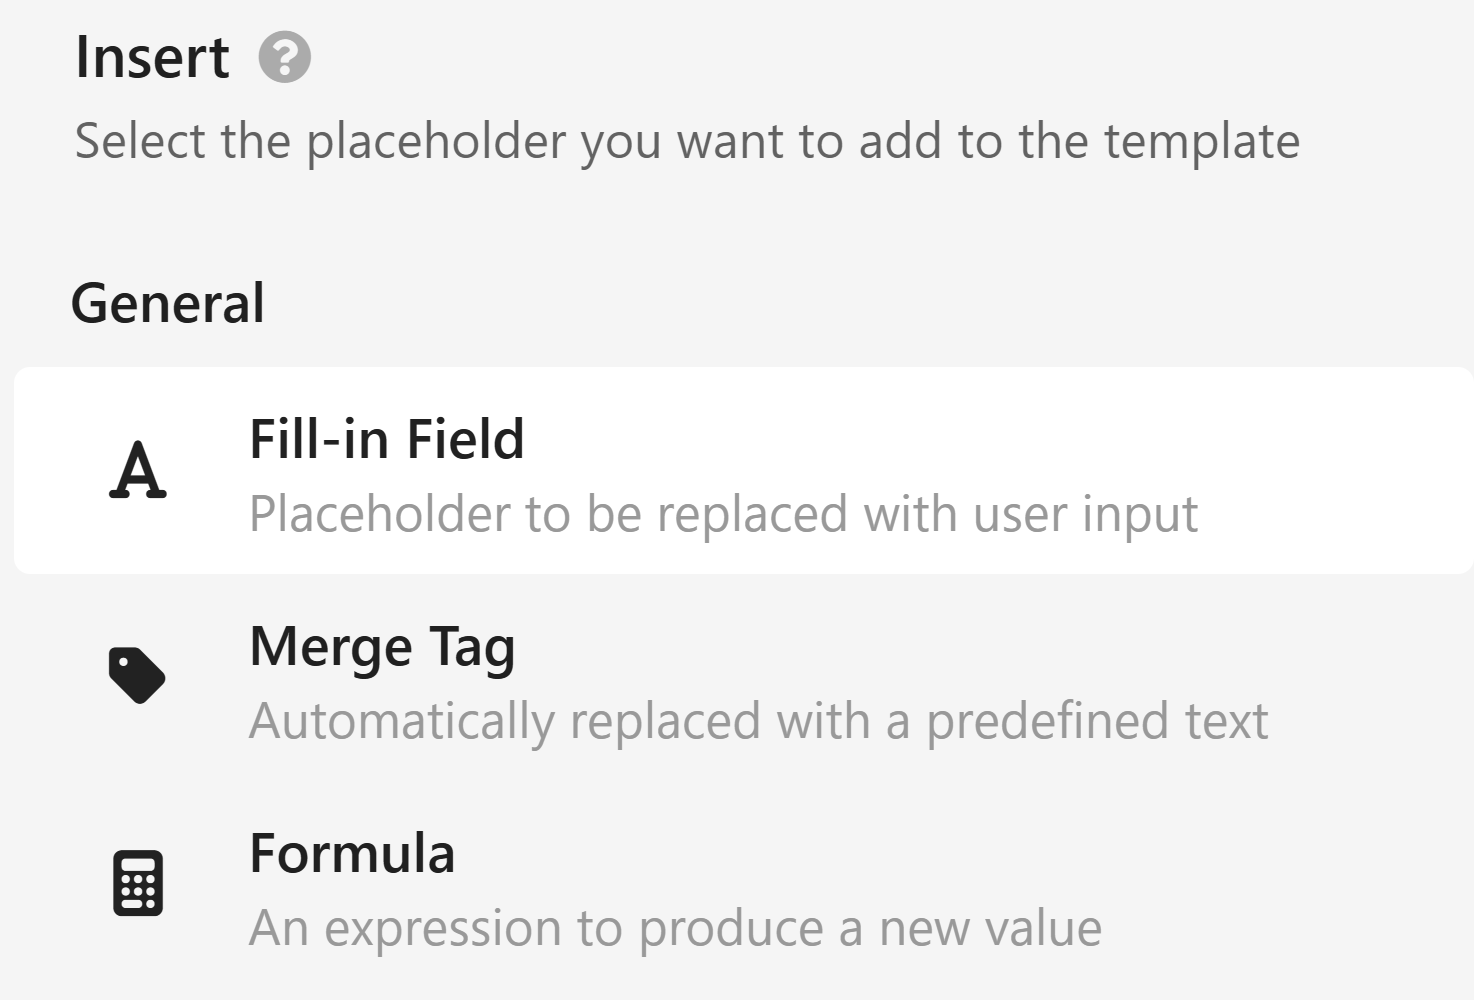
There are three ways to add a fillable field to your template:
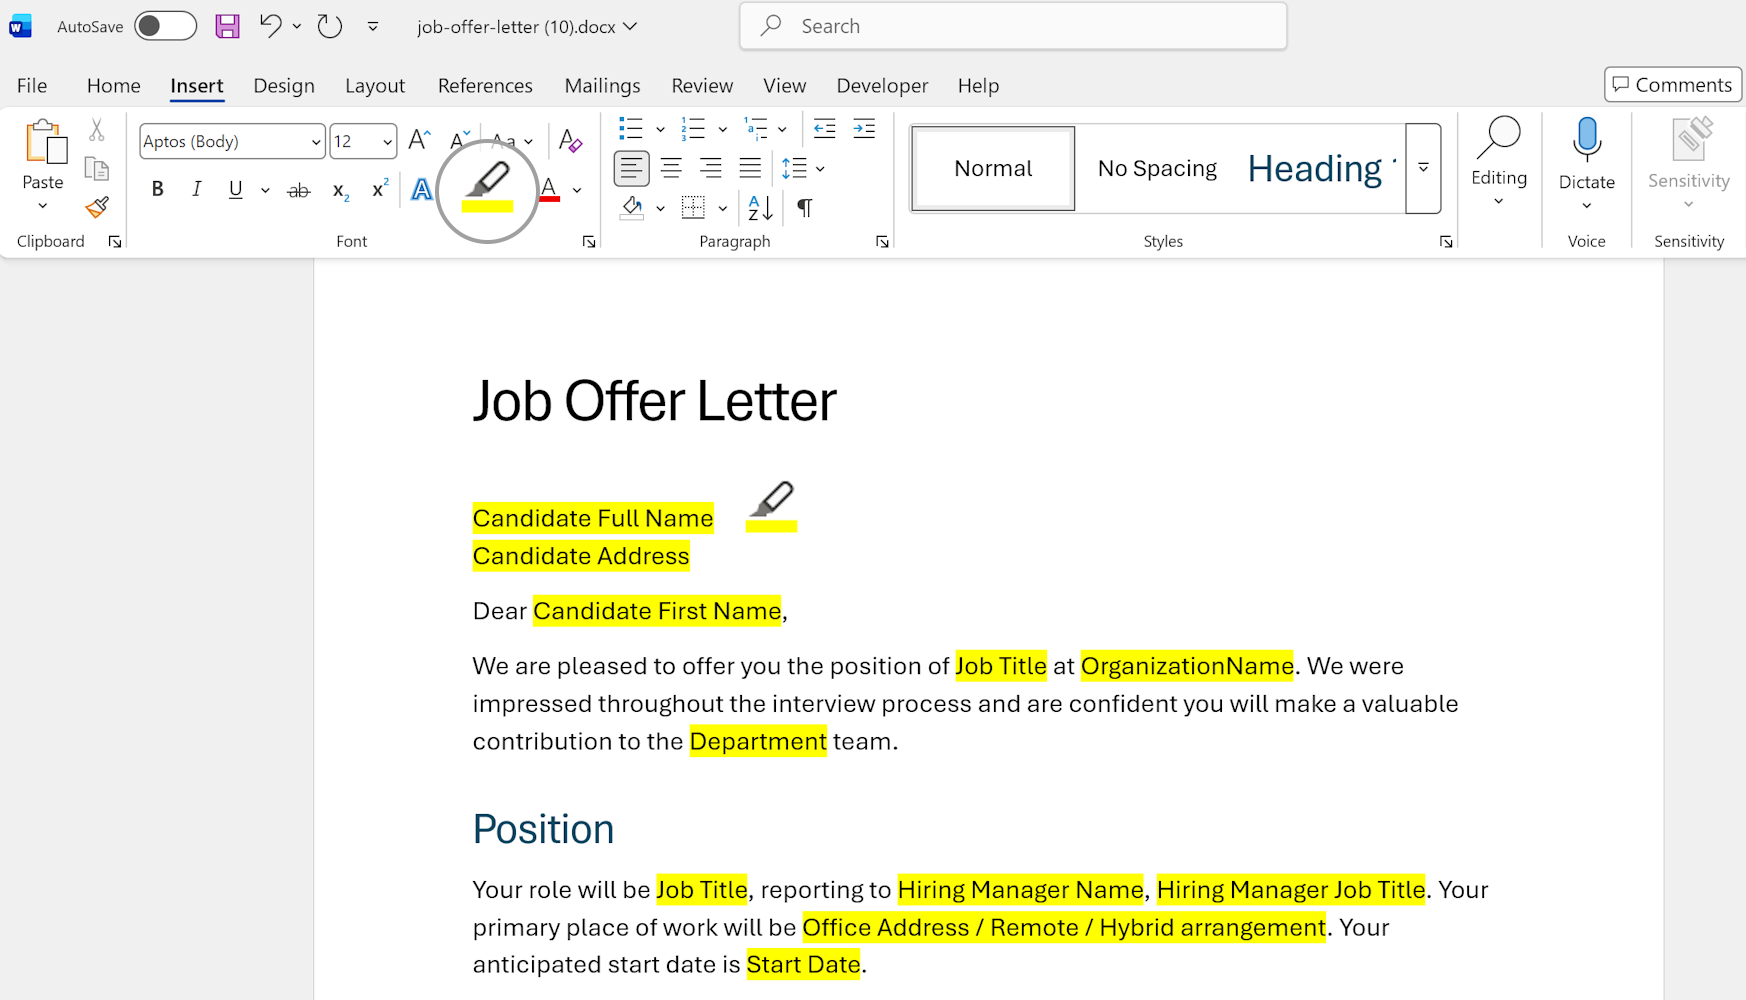
Highlight text in yellow before uploading
The fastest way to mark fields is before you upload. Open your document in Word and highlight the parts that change in yellow — a client name, a date, a contract clause. When you upload the file, WordFields detects the highlighted text and converts it to fillable fields automatically.
Select text or place your cursor in the editor
- Open your template and click the
Editingstatus dropdown at the top to make sure you're in editing mode. - Either select the text you want to replace with a field, or simply place your cursor at the position where you want the field inserted.
- In the right sidebar, click
Fill-in Fieldunder the Insert section.
When text is selected, it is replaced with the field placeholder and used as the field's default name. When only a cursor is placed, the field is inserted at that position.
Type the field directly
You can also insert a field by typing it manually anywhere in the document editor or directly in Word before you upload a document.
${FieldName}
For example, typing ${ClientName} creates a field named ClientName. This also works in documents you prepare before uploading.
Note
Add ${FieldName} placeholders directly in Word or Excel, and WordFields will recognise them when you upload the file. Field names are case-insensitive, so ${ClientName}, ${clientname}, and ${CLIENTNAME} all refer to the same field. Use only letters and numbers — no spaces or special characters.
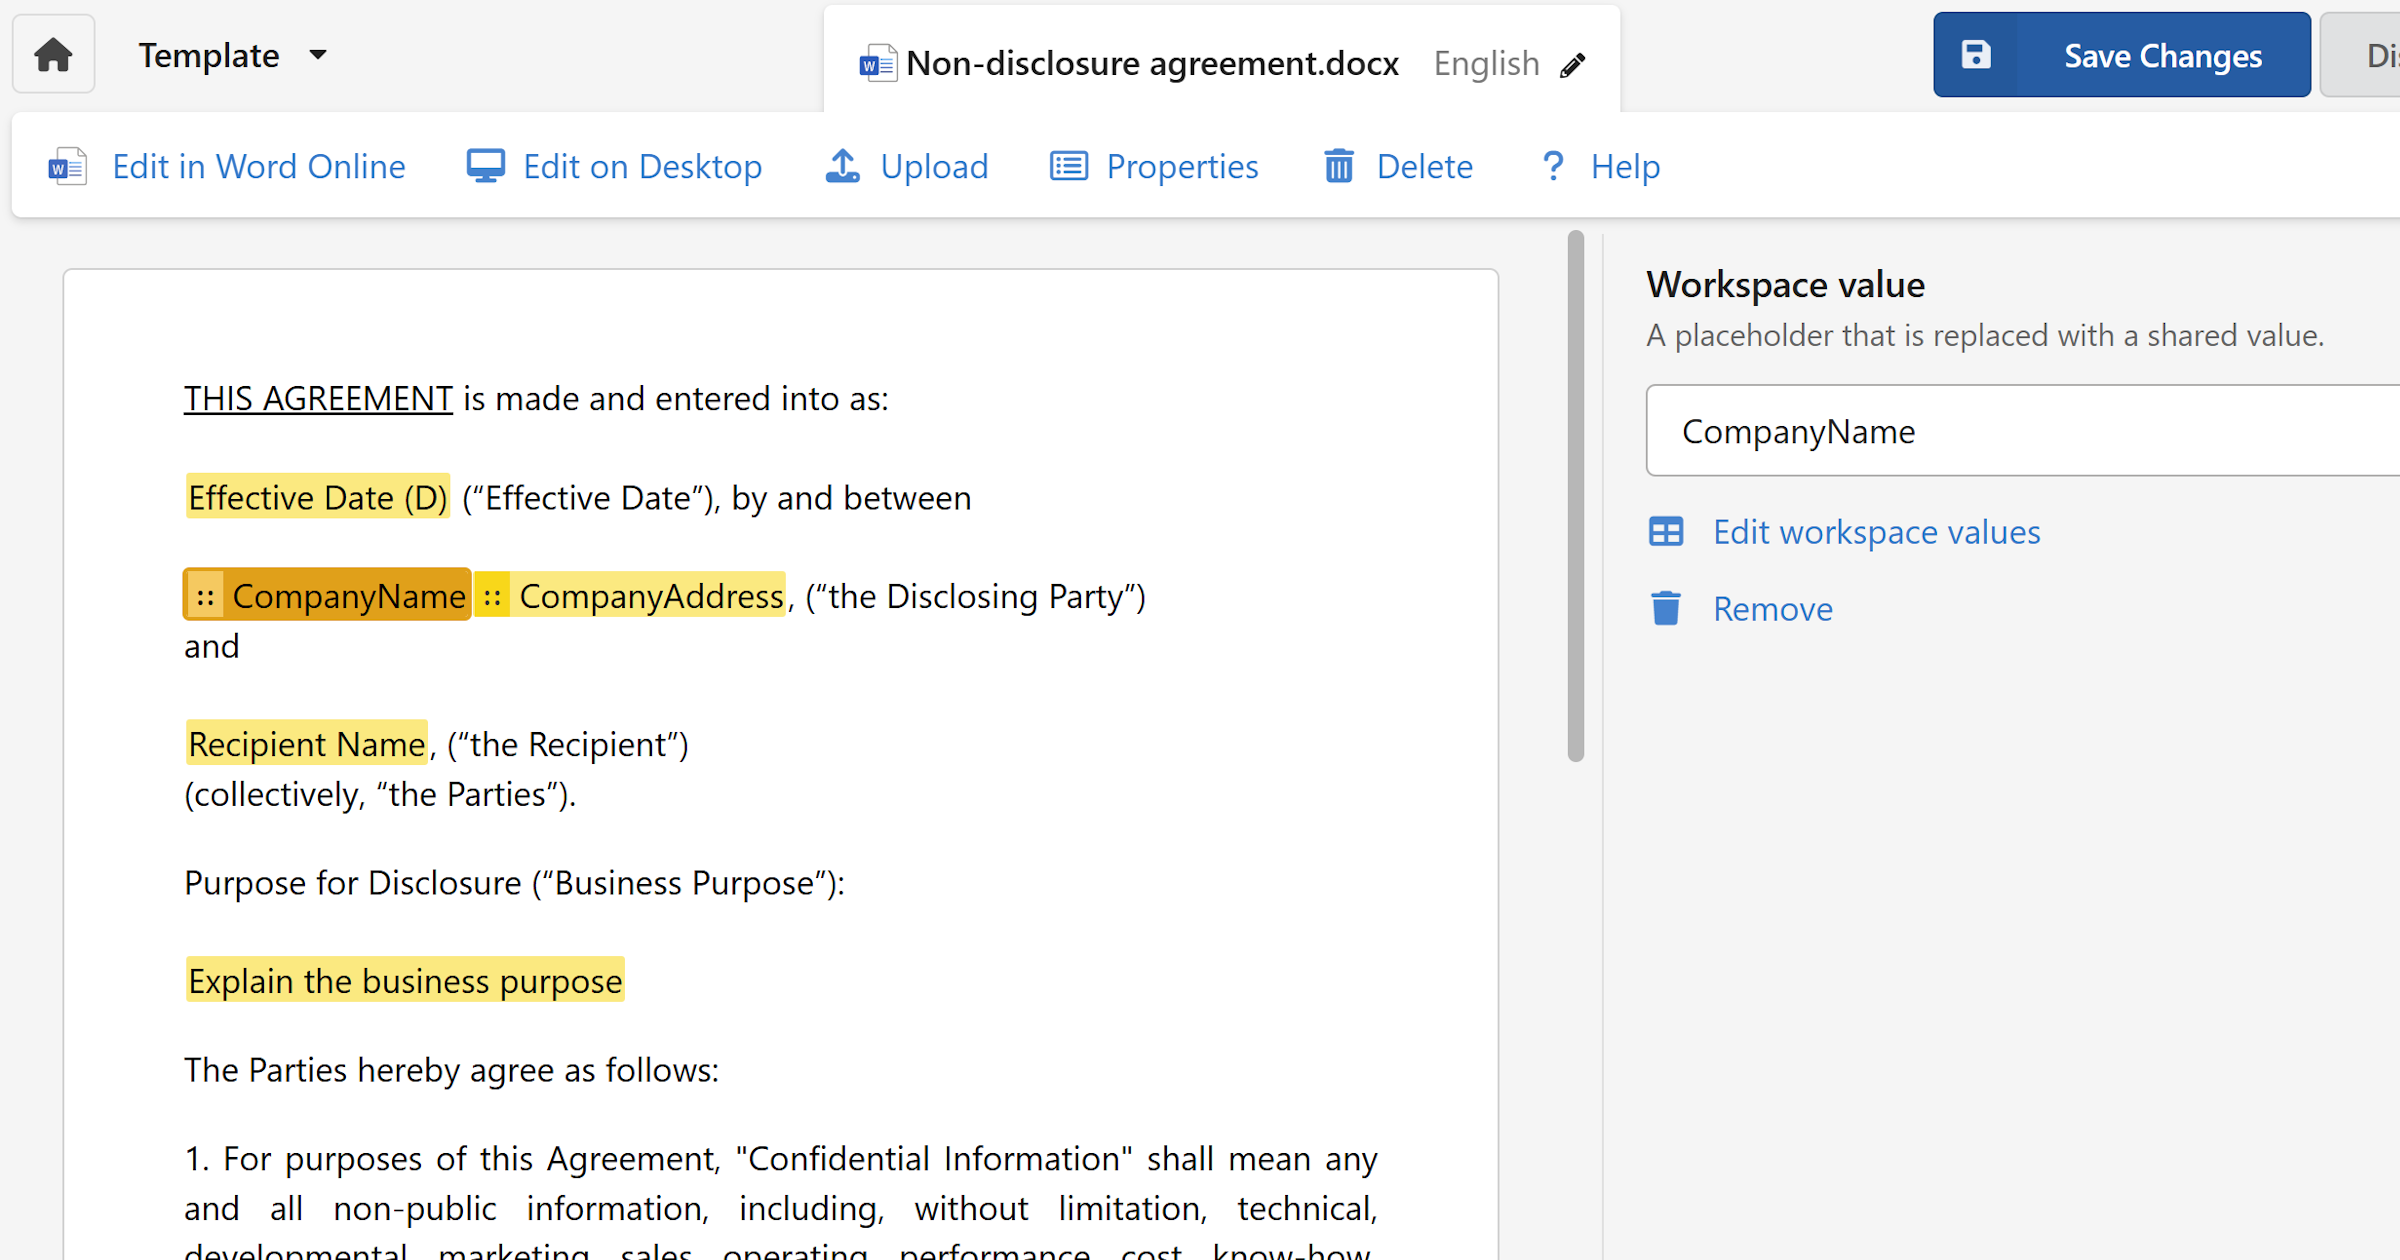
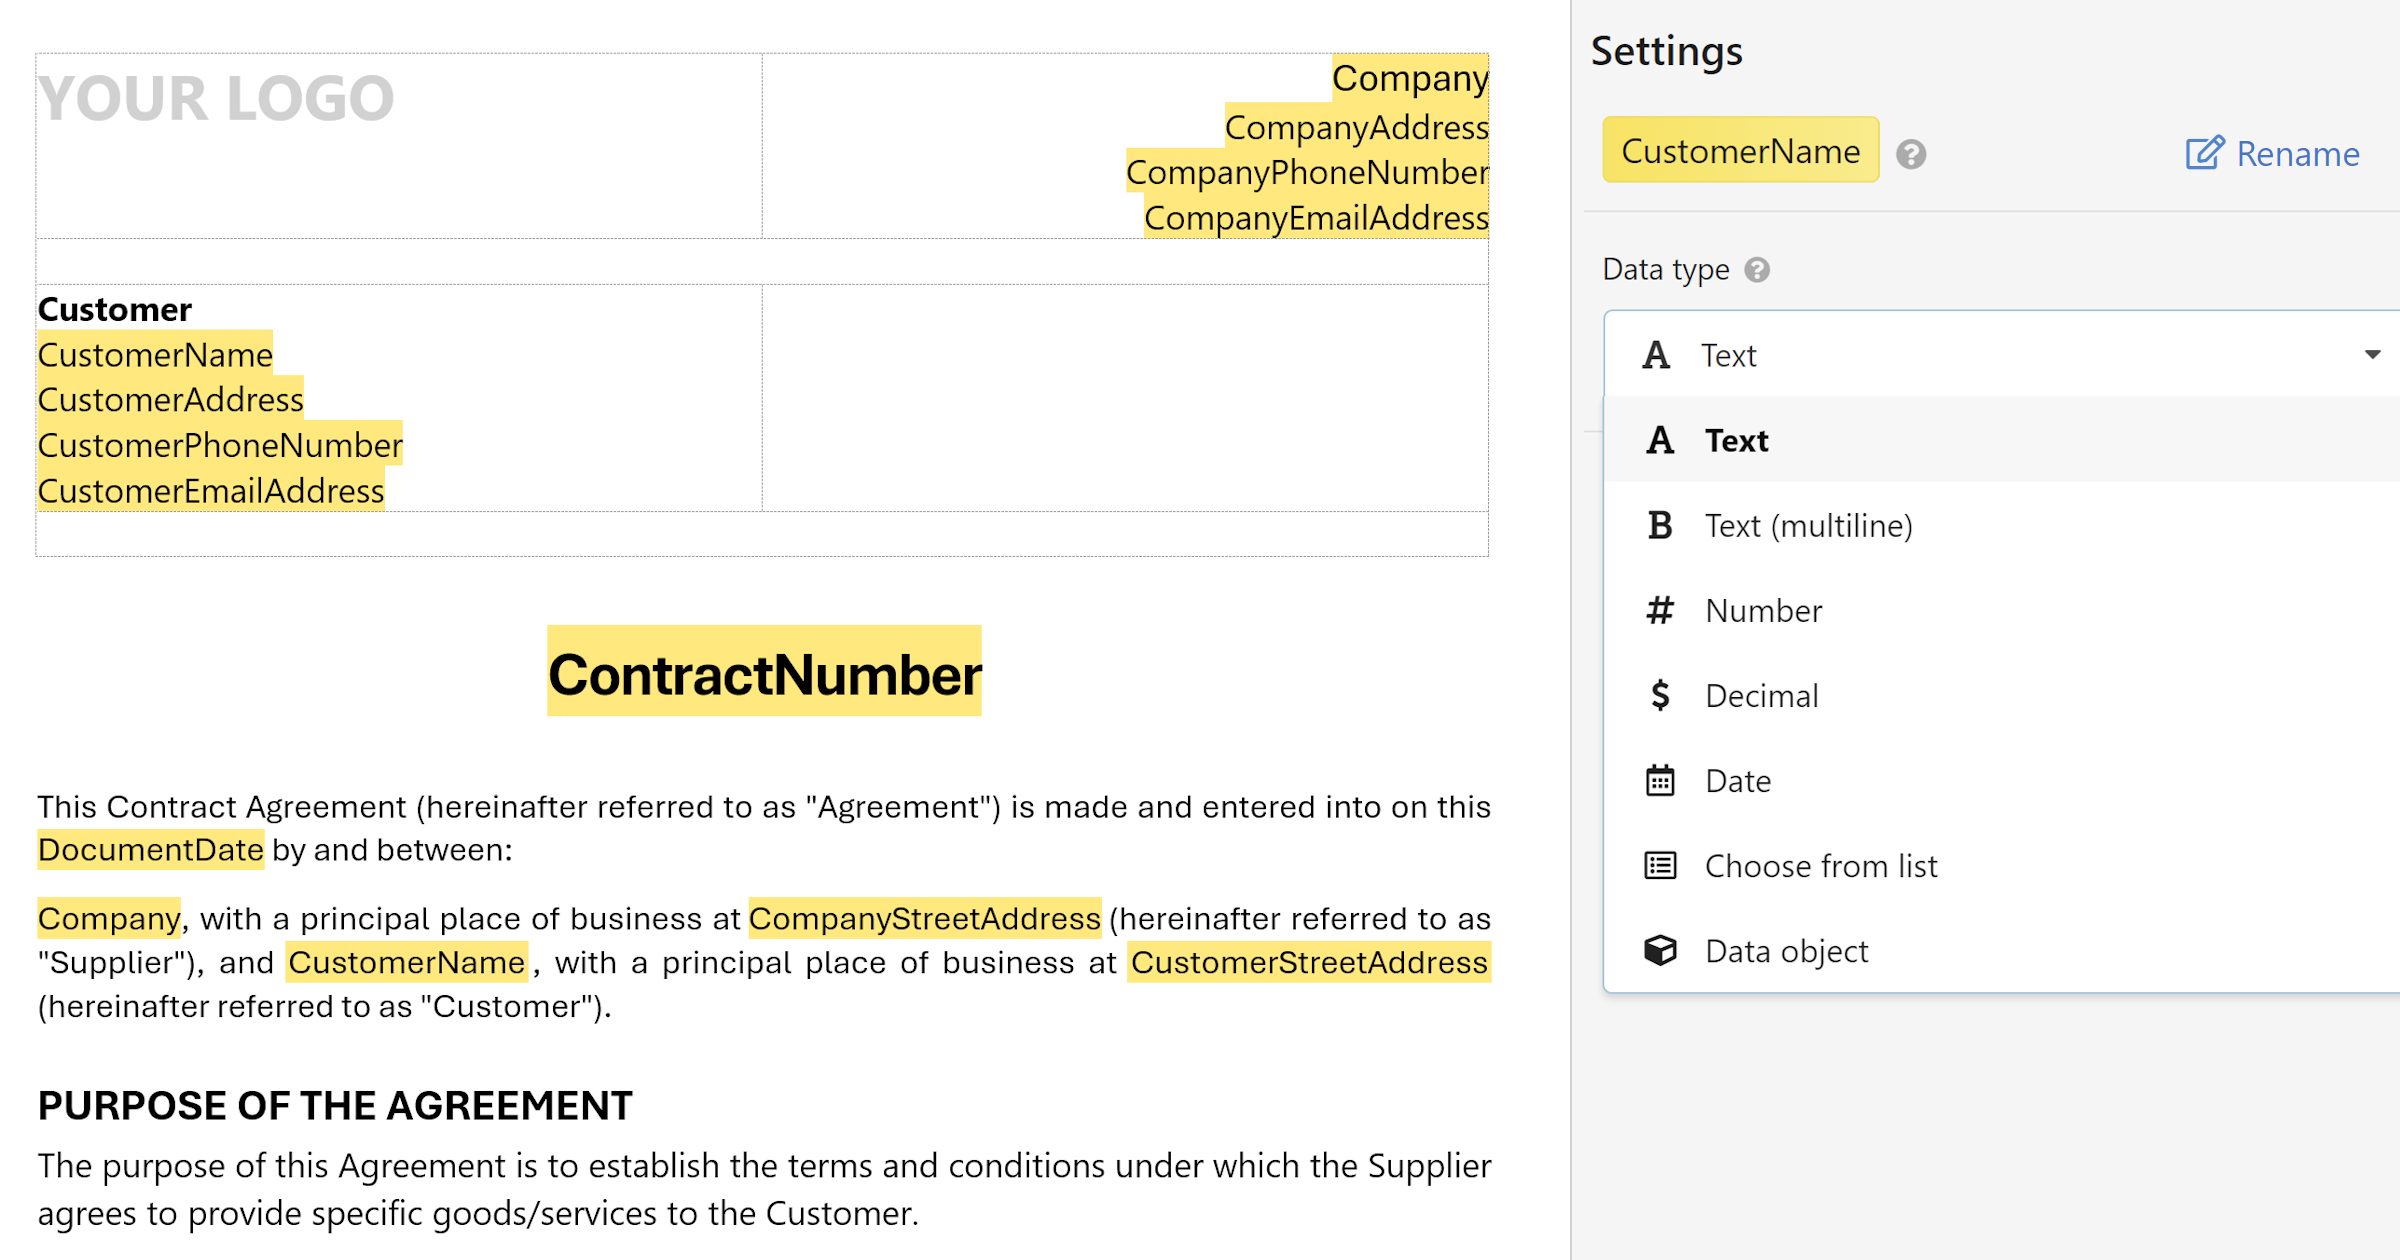
Naming and renaming a field
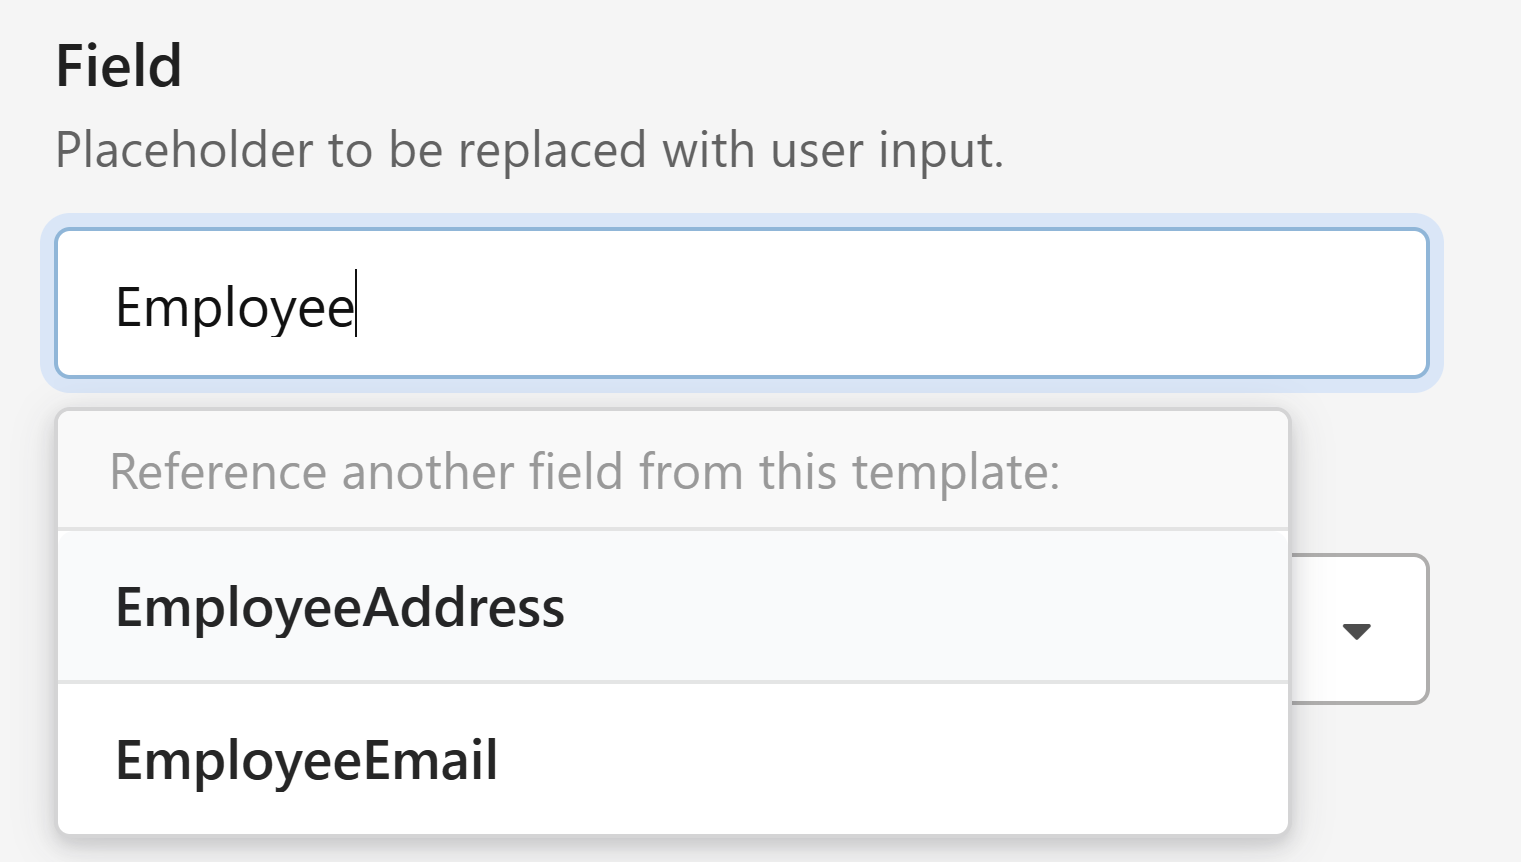
When you click on a field in the document preview, the right sidebar shows its properties.
- Click the Name input at the top of the sidebar.
- Type a clear, descriptive name for the field — for example,
ContractDateorClientAddress.
Tip
If you use the same name for multiple fields in the document, WordFields treats them as one field. The user fills it in once and it's inserted everywhere. This is useful for things like a client name that appears in several places.
Choosing a field type
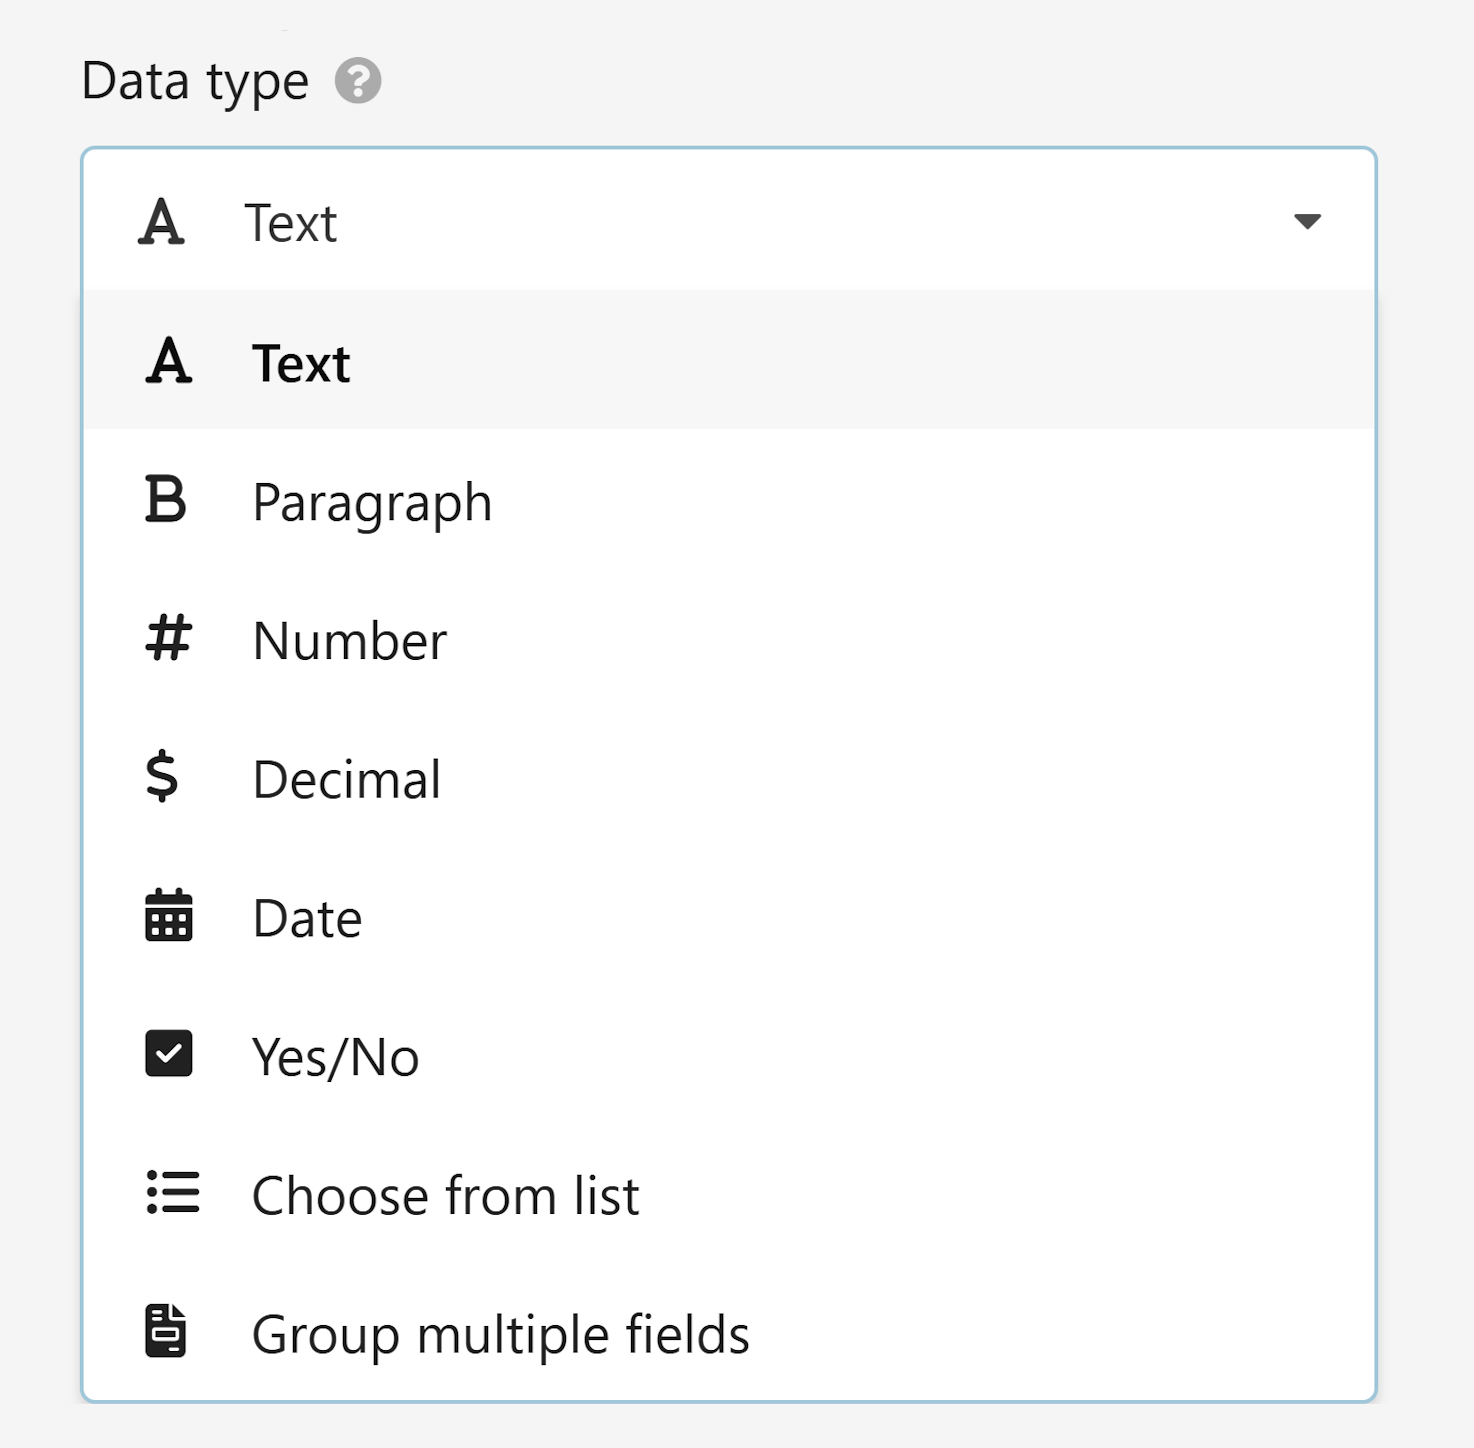
The field type controls what kind of input the user sees when filling out the form. With your field selected, find the Data type dropdown in the right sidebar and choose the type that best fits the data.
- Text — a single line of text. Use this for names, addresses, reference numbers, or any short input.
- Paragraph — a multi-line text area. Best for notes, descriptions, or any content that might run longer than one line.
- Number — accepts whole numbers only, no decimals. Use for quantities or counts.
- Decimal — accepts numbers with decimal places. Use for prices, percentages, or measurements.
- Date — shows a date picker. Use for contract dates, deadlines, or any calendar value.
- Yes/No — a simple toggle or checkbox. Use for binary choices like approval status or whether a clause applies.
- Choose from list — links the field to a predefined workspace data list, like Customers or Products.
Advanced - Group multiple fields — combines several fields into a repeatable group, typically used alongside formulas for things like invoice line items.
Advanced
How a field appears in the document
The How it appears setting controls how the field value is formatted when it's inserted into the document. With your field selected in the sidebar, choose one of the following:
- Normal — inserts the value exactly as the user typed it.
- UPPERCASE — converts the value to all capitals, for example ACME CORPORATION.
- lowercase — converts the value to all lowercase, for example acme corporation.
- Capitalize Each Word — capitalises the first letter of each word, for example Acme Corporation.
Removing a field
- Click on the field in the document preview to select it.
- In the right sidebar, click
Remove, or press theDeletekey.
The field is deleted from the document and will no longer appear in the generated form.
Warning
Removing a field also removes it from the form. Any document previously generated from this template is not affected, but future documents will no longer include that field.
Saving your changes
- When you're done adding and configuring fields, click
Save changesin the top-right corner. To undo all unsaved edits, clickDiscardinstead.